HP Photosmart E400 User Guide - Page 13
Using the Self-Timer mode, Date & Time Imprint - photosmart 400
 |
View all HP Photosmart E400 manuals
Add to My Manuals
Save this manual to your list of manuals |
Page 13 highlights
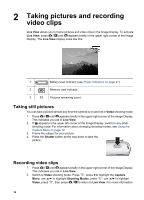
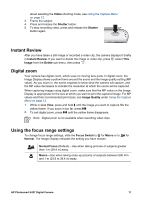
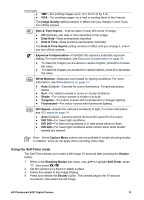
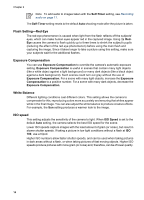
(continued) ● ● 2MP-For printing images up to 13 x 18 cm (5 by 7 in). VGA-For sending images via e-mail or posting them to the Internet. The Image Quality setting remains in effect until you change it, even if you turn off the camera. Date & Time Imprint-Imprints date in lower left corner of image. ● Off (Default)-No date or time imprinted on the image. ● Date Only-Date permanently imprinted. ● Date & Time-Date and time permanently imprinted. The Date & Time Imprint setting remains in effect until you change it, even if you turn off the camera. Exposure Compensation-Overrides the camera's automatic exposure setting. For more information, see Exposure Compensation on page 14. ● To make the images you are about to capture brighter, press to increase the value. ● To make the images you are about to capture darker, press to decrease the value. White Balance-Balances color based on lighting conditions. For more information, see White Balance on page 14. ● Auto (Default)-Corrects for scene illuminance. For general picture taking. ● Sun-For outdoor scenes in sunny or cloudy conditions. ● Shade-For outdoor scenes in shade or at dusk. ● Tungsten-For indoor scenes with incandescent or halogen lighting. ● Fluorescent-For indoor scenes with fluorescent lighting. ISO Speed-Adjusts the camera's sensitivity to light. For more information, see ISO speed on page 14. ● Auto (Default)-Camera selects the best ISO speed for the scene. ● ISO 100-For lower light conditions. ● ISO 200-For fast moving objects or in dark areas without a flash. ● ISO 400-For lower light conditions and/or action when short shutter speeds are desired. Note Some Capture Menu options are not available in certain shooting modes. In addition, some do not apply when recording video clips. Using the Self-Timer mode The Self-Timer allows you to take a still image 10 seconds after pressing the Shutter button. 1. While in the Shooting Modes sub-menu, use to highlight Self-Timer, press , then press . 2. Set the camera on a tripod or stable surface. 3. Frame the subject in the Image Display. 4. Press and release the Shutter button. The camera begins the 10-second countdown, then takes the still image. HP Photosmart E427 Digital Camera 13
-
 1
1 -
2
-
3
-
4
-
5
-
6
-
7
-
 8
8 -
 9
9 -
 10
10 -
 11
11 -
 12
12 -
 13
13 -
 14
14 -
 15
15 -
 16
16 -
 17
17 -
 18
18 -
19
-
20
-
21
-
22
-
23
-
24
-
25
-
26
-
27
-
28
-
29
-
30
-
31
-
32
 |
 |