HP Presario 1800 Presario Selct 1800 Series Maintenance and Service Guide - Page 55
attached to the system
 |
View all HP Presario 1800 manuals
Add to My Manuals
Save this manual to your list of manuals |
Page 55 highlights
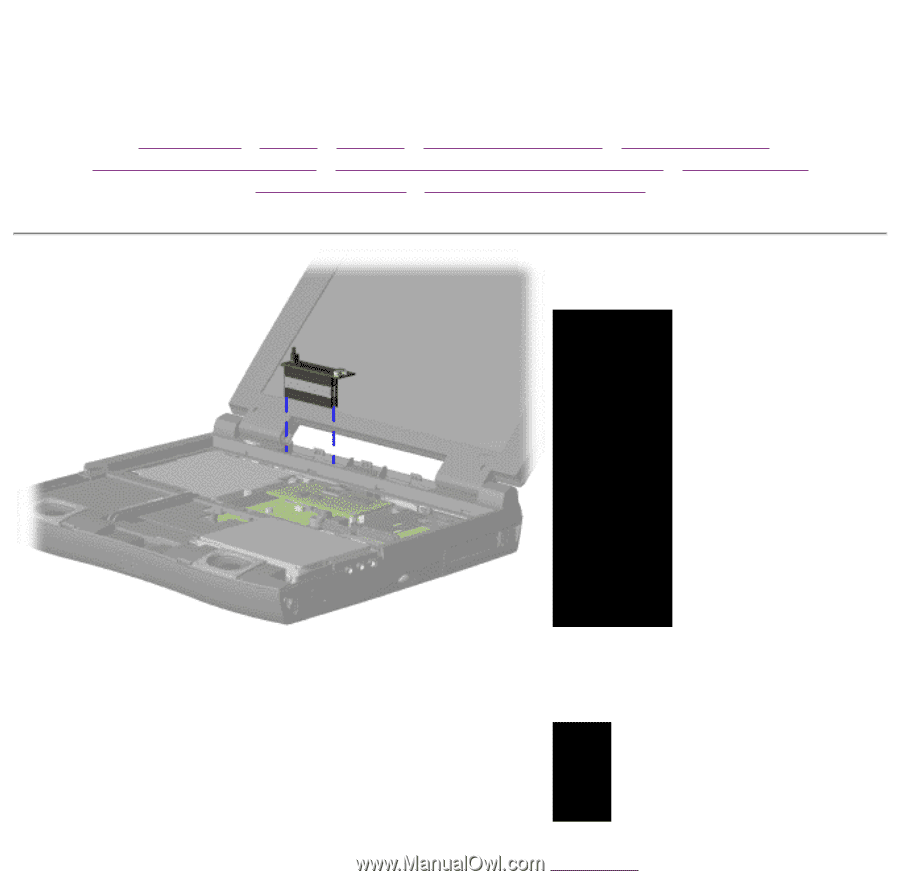
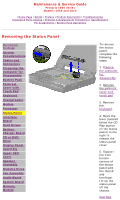
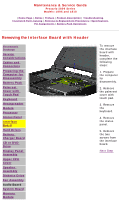
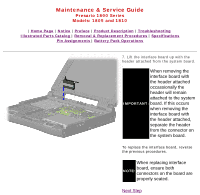
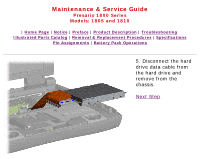
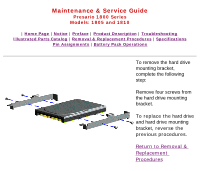
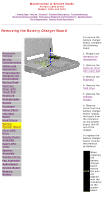
Maintenance & Service Guide Presario 1800 Series Models: 1805 and 1810 | Home Page | Notice | Preface | Product Description | Troubleshooting Illustrated Parts Catalog | Removal & Replacement Procedures | Specifications Pin Assignments | Battery Pack Operations 7. Lift the interface board up with the header attached from the system board. . When removing the interface board with the header attached occassionally the header will remain attached to the system IMPORTANT: board. If this occurs when removing the interface board with the header attached, separate the header from the connector on the system board. To replace the interface board, reverse the previous procedures. When replacing interface board, ensure both NOTE: connectors on the board are properly seated. Next Step
-
 1
1 -
2
-
3
-
4
-
5
-
6
-
7
-
8
-
9
-
10
-
11
-
12
-
13
-
14
-
15
-
16
-
17
-
18
-
19
-
20
-
21
-
22
-
23
-
24
-
25
-
26
-
27
-
28
-
29
-
30
-
31
-
32
-
33
-
34
-
35
-
36
-
37
-
38
-
39
-
40
-
41
-
42
-
43
-
44
-
45
-
46
-
47
-
48
-
49
-
 50
50 -
 51
51 -
 52
52 -
 53
53 -
 54
54 -
 55
55 -
 56
56 -
 57
57 -
 58
58 -
 59
59 -
 60
60 -
61
-
62
-
63
-
64
-
65
-
66
-
67
-
68
-
69
-
70
-
71
-
72
-
73
-
74
-
75
-
76
-
77
 |
 |