HP ProBook 430 HP ProBook 430 G1 Notebook PC Maintenance and Service Guide - Page 120
Performing a system recovery, Save and Backup
 |
View all HP ProBook 430 manuals
Add to My Manuals
Save this manual to your list of manuals |
Page 120 highlights
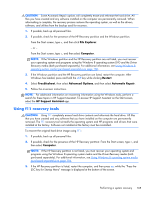
NOTE: Before you back up your information, be sure you have designated a location to save the backup files. 4. Click Save and Backup to start the backup and to save the backup settings. To restore backup files: 1. Select Computer > More Applications > Tools > Backup Manager Restore. 2. Click Backup Source, and then select the location of the backup files. 3. Click Restore Destination, and then select the destination to restore the files. 4. To restore all files from the selected location, click Restore all files. To restore select files only, click Restore selected files, click Select Files and then select the files to be restored. 5. Under Restore Point, click the time and date of the backup. NOTE: If multiple backups have been performed, click Use the latest version to restore the latest version. 6. Click Restore to start restoring the files, or click Cancel to cancel the operation. Performing a system recovery Recovery allows you to repair or restore the computer to its original factory state. You can create an HP Factory Image Restore DVD, using an installed or an external DVD±RW optical drive. CAUTION: Using Recovery completely erases hard drive contents and reformats the hard drive. All files you have created and any software installed on the computer are permanently removed. The recovery tool reinstalls the original operating system and HP programs and drivers that were installed at the factory. Software, drivers, and updates not installed by HP must be manually reinstalled. Personal files must be restored from a backup. To restore the computer using the HP Factory Image Restore DVD, you must first create the recovery disc. To create the recovery disc: NOTE: HP recommends that you create the HP Factory Image Restore DVD in the event of a system failure. 1. Select Computer > More Applications. 2. In the left pane, click Tools, and then click Create HP Factory Image Restore DVD in the right pane. 3. Follow the on-screen instructions to create an image file to burn a recovery disc. To restore the computer from the recovery disc, follow these steps: 1. If possible, back up all personal files. 2. Insert the HP Factory Image Restore DVD into the optical drive and restart the computer. 3. As the computer is restarting, press f9 to open the Computer Setup boot option menu. 110 Chapter 11 Backup and Recovery in SLED
-
 1
1 -
2
-
3
-
4
-
5
-
6
-
7
-
8
-
9
-
10
-
11
-
12
-
13
-
14
-
15
-
16
-
17
-
18
-
19
-
20
-
21
-
22
-
23
-
24
-
25
-
26
-
27
-
28
-
29
-
30
-
31
-
32
-
33
-
34
-
35
-
36
-
37
-
38
-
39
-
40
-
41
-
42
-
43
-
44
-
45
-
46
-
47
-
48
-
49
-
50
-
51
-
52
-
53
-
54
-
55
-
56
-
57
-
58
-
59
-
60
-
61
-
62
-
63
-
64
-
65
-
66
-
67
-
68
-
69
-
70
-
71
-
72
-
73
-
74
-
75
-
76
-
77
-
78
-
79
-
80
-
81
-
82
-
83
-
84
-
85
-
86
-
87
-
88
-
89
-
90
-
91
-
92
-
93
-
94
-
95
-
96
-
97
-
98
-
99
-
100
-
101
-
102
-
103
-
104
-
105
-
106
-
107
-
108
-
109
-
110
-
111
-
112
-
113
-
114
-
 115
115 -
 116
116 -
 117
117 -
 118
118 -
 119
119 -
 120
120 -
 121
121 -
 122
122 -
 123
123 -
 124
124 -
 125
125 -
126
-
127
-
128
-
129
-
130
-
131
-
132
-
133
-
134
-
135
-
136
-
137
-
138
-
139
 |
 |
