HP ProLiant BL420c HP Intelligent Provisioning User Guide - Page 25
Modifying global settings, Modifying standard network settings, Show iLO IP During POST
 |
View all HP ProLiant BL420c manuals
Add to My Manuals
Save this manual to your list of manuals |
Page 25 highlights
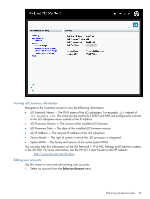
2. Select from the following permissions: • Administer User Accounts enables the new user to add, modify, and delete local iLO user accounts. It also enables the new user to change privileges for all users, including granting all permissions to him or herself. Without this privilege, the user can view his or her own settings and change his or her own password. • Remote Console Access enables the new user to remotely access the host system Remote Console and Remote Serial Console, including video, keyboard and mouse control. The new user must have access to the remote system to use this capability. • Virtual Power and Reset enables the new user to power-cycle or reset the host system. Any of these activities interrupts the availability of the system. A user can also diagnose the system using iLO Diagnostics screen. • Virtual Media enables the new user to use virtual media on the host system. • Configure iLO Settings enables the new user to configure most iLO settings, including security settings. It enables the new user to remotely update iLO firmware. It does not include user account administration. After iLO is configured, revoking this privilege from all users prevents reconfiguration using the web interface or CPQLOCFG. Users with access to iLO RBSU and HPONCFG can still reconfigure iLO. Only a user with the Administer User Accounts privilege can enable or disable this privilege. 3. Click Add. Modifying global settings Use this screen to modify global iLO settings. 1. Select or clear the following check boxes to enable or disable iLO global settings: • Lights-Out Functionality - This setting enables connection to iLO. When disabled, all connections to iLO are prevented. The iLO 10/100 network and communications with operating system drivers are turned off when iLO functionality is disabled. If iLO functionality is disabled (including the iLO Diagnostic Port), you must use the server Security Override Switch to enable iLO. See your server documentation to locate the Security Override Switch, and then set it to override. Power up the server, and then use the iLO RBSU to set iLO Functionality to Enabled. NOTE: The iLO functionality cannot be disabled on server blades. • ROM Based Setup Utility - This setting enables or disables the iLO ROM-Based Setup Utility. The iLO Option ROM prompts you to press F8 to enter RBSU, but if iLO is disabled or iLO RBSU is disabled, the RBSU prompt is bypassed. • Require RBSU Login - This setting enables RBSU access with or without a user-credentials challenge. If this setting is enabled, and you press F8 during POST, a login dialog box appears. • Show iLO IP During POST - This setting enables the display of the iLO network IP address during the host server POST process. 2. Click Save. Modifying standard network settings Use this screen to modify standard iLO network settings. Performing maintenance tasks 25
-
 1
1 -
2
-
3
-
4
-
5
-
6
-
7
-
8
-
9
-
10
-
11
-
12
-
13
-
14
-
15
-
16
-
17
-
18
-
19
-
 20
20 -
 21
21 -
 22
22 -
 23
23 -
 24
24 -
 25
25 -
 26
26 -
 27
27 -
 28
28 -
 29
29 -
 30
30 -
31
-
32
-
33
-
34
-
35
-
36
-
37
-
38
-
39
-
40
-
41
-
42
 |
 |