HP ProLiant ML110 Instructions for installing Microsoft Windows Small Business - Page 6
Part 2: Installing and configuring a modem - drivers windows 7
 |
View all HP ProLiant ML110 manuals
Add to My Manuals
Save this manual to your list of manuals |
Page 6 highlights
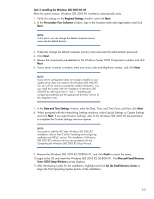
9. Perform the SNMP configuration steps below to enable support for the HP Insight Management Agents: - Select the Install SNMP check box. - Enter the community strings and IP address information into the appropriate window boxes. - Click the Continue button. NOTE: For the HP Insight Management Agents to function properly, SNMP installation and configuration is required before installing the PSP. The SNMP Service default security is set to no community string and no community rights. With these settings, the Insight Management Agents Version 6.1 (or earlier) will be unable to display the Version Control inventory on the Version Control Agents Home Page. SNMP is not installed by default. CAUTION: A potential security risk exists due to SNMP messages being sent in clear text. These clear text messages are easily intercepted and decoded by network analyzers, such as Microsoft Network Monitor. Community names can be captured and used by unauthorized personnel to gain valuable information about network resources. 10.After receiving a warning that the drives will be erased, click the Continue button. At this point, the drivers and the PSP will be installed. 11.Upon the automatic ejection of the SmartStart CD and the prompting to insert the OS CD, insert the Windows SBS 2003 R2 Disk 1, and click the Continue button. Once the OS data files are copied, the OS CD will be ejected and the server will be rebooted automatically. This step marks the beginning of the OS installation. 12.Follow the on-screen instructions to complete the OS installation. Part 2: Installing and configuring a modem Windows SBS 2003 R2 may not contain the correct drivers for the server's modem. If a modem is installed after Windows SBS 2003 R2 installation completes, the Hardware Wizard runs automatically. 1. When the Welcome to the Found New Hardware Wizard window displays, click Next. 2. In the Install Hardware Device Drivers window, search for a suitable driver for the device, and click Next. 3. Select from the Optional search locations on the Locate Driver Files window. Provide the OEM driver if it is located on a diskette, and click Next. After the wizard completes the search, it displays the driver it found for the modem. 4. Click Next to install the found driver. 5. Click Finish to complete the Found New Hardware Wizard. The modem should now be functional with Windows SBS 2003 R2. 6
-
 1
1 -
 2
2 -
 3
3 -
 4
4 -
 5
5 -
 6
6 -
 7
7 -
 8
8 -
 9
9 -
 10
10 -
 11
11 -
 12
12 -
13
-
14
-
15
 |
 |