HP Retail Integrated 2x Point of Sale POS Peripherals Configuration Guide - Page 398
HP ap5000 VFD BIOS Power Setting, F10 BIOS Method, Windows Graphical Method
 |
View all HP Retail Integrated 2x manuals
Add to My Manuals
Save this manual to your list of manuals |
Page 398 highlights
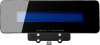
6.13.7 HP ap5000 VFD BIOS Power Setting The 5 volt power that is needed for the HP ap5000 VFD is supplied via the serial port (pin 9). When the ap5000 VFD is attached to the unit on COM2 from the HP factory and a Windows operating system is installed, the 5 volt for COM2 will be enabled natively. If the user has the need to move the VFD from COM2 to COM1 then the 5 volt for COM1 will need to be enabled by the steps outlined below. In addition, it is recommended that the 5 volt for COM2 should be disabled. This will prevent any possible damage to future serial devices inserted into COM2 but not rated for 5 volt. There are two ways one can enable the voltage on COM1 on the HP ap5000 unit. One method is to go into F10 BIOS and enable the voltage on the serial port. The second method under Windows is by using the graphical utility to change the setting. 6.13.7.1 F10 BIOS Method • Press F10 to enter BIOS setup at the post screen. If power-on or password option is enabled, enter the password in order to continue. • Press the right arrow key to highlight "Advanced" option. • Press the down arrow key to highlight "SuperIO Configuration" option and press the "ENTER" key. • Press the down arrow key to go the serial port that you wish to change the power setting and press the "ENTER" key. • Once the menu appears select the setting the power option for the port to be set to. "Standard Mode" means no power on the serial port. Note: The ap5000 VFD cannot be installed on COM3, it only be used on COM1 or COM2. 6.13.7.2 Windows Graphical Method In order to use the Windows graphical utility no BIOS password (power-on or Setup) must be enabled and one must have administrator privilege. Note: The ap5000 VFD cannot be installed on COM3, it only be used on COM1 or COM2 The following is an overview of the Windows graphical utility for the COM port setting: 1. Close any open application or document. 2. Open the "HP Com Port Utility.EXE" which is located on the "HP POS Software and Documentation CD" that is included in the peripherals after-market option kit. 3. Select the COM port that you which to change. 4. Select the option that you wish for the COM port (Enable Power or Disable Power). 5. After the COM port setting is changed, restart Windows operating system for the BIOS changes to take effect. Detailed Steps 1. Close any open application or document. Page 398 of 545
-
 1
1 -
2
-
3
-
4
-
5
-
6
-
7
-
8
-
9
-
10
-
11
-
12
-
13
-
14
-
15
-
16
-
17
-
18
-
19
-
20
-
21
-
22
-
23
-
24
-
25
-
26
-
27
-
28
-
29
-
30
-
31
-
32
-
33
-
34
-
35
-
36
-
37
-
38
-
39
-
40
-
41
-
42
-
43
-
44
-
45
-
46
-
47
-
48
-
49
-
50
-
51
-
52
-
53
-
54
-
55
-
56
-
57
-
58
-
59
-
60
-
61
-
62
-
63
-
64
-
65
-
66
-
67
-
68
-
69
-
70
-
71
-
72
-
73
-
74
-
75
-
76
-
77
-
78
-
79
-
80
-
81
-
82
-
83
-
84
-
85
-
86
-
87
-
88
-
89
-
90
-
91
-
92
-
93
-
94
-
95
-
96
-
97
-
98
-
99
-
100
-
101
-
102
-
103
-
104
-
105
-
106
-
107
-
108
-
109
-
110
-
111
-
112
-
113
-
114
-
115
-
116
-
117
-
118
-
119
-
120
-
121
-
122
-
123
-
124
-
125
-
126
-
127
-
128
-
129
-
130
-
131
-
132
-
133
-
134
-
135
-
136
-
137
-
138
-
139
-
140
-
141
-
142
-
143
-
144
-
145
-
146
-
147
-
148
-
149
-
150
-
151
-
152
-
153
-
154
-
155
-
156
-
157
-
158
-
159
-
160
-
161
-
162
-
163
-
164
-
165
-
166
-
167
-
168
-
169
-
170
-
171
-
172
-
173
-
174
-
175
-
176
-
177
-
178
-
179
-
180
-
181
-
182
-
183
-
184
-
185
-
186
-
187
-
188
-
189
-
190
-
191
-
192
-
193
-
194
-
195
-
196
-
197
-
198
-
199
-
200
-
201
-
202
-
203
-
204
-
205
-
206
-
207
-
208
-
209
-
210
-
211
-
212
-
213
-
214
-
215
-
216
-
217
-
218
-
219
-
220
-
221
-
222
-
223
-
224
-
225
-
226
-
227
-
228
-
229
-
230
-
231
-
232
-
233
-
234
-
235
-
236
-
237
-
238
-
239
-
240
-
241
-
242
-
243
-
244
-
245
-
246
-
247
-
248
-
249
-
250
-
251
-
252
-
253
-
254
-
255
-
256
-
257
-
258
-
259
-
260
-
261
-
262
-
263
-
264
-
265
-
266
-
267
-
268
-
269
-
270
-
271
-
272
-
273
-
274
-
275
-
276
-
277
-
278
-
279
-
280
-
281
-
282
-
283
-
284
-
285
-
286
-
287
-
288
-
289
-
290
-
291
-
292
-
293
-
294
-
295
-
296
-
297
-
298
-
299
-
300
-
301
-
302
-
303
-
304
-
305
-
306
-
307
-
308
-
309
-
310
-
311
-
312
-
313
-
314
-
315
-
316
-
317
-
318
-
319
-
320
-
321
-
322
-
323
-
324
-
325
-
326
-
327
-
328
-
329
-
330
-
331
-
332
-
333
-
334
-
335
-
336
-
337
-
338
-
339
-
340
-
341
-
342
-
343
-
344
-
345
-
346
-
347
-
348
-
349
-
350
-
351
-
352
-
353
-
354
-
355
-
356
-
357
-
358
-
359
-
360
-
361
-
362
-
363
-
364
-
365
-
366
-
367
-
368
-
369
-
370
-
371
-
372
-
373
-
374
-
375
-
376
-
377
-
378
-
379
-
380
-
381
-
382
-
383
-
384
-
385
-
386
-
387
-
388
-
389
-
390
-
391
-
392
-
 393
393 -
 394
394 -
 395
395 -
 396
396 -
 397
397 -
 398
398 -
 399
399 -
 400
400 -
 401
401 -
 402
402 -
 403
403 -
404
-
405
-
406
-
407
-
408
-
409
-
410
-
411
-
412
-
413
-
414
-
415
-
416
-
417
-
418
-
419
-
420
-
421
-
422
-
423
-
424
-
425
-
426
-
427
-
428
-
429
-
430
-
431
-
432
-
433
-
434
-
435
-
436
-
437
-
438
-
439
-
440
-
441
-
442
-
443
-
444
-
445
-
446
-
447
-
448
-
449
-
450
-
451
-
452
-
453
-
454
-
455
-
456
-
457
-
458
-
459
-
460
-
461
-
462
-
463
-
464
-
465
-
466
-
467
-
468
-
469
-
470
-
471
-
472
-
473
-
474
-
475
-
476
-
477
-
478
-
479
-
480
-
481
-
482
-
483
-
484
-
485
-
486
-
487
-
488
-
489
-
490
-
491
-
492
-
493
-
494
-
495
-
496
-
497
-
498
-
499
-
500
-
501
-
502
-
503
-
504
-
505
-
506
-
507
-
508
-
509
-
510
-
511
-
512
-
513
-
514
-
515
-
516
-
517
-
518
-
519
-
520
-
521
-
522
-
523
-
524
-
525
-
526
-
527
-
528
-
529
-
530
-
531
-
532
-
533
-
534
-
535
-
536
-
537
-
538
-
539
-
540
-
541
-
542
-
543
-
544
-
545
 |
 |
