HP Scanjet 300 User Guide - Page 13
Scan to a PDF file, Scan to email, icon in
 |
View all HP Scanjet 300 manuals
Add to My Manuals
Save this manual to your list of manuals |
Page 13 highlights
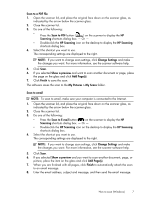
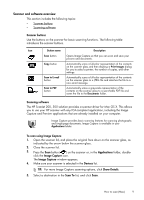
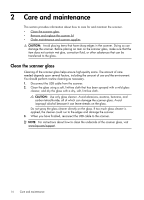
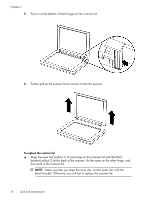
5. If you intend to save the scanned image as searchable PDF or process the page in an optical character recognition (OCR) application for editable text, select an appropriate resolution and file format. • Resolution: 300 dpi for most languages; 400 dpi for Asian, Cyrillic, and bidirectional languages. • File format: JPEG or TIFF file format is best for most OCR applications. See the Help for your OCR application for more information. 6. Select the destination in the Scan To list and click Scan. Each scanned page is saved to the destination as a separate image file. Scan to a PDF file 1. Open the scanner lid, and place the original face down on the scanner glass, as indicated by the arrow below the scanner glass. 2. Close the scanner lid. 3. Press the Scan to PDF button ( searchable PDF automatically. ) on the scanner to scan the original to a NOTE: Each page you scan is saved as a separate PDF file. You can merge PDF files into a multiple-page PDF file using Preview. Scan to email NOTE: To scan to email, make sure your computer is connected to the Internet. 1. Open the scanner lid, and place the original face down on the scanner glass, as indicated by the arrow below the scanner glass. 2. Close the scanner lid. 3. Do one of the following: • Press the Scan to E-mail button ( ) on the scanner to automatically attach the scan to an email message. - Or - • On your computer, double-click the Image Capture icon in the Applications folder, and choose Mail in the Scan To list to automatically attach the scan to an email message. NOTE: The Scan to E-mail button supports only Apple Mail. If you use a different email application, either follow the steps below to configure Image Capture to scan to your email application, or scan to a file and then manually attach it to your email message: To add your email application in the Scan To list, select Other, select your mail application, and then click Choose. 4. Enter the email address, subject and message, and then send the email message. How to scan (Mac) 11
-
 1
1 -
2
-
3
-
4
-
5
-
6
-
7
-
 8
8 -
 9
9 -
 10
10 -
 11
11 -
 12
12 -
 13
13 -
 14
14 -
 15
15 -
 16
16 -
 17
17 -
 18
18 -
19
-
20
-
21
-
22
-
23
-
24
-
25
-
26
-
27
-
28
-
29
-
30
-
31
-
32
-
33
-
34
-
35
-
36
 |
 |
