HP Scanjet 3970 HP Scanjet 3970 digital flatbed scanners - (English) Setup Pos - Page 1
HP Scanjet 3970 Manual
 |
View all HP Scanjet 3970 manuals
Add to My Manuals
Save this manual to your list of manuals |
Page 1 highlights
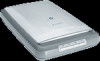
hp scanjet 3970 digital flatbed scanner 1 1 3 2 2 5 4 setup check the box contents 1. HP Scanjet digital flatbed scanner 2. Built-in transparent materials adapter (TMA) located on the underside of the scanner lid 3. One or more CDs (depending on your location) 4. USB cable 5. Power cable and AC adapter (one or two pieces, depending on your scanner) 5 a install the software 1. Review the system requirements on the box. 2. Close all programs on the computer. 3. Locate the HP Photo & Imaging software CD that is appropriate for your language. 4. Insert the CD into the computer's CD-ROM drive. 6 Windows Follow the instructions on the screen. If the installation application does not start automatically, do the following: On the Start menu, click Run, and type: x:setup.exe (where x is the letter of the CD-ROM drive). After installation is complete, you should see a shortcut to the HP Director on your desktop, indicating that the software is installed correctly. Macintosh Double-click the installer icon on the CD and follow the instructions. After installation is complete, you should see the following: 1 • A message, indicating that installation was successful. • A shortcut to the HP Director on your desktop (OS 9.x), or an HP Director item in the dock (OS X). connect the scanner to the computer 3 1. Connect the USB cable between the USB port on the scanner and the USB port on the computer. 7 b c 2 connect the power 1. Connect the power cable to the power port on the scanner (a). 2. Do one of the following: • If you have a one-piece power cable: Connect the other end to a surge protector or a grounded wall outlet (b). • If you have a two-piece power cable (comes with an adapter): Connect one end of the power cable to the power adapter (c), and connect the other end of the power cable to a surge protector or a grounded wall outlet (b). scan pictures and documents 1. Place an original face down on the scanner glass and close the lid. 2. Press the SCAN button. 3. Follow the instructions on the screen. Front panel buttons SCAN COPY HP INSTANT SHARE MEMORIES DISC CREATOR scan slides and negatives 1. Open the scanner lid. 2. Insert one slide or up to four negatives. See the User's Manual for details. 3. Close the scanner lid. 4. Press the SCAN button. 5. Select Picture, and click Scan. 6. Select one of these options: • If you're scanning a slide: Slides from a Transparent Materials Adapter. • If you're scanning negatives: Negatives from a Transparent Materials Adapter. 7. Click Scan. 8. Select a final scan area within a slide or negative. Click and drag a border around the area you want for a final scan (final scan area). 9. Make any necessary adjustments to the preview image. 10. Click Accept and follow the instructions on the screen. 4 1 2 *Q3200−90101* Q3200-90101 attach the scanner lid 1. Insert the hinges on the scanner lid into the hinge slots on the back of the scanner. 2. Connect the transparent materials adapter cable to the TMA port on the back of the scanner. 8 www.scanjet.hp.com www.hp.com/support www.shopping.hp.com (U.S. only) www.hp.com (worldwide) product support • For information on installation problems, customer support, and how to use the scanner, see the electronic User's Manual. The User's Manual is available in PDF format from a Help menu in the scanning software. • Visit these websites: www.scanjet.hp.com for product updates, promotions and scanning tips www.hp.com/support for customer support www.shopping.hp.com (U.S. only) or www.hp.com (worldwide) for ordering HP accessories, supplies, and products
-
 1
1
 |
 |