HP Server tc3100 HP Windows Server 2003 for IA-32 General Installation Guide - Page 2
High Level Process Flow, Create the Driver Diskettes, Perform Windows Server 2003 Installation
 |
View all HP Server tc3100 manuals
Add to My Manuals
Save this manual to your list of manuals |
Page 2 highlights
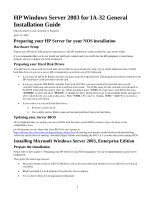
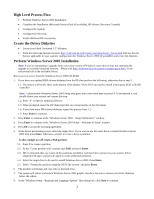
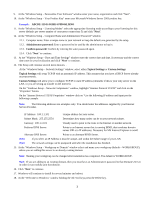
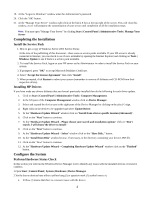
High Level Process Flow · Perform Windows Server 2003 Installation. · Complete the Installation (Microsoft Service Pack (if available), HP drivers, Recovery Console). · Configure the System. · Configure the Network. · Install additional HP accessories. Create the Driver Diskettes · Locate your blank, formatted 3.5" diskettes. · From the following Internet location; http://welcome.hp.com/country/us/eng/software_drivers.htm find any drivers that are applicable to your system's configuration for Windows Server 2003 (if available), and create the diskettes. Perform Windows Server 2003 Installation Note: If you are attempting to upgrade from a previous version of Windows, some drivers may not automatically upgrade to currently supported versions. Please visit http://welcome.hp.com/country/us/eng/support.html, locate and reinstall all of the available drivers. Boot your new server from the Windows Server 2003 CD-ROM. 1. If you have any updated HBA drivers diskettes from the HP then perform the following, otherwise skip to step 3. 1.1. The system will briefly show at the bottom of the display "Press F6 if you need to install a third party SCSI or RAID controller". Note: Unfortunately Windows Server 2003 Setup only gives you a very short time to press F6. If you missed it, you should reboot your system and resume this step. 1.2. Press "S" to Specify Additional Device. 1.3. When prompted, insert the HP diskette(s) that you created earlier in this document. 1.4. If you have more HBA driver diskettes repeat this process from 1.2. 1.5. Press Enter to continue. 2. Press Enter to continue at the "Windows Server 2003 - Setup Notification:" window. 3. Press Enter to continue at the "Windows Server 2003 Setup - Welcome to Setup" window. 4. Press F8 to accept the licensing agreement. 5. At the drives partitioning screen, select the target drive. If you want to use the entire drive to install Windows Server 2003 then press Enter. Otherwise, press C to create a drive a partition. In this example we will create a 8GB partition. 5.1. Press C to create a partition. 5.2. At the "Create partition size" prompt, type 8192 and press Enter. 5.3. HP recommends that you create all the partitions needed for each hard drive present on your system. Select unpartitioned space and press C again to create additional partitions. 5.4. Select the target drive to be used to install Windows Server 2003. Press Enter. 5.5. Select "Format the partition using the NTFS file system" and press Enter. 6. The installer will format and copy files to the hard drive. 7. The system will reboot and launch Windows Server 2003 graphic interface. Be sure to remove any driver diskettes before the reboot. 8. At the "Windows Setup - Regional and Language Options" first dialog box, click Next to continue. 2
-
 1
1 -
 2
2 -
 3
3 -
 4
4 -
 5
5 -
 6
6 -
 7
7 -
 8
8 -
9
 |
 |