HP SignagePlayer mp8200 Hardware Reference Guide - HP SignagePlayer mp8200 and - Page 42
Installing the Front Bezel Security Screw
 |
View all HP SignagePlayer mp8200 manuals
Add to My Manuals
Save this manual to your list of manuals |
Page 42 highlights
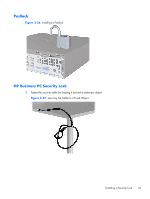
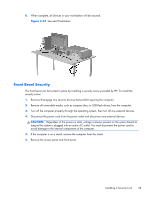
7. Remove the black screw on the front of the chassis behind the bezel. The screw is located next to the optical drive and is labeled "BEZEL." Figure 2-35 Retrieving the Front Bezel Security Screw 8. Replace the front bezel. 9. Install the security screw through the middle front bezel release tab and into the chassis to secure the front bezel in place. Figure 2-36 Installing the Front Bezel Security Screw 10. Replace the access panel. 11. If the computer was on a stand, replace the stand. 12. Reconnect the power cord and turn on the computer. 13. Lock any security devices that were disengaged when the access panel was removed. 36 Chapter 2 Hardware Upgrades
-
 1
1 -
2
-
3
-
4
-
5
-
6
-
7
-
8
-
9
-
10
-
11
-
12
-
13
-
14
-
15
-
16
-
17
-
18
-
19
-
20
-
21
-
22
-
23
-
24
-
25
-
26
-
27
-
28
-
29
-
30
-
31
-
32
-
33
-
34
-
35
-
36
-
 37
37 -
 38
38 -
 39
39 -
 40
40 -
 41
41 -
 42
42 -
 43
43 -
 44
44 -
 45
45 -
 46
46 -
 47
47 -
48
-
49
 |
 |
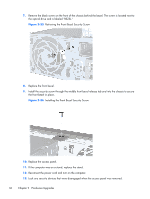
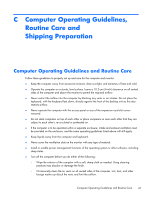
7.
Remove the black screw on the front of the chassis behind the bezel. The screw is located next to
the optical drive and is labeled "BEZEL."
Figure 2-35
Retrieving the Front Bezel Security Screw
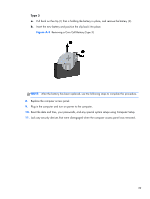
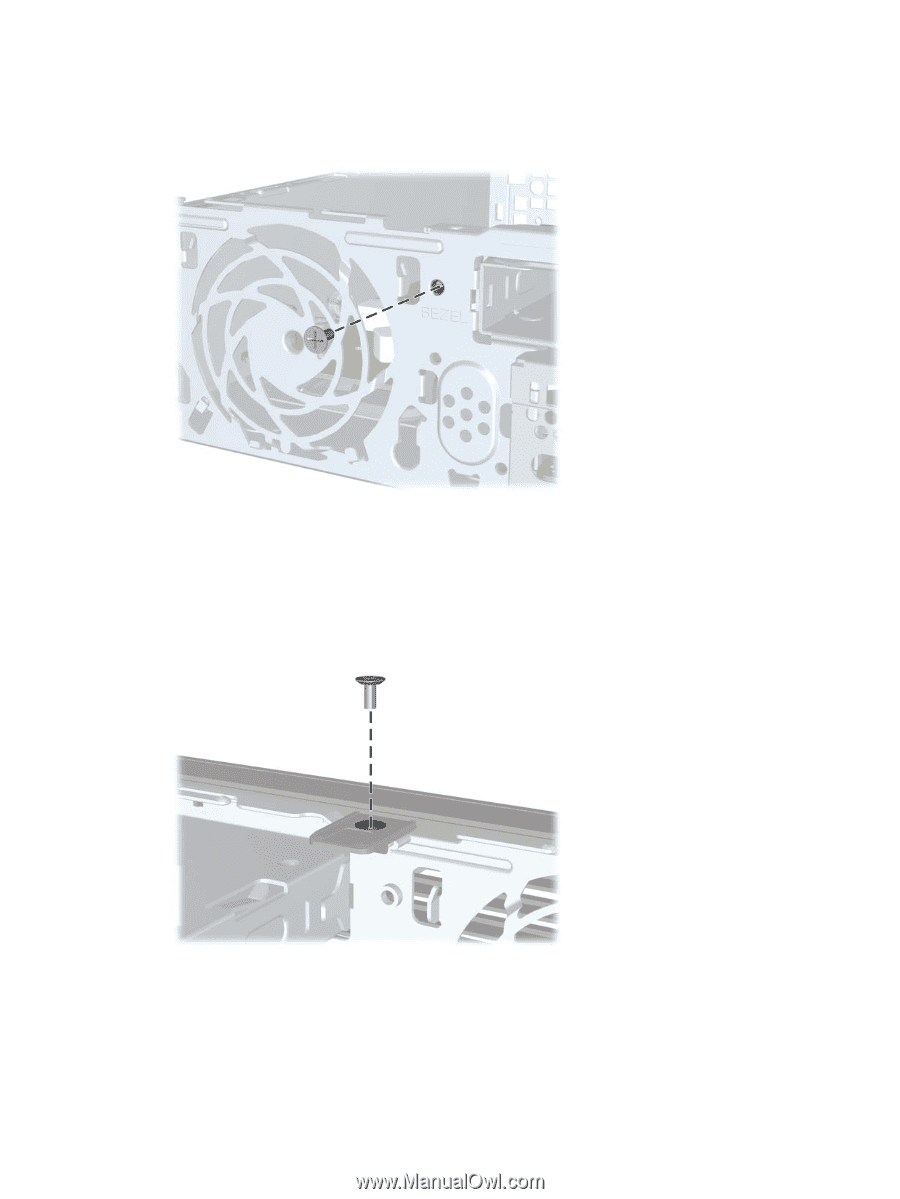
8.
Replace the front bezel.
9.
Install the security screw through the middle front bezel release tab and into the chassis to secure
the front bezel in place.
Figure 2-36
Installing the Front Bezel Security Screw
10.
Replace the access panel.
11.
If the computer was on a stand, replace the stand.
12.
Reconnect the power cord and turn on the computer.
13.
Lock any security devices that were disengaged when the access panel was removed.
36
Chapter 2
Hardware Upgrades