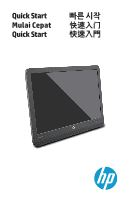
HP Slate 21 Pro PC Quick Start 1 - Page 3
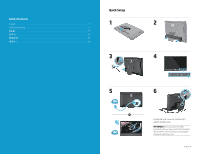
Quick Tour, Completing All-in-One Setup
 |
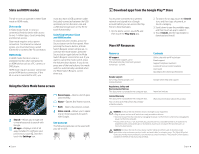
View all HP Slate 21 Pro PC manuals
Add to My Manuals
Save this manual to your list of manuals |
Page 3 highlights
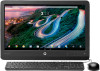
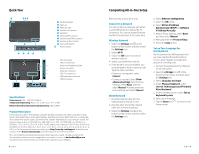
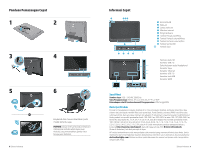
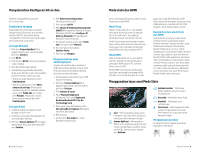
Quick Tour 1 234 5 6789 - q w e 1 WLAN antennas 2 Webcam 3 Webcam light 4 Internal microphone 5 Speakers 6 Settings/Menu button 7 Volume down/Minus button 8 Volume up/Plus button 9 Source/OK button - Power button q SD card reader w USB 2.0 connector e Audio-out (headphone) jack r Power connector t Ethernet connector y USB 2.0 connectors u USB upstream connector i HDMI connector r t y ui Specifications Power source: 100 - 240 VAC 50/60 Hz Temperature Operating: Metric, 5°C to 35°C; U.S., 41°F to 95°F Relative humidity (noncondensing) Operating: 20% to 80% Product Description This product is an All-in-One desktop computer, desktop computer, thin client computer, or retail system and might feature a thin-panel display, TouchPad, processor, RAM, hard drive or solid state drive and internal power supply, and external AC adapter. Depending on your computer model, the products have a rating of 100-240 V ac, 200-240 V ac or 100- 127/200-240 V ac, 50-60 Hz or 50/60Hz, 1.5 A, 3 A, 4 A, 5.5 A, 6 A, or 8 A. The AC adapter has a rating of 100-240 Vac, 50-60 Hz or 50-60Hz, 0.5 A, 0.6 A, 0.8A, 1A, 1.2 A, 1.4 A, 1.5 A, 1.6 A, 1.7 A, 2 A, 2.2 A, 2.25 A, 2.4 A, 2.5 A, 2.7 A, 2.9 A, or 4 A. To access the latest user guide, go to http://www.hp.com/support, and select your country. Select Drivers & Downloads, and then follow the onscreen instructions. HP is committed to providing documentation that meets your needs. To help us improve the documentation, please send any suggestions, comments, or errors to [email protected]. Include the document title and part number when submitting your feedback. 2 English Completing All-in-One Setup After turning on your all-in-one: Connect to a Network You can connect to networks with either a wired (Ethernet) or wireless (Wi-Fi) connection. You cannot enable Ethernet and Wi-Fi connections at the same time. Wireless Network 1. Select the All Apps icon at the bottom of the screen, and then select the Settings icon. 2. Select Wi-Fi. 3. Select the ON button to turn the wireless radio on. 4. Select your WLAN from the list. 5. If the WLAN is security-enabled, you are prompted to enter a security code. Type the code, and then: • If proxy is not required, select Connect. • If proxy is required, select Show advanced settings. Next to Proxy settings, select None, and then select Manual. Manually enter the proxy settings and select Connect. Wired Network 1. Plug the network cable into the network jack on the all-in-one. 2. Plug the other end of the network cable into a network wall jack. 3. Select the All Apps icon at the bottom of the screen, and then select the Settings icon. 4. Select Ethernet configuration. 5. Select the ON button. 6. Select Obtain IP Address Automatically (DHCP) or Configure IP Address Manually. 7. Next to Proxy settings, select None, and then select Manual. 8. Manually enter the Proxy settings. 9. Select the Save button. Set up Your Language for the Keyboard Do not connect the USB keyboard until you have reached the Android Home screen, which displays a background picture of a winding road. 1. Connect the keyboard to the USB port on the rear panel. 2. Select the All Apps icon at the bottom of the screen, and then select the Settings icon. 3. Select Language and Input. 4. Under Physical Keyboard, select Lite-On Technology Corp HP Android Wired Keyboard. 5. On the resulting screen, select Set up keyboard layouts. 6. Select your language. 7. Tap the Home icon to return to the Home screen. English 3
-
 1
1 -
 2
2 -
 3
3 -
 4
4 -
 5
5 -
 6
6 -
 7
7 -
 8
8 -
 9
9 -
10
-
11
-
12
-
13
-
14
-
15
-
16
-
17
-
18
 |
 |
