HP StorageWorks 16-EL SAN switch 2/16 v3.1.x installation guide - Page 33
Securing the inner slide rails to the switch
 |
View all HP StorageWorks 16-EL manuals
Add to My Manuals
Save this manual to your list of manuals |
Page 33 highlights
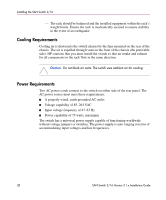
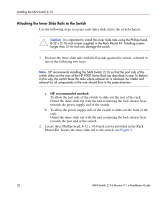
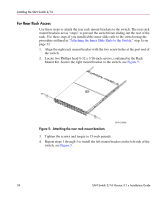
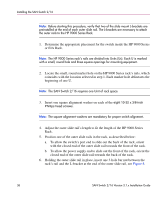
Installing the SAN Switch 2/16 3. Tighten the screws and torque to 15-inch pounds. SHR-2477A Figure 4: Securing the inner slide rails to the switch 4. Repeat steps 1 and 2 to attach the second inner slide rail to the switch. Make sure to orient the second inner slide rail in the same way you positioned the first (based on 1a or 1b above). Attaching the Rear or Front Rack Mount Brackets The Rack Mount Kit supplied with the switch contains two rear rack mount brackets and two front rack mount brackets. To prevent the switch from accidentally sliding out of the rack, install these rack mount brackets as described in the following section. Note: HP recommends installing the switch so that the port side of the switch slides out the back of the HP 9000 Series rack. (For example, the switch should face the aisle where exhaust air is released. Air intake and exhaust for all components in the rack should flow in the same direction.) SAN Switch 2/16 Version 3.1.x Installation Guide 33
-
 1
1 -
2
-
3
-
4
-
5
-
6
-
7
-
8
-
9
-
10
-
11
-
12
-
13
-
14
-
15
-
16
-
17
-
18
-
19
-
20
-
21
-
22
-
23
-
24
-
25
-
26
-
27
-
 28
28 -
 29
29 -
 30
30 -
 31
31 -
 32
32 -
 33
33 -
 34
34 -
 35
35 -
 36
36 -
 37
37 -
 38
38 -
39
-
40
-
41
-
42
-
43
-
44
-
45
-
46
-
47
-
48
-
49
-
50
-
51
-
52
-
53
-
54
-
55
-
56
-
57
-
58
-
59
-
60
-
61
-
62
-
63
-
64
-
65
-
66
-
67
-
68
-
69
-
70
-
71
-
72
-
73
-
74
-
75
-
76
-
77
-
78
-
79
-
80
-
81
-
82
-
83
-
84
-
85
-
86
-
87
-
88
-
89
-
90
-
91
-
92
-
93
-
94
-
95
-
96
-
97
-
98
-
99
-
100
-
101
-
102
-
103
-
104
-
105
-
106
-
107
-
108
-
109
-
110
-
111
-
112
-
113
-
114
-
115
-
116
-
117
-
118
-
119
-
120
 |
 |
