HP StorageWorks 20 HP StorageWorks Controller Power Supply Replacement Instruc - Page 2
Removing a power supply, Installing a power supply, Verifying proper operation
 |
View all HP StorageWorks 20 manuals
Add to My Manuals
Save this manual to your list of manuals |
Page 2 highlights
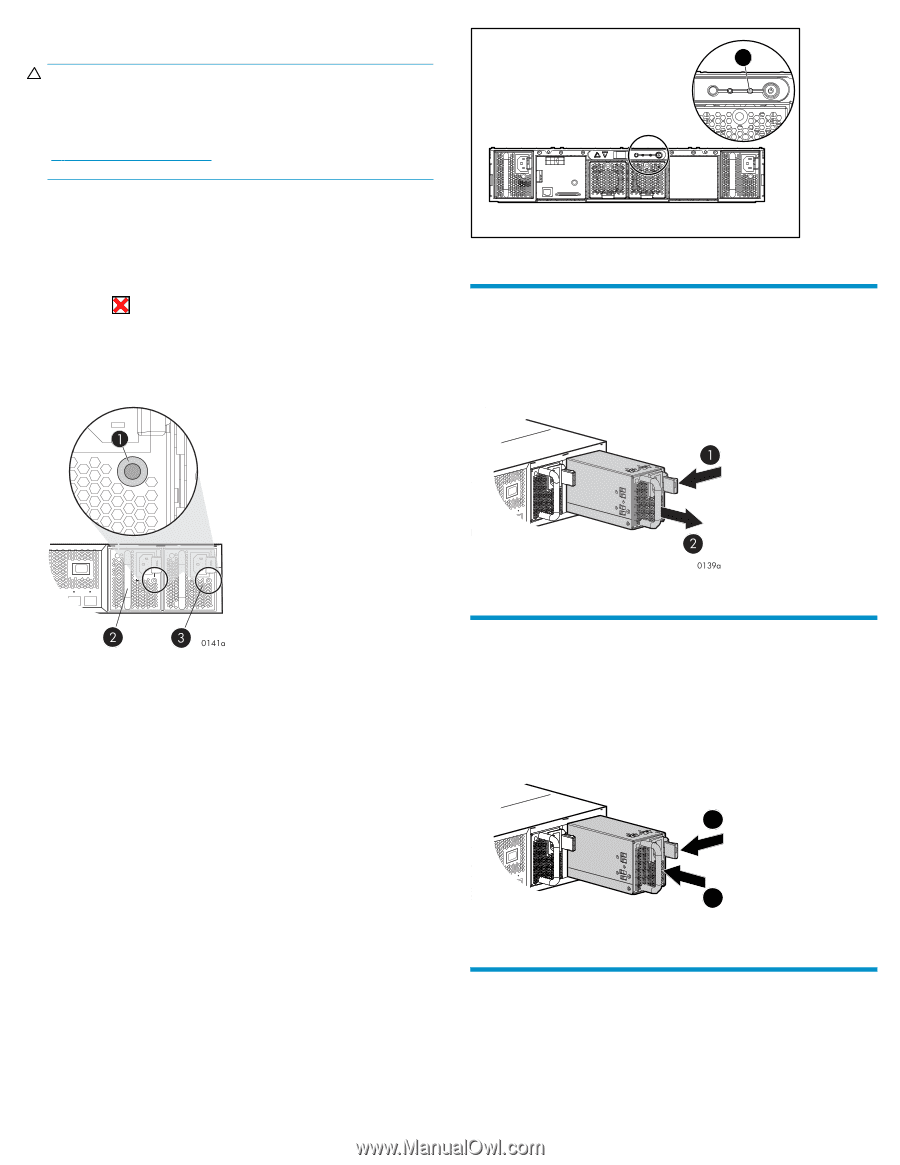
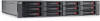
EVA products 1 CAUTION: If HP Command View EVA does not present a status consistent with the power supply status indicator, or if either HP Command View EVA or your system monitoring tool indicates multiple hardware failures, contact HP support for assistance (http://www.hp.com/support). • Analyze any failure messages received. • Check status using HP Command View EVA: 1. In the Navigation pane, select Storage system > Hardware > Rack > Controller enclosure > Controller. 2. In the Content pane, select the Enclosure tab. The status is displayed in the Power System field. The status should be Failed . 3. To help identify the correct enclosure, click Locate > Locate On to display Locate Confirmed on the controller operator control panel (OCP). The blue Unit ID indicator will also turn on. • Check the power supply status indicator. See Figure 1. It should be amber or off. Figure 2 MSA20 enclosure fault indicator Removing a power supply 1. Disconnect the AC power cord from the power supply. 2. While moving the wine-colored latch to the left (1, Figure 3), grasp the handle and pull the power supply out of the enclosure (2). Figure 3 Removing a power supply Figure 1 Power supply status indicator EVA 1. Status indicator 2. Power supply 0 3. Power supply 1 MSA 1. Status indicator 2. Power supply 1 3. Power supply 2 MSA products • Check the power supply status indicator (Figure 1). It should be amber or off. • On an MSA1500cs, check the controller LCD for the following message: 409 STORAGE BOX # POWER SUPPLY FAILED • On an MSA20, check the enclosure fault indicator (Figure 2). It should be amber. Installing a power supply 1. Remove any connector protector that may be covering the AC power connector on the new power supply. 2. While pressing in on the mounting latch (1, Figure 4), slide the power supply into the enclosure until it is fully seated (2). 3. Connect the AC power cord to the power supply. 1 2 0138a Figure 4 Installing a power supply Verifying proper operation After replacing the power supply, check the following to verify that the component is operating properly: • Check the power supply status indicator. It should be green. • On an MSA20, ensure the enclosure fault indicator is off. Page 2
-
 1
1 -
 2
2 -
 3
3
 |
 |