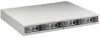
HP StorageWorks 2100 HP StorageWorks Disk System 2100/2110 User's Guide (Augus - Page 20
Replace a Disk Module, Refer to your operating system documentation for requirements and procedures
 |
View all HP StorageWorks 2100 manuals
Add to My Manuals
Save this manual to your list of manuals |
Page 20 highlights
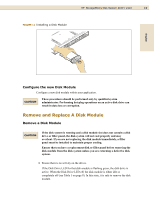
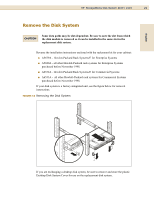
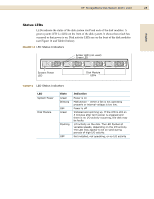
20 HP StorageWorks Disk System 2100 / 2110 2 Prepare the software environment to remove the drive. See your operating system documentation for instructions and procedures required to remove a disk module. It may be necessary to unmount file systems associated with the disk drives installed in the disk system. 3 Unlatch the disk module handle and remove the disk module. Squeeze the latch to unlock the disk module. Put a finger behind the latch and pull the disk module out until it disengages from the backplane. Leave it in its slot for two to three minutes to allow the disk drive to spin down before removing the disk module from the enclosure. If you are going to replace the disk module immediately, refer to "Replace a Disk Module" below. If you are not going to replace the disk module immediately insert a filler panel into the open slot to assure the required cooling. Replace a Disk Module 1 Refer to your operating system documentation for requirements and procedures for replacing disk modules. 2 Align the replacement disk module with the disk module slot. 3 Slide the disk module into the slot until it engages with the backplane. 4 Press on the locking handle until it locks. You will hear an audible click when the locking mechanism is fully engaged.
-
 1
1 -
2
-
3
-
4
-
5
-
6
-
7
-
8
-
9
-
10
-
11
-
12
-
13
-
14
-
 15
15 -
 16
16 -
 17
17 -
 18
18 -
 19
19 -
 20
20 -
 21
21 -
 22
22 -
 23
23 -
 24
24 -
 25
25 -
26
-
27
-
28
-
29
-
30
-
31
-
32
-
33
-
34
-
35
-
36
-
37
-
38
-
39
-
40
-
41
-
42
 |
 |
