HP StorageWorks 7410 Upgrading a VA 7100/7400to a VA 7410/7110 - Upgrade Instr - Page 7
Upgrading the Array Hardware, Disconnect Fiber Cabling, Replace the Array Controllers
 |
View all HP StorageWorks 7410 manuals
Add to My Manuals
Save this manual to your list of manuals |
Page 7 highlights
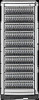
Upgrading the Array Hardware Upgrading the original array to a VA 7410/7110 involves replacing controllers and LCCs on the original array. The procedure may also involve adding new disk enclosures if the array capacity is being increased. Note Make sure you have a copy of the HP StorageWorks Virtual Array User and Service Guide available. The detailed steps for the procedures involved are covered in this book and are not duplicated here. Disconnect Fiber Cabling 1 Disconnect all fiber cabling from the array enclosure. 2 Disconnect all fiber cabling from the disk enclosures on a VA 7400. Replace the Array Controllers The controllers in the array enclosure must be replaced with VA 7410 or VA 7110 controllers. Note Before replacing the controllers, check the BATTERY LED on each VA 7410/7110 controller to ensure the LED is off. If the LED is flashing, it indicates that the battery is supplying power to the NVSRAM. If the LED is flashing, remove the battery from the controller, wait a few seconds, and reinstall it. This will ensure that the NVSRAM contents are cleared. 1 Remove both controllers from the array enclosure. 2 If the cache DIMMs will be used on the VA 7410/7110 array, remove the DIMMs from the controllers. Note 256 MB DIMMs are not supported on the VA 7410/7110. 3 Install cache DIMMs on the VA 7410/7110 controllers. The minimum cache configuration for the VA 7410/7110 is 1024 MB per controller (two 512 MB DIMMS or a single 1024 MB DIMM). 4 Install the VA 7410/7110 controllers in the array enclosure. Upgrading a VA 7100/7400 to a VA 7410/7110 7
-
 1
1 -
 2
2 -
 3
3 -
 4
4 -
 5
5 -
 6
6 -
 7
7 -
 8
8 -
 9
9 -
 10
10 -
 11
11 -
 12
12
 |
 |
