HP StoreVirtual 4000 9.0 HP StorageWorks P4000 SAN Solution User Guide - Page 308
Deleting a NIC bond, Setting the TCP speed, duplex, and frame size, Link Aggregation Dynamic Mode bond
 |
View all HP StoreVirtual 4000 manuals
Add to My Manuals
Save this manual to your list of manuals |
Page 308 highlights
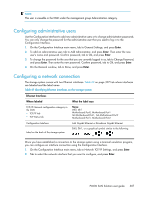
3. Enter the host name, and tab to the next section to configure the network settings. NOTE: If you specify an IP address, the Gateway is a required field. If you do not have a Gateway, enter 0.0.0.0 for the Gateway address. 4. Tab to OK, and press Enter to complete the network configuration. 5. Press Enter on the confirmation window. A window opens listing the assigned IP address. 6. Open the CMC, and locate the storage system using the Find function. Deleting a NIC bond You can delete the following NIC bonds using the Configuration Interface: • Active-Passive bond • Link Aggregation Dynamic Mode bond • Adaptive Load Balancing bond For more information about creating and configuring NIC bonds, see "Configuring network interface bonds" on page 87. When you delete an Active-Passive bond, the primary interface assumes the IP address and configuration of the deleted logical interface. The other NIC is disabled and its IP address is set to 0.0.0.0. When you delete a Link Aggregation Dynamic Mode or an Adaptive Load Balancing bond, eth0 or motherboard: port 1 retains the IP address of the deleted logical interface. The other NIC is disabled, and its IP address is set to 0.0.0.0. 1. On the Configuration Interface main menu, tab to Network TCP/IP, Settings and press Enter. The Available Network Devices window opens. The logical bond is the only interface listed in the window. 2. Tab to select the bond, and press Enter. 3. Tab to Delete Bond, and press Enter. 4. Press Enter on the confirmation window. 5. On the Available Network Devices window, tab to Back, and press Enter. Setting the TCP speed, duplex, and frame size You can use the Configuration Interface to set the TCP speed, duplex, and frame size of a network interface. TCP speed and duplex. You can change the speed and duplex of an interface. If you change these settings, you must ensure that both sides of the NIC cable are configured in the same manner. For example, if the storage system is set for Auto/Auto, the switch must be set the same. For more information about TCP speed and duplex settings, see "Managing settings on network interfaces" on page 80. 308 Using the Configuration Interface
-
 1
1 -
2
-
3
-
4
-
5
-
6
-
7
-
8
-
9
-
10
-
11
-
12
-
13
-
14
-
15
-
16
-
17
-
18
-
19
-
20
-
21
-
22
-
23
-
24
-
25
-
26
-
27
-
28
-
29
-
30
-
31
-
32
-
33
-
34
-
35
-
36
-
37
-
38
-
39
-
40
-
41
-
42
-
43
-
44
-
45
-
46
-
47
-
48
-
49
-
50
-
51
-
52
-
53
-
54
-
55
-
56
-
57
-
58
-
59
-
60
-
61
-
62
-
63
-
64
-
65
-
66
-
67
-
68
-
69
-
70
-
71
-
72
-
73
-
74
-
75
-
76
-
77
-
78
-
79
-
80
-
81
-
82
-
83
-
84
-
85
-
86
-
87
-
88
-
89
-
90
-
91
-
92
-
93
-
94
-
95
-
96
-
97
-
98
-
99
-
100
-
101
-
102
-
103
-
104
-
105
-
106
-
107
-
108
-
109
-
110
-
111
-
112
-
113
-
114
-
115
-
116
-
117
-
118
-
119
-
120
-
121
-
122
-
123
-
124
-
125
-
126
-
127
-
128
-
129
-
130
-
131
-
132
-
133
-
134
-
135
-
136
-
137
-
138
-
139
-
140
-
141
-
142
-
143
-
144
-
145
-
146
-
147
-
148
-
149
-
150
-
151
-
152
-
153
-
154
-
155
-
156
-
157
-
158
-
159
-
160
-
161
-
162
-
163
-
164
-
165
-
166
-
167
-
168
-
169
-
170
-
171
-
172
-
173
-
174
-
175
-
176
-
177
-
178
-
179
-
180
-
181
-
182
-
183
-
184
-
185
-
186
-
187
-
188
-
189
-
190
-
191
-
192
-
193
-
194
-
195
-
196
-
197
-
198
-
199
-
200
-
201
-
202
-
203
-
204
-
205
-
206
-
207
-
208
-
209
-
210
-
211
-
212
-
213
-
214
-
215
-
216
-
217
-
218
-
219
-
220
-
221
-
222
-
223
-
224
-
225
-
226
-
227
-
228
-
229
-
230
-
231
-
232
-
233
-
234
-
235
-
236
-
237
-
238
-
239
-
240
-
241
-
242
-
243
-
244
-
245
-
246
-
247
-
248
-
249
-
250
-
251
-
252
-
253
-
254
-
255
-
256
-
257
-
258
-
259
-
260
-
261
-
262
-
263
-
264
-
265
-
266
-
267
-
268
-
269
-
270
-
271
-
272
-
273
-
274
-
275
-
276
-
277
-
278
-
279
-
280
-
281
-
282
-
283
-
284
-
285
-
286
-
287
-
288
-
289
-
290
-
291
-
292
-
293
-
294
-
295
-
296
-
297
-
298
-
299
-
300
-
301
-
302
-
 303
303 -
 304
304 -
 305
305 -
 306
306 -
 307
307 -
 308
308 -
 309
309 -
 310
310 -
 311
311 -
 312
312 -
 313
313 -
314
-
315
-
316
-
317
-
318
-
319
-
320
-
321
-
322
-
323
-
324
-
325
-
326
-
327
-
328
-
329
-
330
-
331
-
332
-
333
-
334
-
335
-
336
-
337
-
338
-
339
-
340
-
341
-
342
-
343
-
344
-
345
-
346
-
347
-
348
-
349
-
350
 |
 |
