HP Thin Client PC t1010 Compaq Hardware Reference Guide For Thin Clients - Page 23
SODIMM Installation, Installing an optional SODIMM T20 model shown
 |
View all HP Thin Client PC t1010 manuals
Add to My Manuals
Save this manual to your list of manuals |
Page 23 highlights
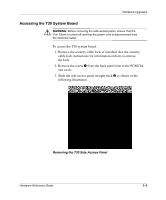
Hardware Upgrades SODIMM Installation If your Thin Client can be upgraded with optional SODIMM memory, use the following instructions for an overview of this procedure. Ä CAUTION: If necessary, back up any data before continuing the installation. ✎ In addition to following these instructions, follow the instructions that are applicable to your specific Thin Client option. 1. Follow the applicable instructions in the "General Hardware Installation Sequence" section at the beginning of this chapter. 2. Access the Thin Client system board. 3. Remove any existing SODIMM if installed. 4. Install the module into the socket at a 45° angle 1 until it clicks, then snap the module 2 into position as shown. Installing an optional SODIMM (T20 model shown) 5. Attach the side access panel. 6. Power up the Thin Client. Hardware Reference Guide 2-9
-
 1
1 -
2
-
3
-
4
-
5
-
6
-
7
-
8
-
9
-
10
-
11
-
12
-
13
-
14
-
15
-
16
-
17
-
 18
18 -
 19
19 -
 20
20 -
 21
21 -
 22
22 -
 23
23 -
 24
24 -
 25
25 -
 26
26 -
 27
27 -
 28
28 -
29
-
30
-
31
-
32
-
33
-
34
-
35
 |
 |
