HP TouchSmart 310-1200 Upgrading and Servicing - Page 12
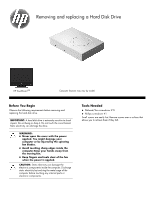
Installing a New Hard Disk Drive, quality parts that meet or exceed your original computer
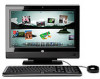 |
View all HP TouchSmart 310-1200 manuals
Add to My Manuals
Save this manual to your list of manuals |
Page 12 highlights
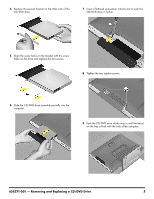
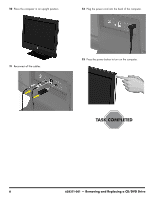
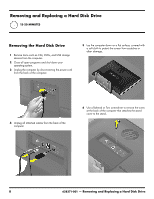
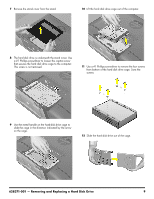
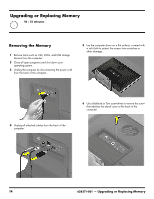
Installing a New Hard Disk Drive NOTE: The replacement hard disk drive may not look exactly the same as the original drive due to different manufacturers or models. Hewlett-Packard always provides quality parts that meet or exceed your original computer specifications. 1 Insert the new hard disk drive into the cage. Make sure that the hard disk drive is inserted with the label facing up. NOTE: The four screws that secure the hard disk drive to the hard-disk drive cage may have had rubber grommets. These grommets can fall off when you remove the hard drive from the hard-drive cage. Replacement grommets might be included with the new hard drive. If so, place a new grommet over each hole before fastening the screw. 4 Hold the wire handle on the hard drive cage to insert the cage into the computer. Push the cage to the right until it locks into position. 2 Align the hard disk drive screw holes with the screw holes on the cage. 5 Tighten the captive screw with a Phillips #1 screwdriver. 3 Replace the four screws on the bottom of the hard drive cage. 10 628371-001 - Removing and Replacing a Hard Disk Drive
-
 1
1 -
2
-
3
-
4
-
5
-
6
-
 7
7 -
 8
8 -
 9
9 -
 10
10 -
 11
11 -
 12
12 -
 13
13 -
 14
14 -
 15
15 -
 16
16 -
 17
17 -
18
-
19
-
20
-
21
-
22
-
23
-
24
-
25
-
26
-
27
-
28
-
29
 |
 |
