HP TouchSmart tm2-1016tx HP TouchSmart tm2 Notebook PC - Maintenance and Servi - Page 75
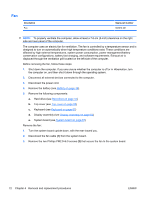
System board
 |
View all HP TouchSmart tm2-1016tx manuals
Add to My Manuals
Save this manual to your list of manuals |
Page 75 highlights
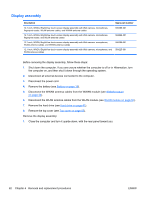
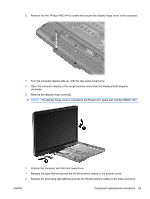
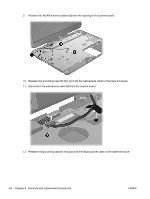
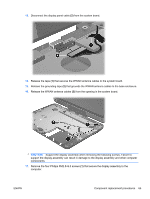
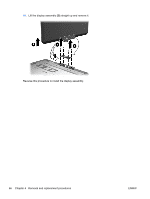
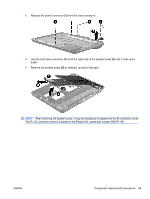
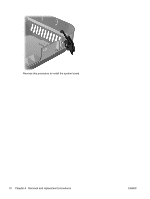
System board NOTE: The system board spare part kit includes replacement thermal material. Description Spare part number Equipped with discrete graphics subsystem and Intel Core2 SU9600 1.60-GHz processor (800-MHz 584129-001 FSB, 3-MB L2 cache, 10-W) Equipped with discrete graphics subsystem and Intel Core2 SU7300 1.30-GHz processor (800-MHz 584133-001 FSB, 3-MB L2 cache, 10-W) Equipped with discrete graphics subsystem and Intel Pentium DC SU4100 1.30-GHz processor (800-MHz FSB, 2-MB L2 cache, 10-W) 584135-001 Equipped with discrete graphics subsystem and Intel Celeron DC SU2300 1.20-GHz processor (800-MHz FSB, 1-MB L2 cache, 10-W) Equipped with UMA graphics subsystem and Intel Core2 SU9600 1.60-GHz processor (800-MHz FSB, 3-MB L2 cache, 10-W) Equipped with UMA graphics subsystem and Intel Core2 SU7300 1.30-GHz processor (800-MHz FSB, 3-MB L2 cache, 10-W) 584137-001 584128-001 584132-001 Equipped with UMA graphics subsystem and Intel Pentium DC SU4100 1.30-GHz processor (800MHz FSB, 2-MB L2 cache, 10-W) Equipped with UMA graphics subsystem and Intel Celeron DC SU2300 1.20-GHz processor (800MHz FSB, 1-MB L2 cache, 10-W) 584134-001 584136-001 Before removing the system board, follow these steps: 1. Shut down the computer. If you are unsure whether the computer is off or in Hibernation, turn the computer on, and then shut it down through the operating system. 2. Disconnect all external devices connected to the computer. 3. Disconnect the power cord. 4. Remove the battery (see Battery on page 39). 5. Remove the hard drive (see Hard drive on page 41). 6. Disconnect the WWAN antenna cables from the WWAN module (see WWAN module on page 44). 7. Disconnect the WLAN antenna cables from the WLAN module (see WLAN module on page 50). 8. Remove the following components: a. Hard drive (see Hard drive on page 41). b. Top cover (see Top cover on page 55) c. Display assembly (see Display assembly on page 62) ENWW Component replacement procedures 67
-
 1
1 -
2
-
3
-
4
-
5
-
6
-
7
-
8
-
9
-
10
-
11
-
12
-
13
-
14
-
15
-
16
-
17
-
18
-
19
-
20
-
21
-
22
-
23
-
24
-
25
-
26
-
27
-
28
-
29
-
30
-
31
-
32
-
33
-
34
-
35
-
36
-
37
-
38
-
39
-
40
-
41
-
42
-
43
-
44
-
45
-
46
-
47
-
48
-
49
-
50
-
51
-
52
-
53
-
54
-
55
-
56
-
57
-
58
-
59
-
60
-
61
-
62
-
63
-
64
-
65
-
66
-
67
-
68
-
69
-
 70
70 -
 71
71 -
 72
72 -
 73
73 -
 74
74 -
 75
75 -
 76
76 -
 77
77 -
 78
78 -
 79
79 -
 80
80 -
81
-
82
-
83
-
84
-
85
-
86
-
87
-
88
-
89
-
90
-
91
-
92
-
93
-
94
-
95
-
96
-
97
-
98
-
99
-
100
-
101
-
102
-
103
-
104
-
105
-
106
-
107
-
108
-
109
-
110
-
111
-
112
-
113
-
114
-
115
-
116
-
117
-
118
-
119
-
120
-
121
-
122
-
123
-
124
 |
 |