HP Workstation x1000 fx2+, fx4+, fx6+ graphics installation guide - Page 47
connectors before securing them with the two accessory slot screws
 |
View all HP Workstation x1000 manuals
Add to My Manuals
Save this manual to your list of manuals |
Page 47 highlights
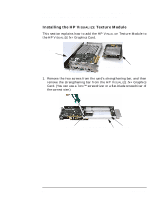
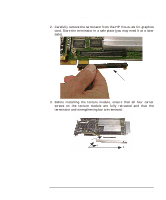
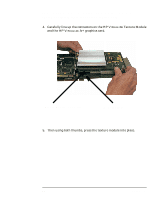
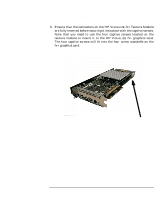
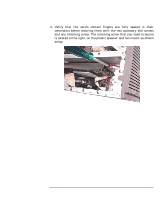
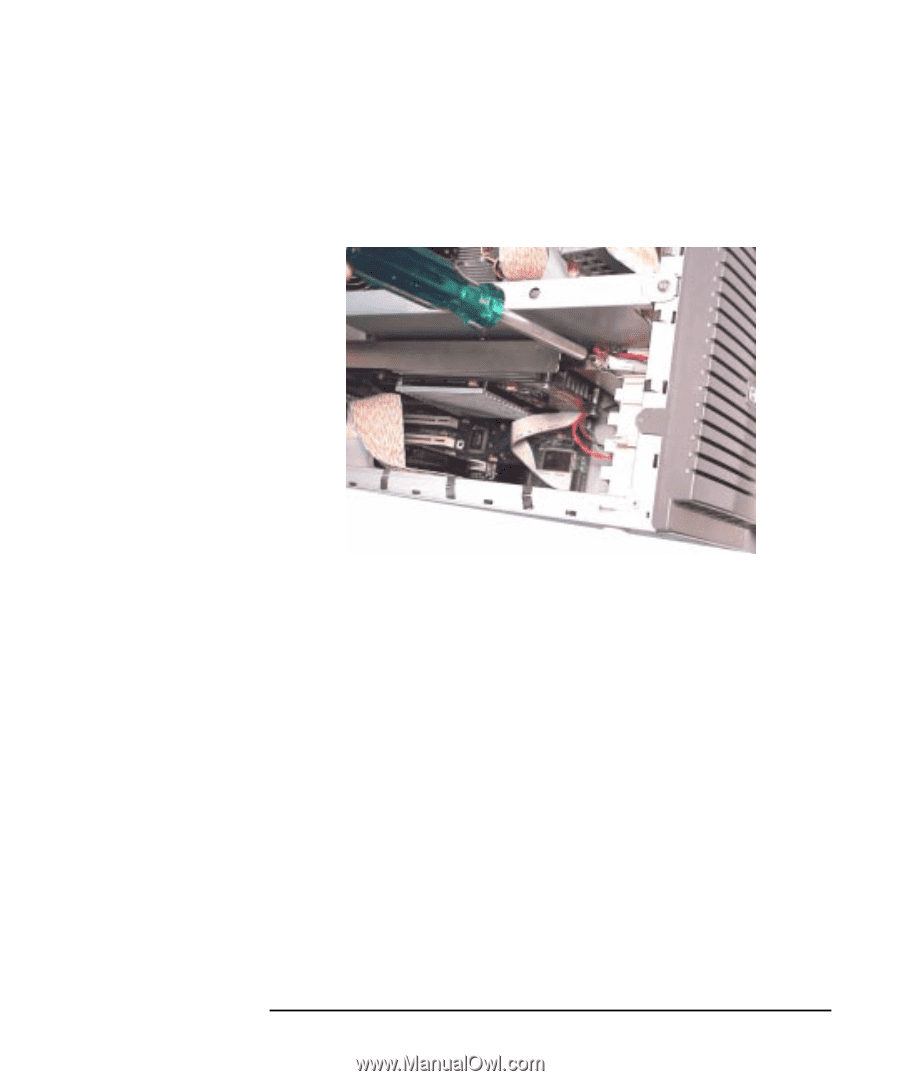
HP Visualize fx2+, fx4+, fx6+ Graphics Cards and Texture Module Adding a Texture Module to Your fx+ Graphics Card 4. Verify that the card's contact fingers are fully seated in their connectors before securing them with the two accessory slot screws and one retaining screw. The retaining screw that you need to secure is located to the right, on the plastic speaker and fan mount as shown below. Chapter 1 47
-
 1
1 -
2
-
3
-
4
-
5
-
6
-
7
-
8
-
9
-
10
-
11
-
12
-
13
-
14
-
15
-
16
-
17
-
18
-
19
-
20
-
21
-
22
-
23
-
24
-
25
-
26
-
27
-
28
-
29
-
30
-
31
-
32
-
33
-
34
-
35
-
36
-
37
-
38
-
39
-
40
-
41
-
 42
42 -
 43
43 -
 44
44 -
 45
45 -
 46
46 -
 47
47 -
 48
48 -
 49
49 -
 50
50 -
 51
51 -
 52
52 -
53
-
54
-
55
-
56
-
57
-
58
-
59
-
60
 |
 |
Chapter 1
47
HP Visualize fx2+, fx4+, fx6+ Graphics Cards and Texture Module
Adding a Texture Module to Your fx+ Graphics Card
4.
Verify
that
the
card’s
contact
fingers
are
fully
seated
in
their
connectors before securing them with the two accessory slot screws
and one retaining screw. The retaining screw that you need to secure
is located to the right, on the plastic speaker and fan mount as shown
below.