| Section |
Page |
| getting started guide |
1 |
| getting started guide |
1 |
| getting started guide |
1 |
| hp Linux workstation x1100 |
1 |
| Manufacturing Part Number:� A7868-90009 |
1 |
| Edition E0202 |
1 |
| © Copyright 2002 |
1 |
| © Copyright 2002 |
1 |
| Hewlett-Packard Company |
1 |
| legal notices |
2 |
| legal notices |
2 |
| Hewlett-Packard Co. |
3 |
| Hewlett-Packard Co. |
3 |
| Technical Computer Division |
3 |
| 3404 E. Harmony Rd. Fort Collins, CO 80525 |
3 |
| preface |
9 |
| preface |
9 |
| important warnings |
9 |
| avoiding electrical shocks |
9 |
| WARNING To avoid electrical shock, do not open the power supply. There are no user-serviceable pa... |
9 |
| removing and replacing the cover |
9 |
| WARNING For your safety, never remove the Workstation cover without first disconnecting the power... |
9 |
| safety information |
10 |
| WARNING There is a danger of explosion if the battery is incorrectly installed. For your safety, ... |
10 |
| if you have a modem |
10 |
| WARNING Do not attempt to connect this product to the phone line during a lightning storm. Never ... |
10 |
| WARNING Some parts inside the computer may be hot, wait approximately three to five minutes for t... |
10 |
| avoiding static electricity |
11 |
| CAUTION Static electricity can damage electronic components. Turn OFF all equipment before instal... |
11 |
| information on ergonomic issues |
11 |
| recycling your workstation |
11 |
| finding information and help |
12 |
| <TABLE> |
12 |
| <TABLE HEADING> |
12 |
| <TABLE ROW> |
12 |
| If you want... |
12 |
| Refer to... |
12 |
| <TABLE BODY> |
12 |
| <TABLE ROW> |
12 |
| To set up your computer |
12 |
| • x1100 Installation Poster — shipped with the Workstation, basic information only. |
12 |
| • x1100 Installation Poster |
12 |
| • x1100 Installation Poster |
12 |
| • x1100 Installation Poster |
12 |
| • This manual — basic information only. |
12 |
| <TABLE ROW> |
12 |
| To troubleshoot your Workstation, install accessories, find part numbers. |
12 |
| • This manual — basic information only |
12 |
| • This manual — basic information only |
12 |
| • This manual — basic information only |
12 |
| • x1100 Technical Reference |
12 |
| • x1100 Technical Reference |
12 |
| <TABLE ROW> |
12 |
| Support information |
12 |
| www.hp.com/go/workstationsupport — downloadable documentation, drivers and utilities, service and... |
12 |
| www.hp.com/go/workstationsupport |
12 |
| www.hp.com/go/workstationsupport |
12 |
| <TABLE ROW> |
12 |
| Warranty information |
12 |
| This manual. See “hardware warranty” or “hp software limited warranty” in Appendix A. |
12 |
| downloadable documentation from hp’s web site |
12 |
| hp x1100 technical characteristics |
13 |
| <TABLE> |
13 |
| <TABLE BODY> |
13 |
| <TABLE ROW> |
13 |
| Characteristics |
13 |
| HP Workstation x1100 |
13 |
| <TABLE ROW> |
13 |
| Weight (configuration with one CD-ROM drive, excluding keyboard and display) |
13 |
| 14.8 kg (32.5 pounds) |
13 |
| <TABLE ROW> |
13 |
| Dimensions |
13 |
| Width: �20.6cm (8.1in.) Height: 47.5cm (18.7in.) Depth: 44.2cm (17.4in.) |
13 |
| <TABLE ROW> |
13 |
| Footprint |
13 |
| 0.09 m2 (0.97 sq ft). |
13 |
| <TABLE ROW> |
13 |
| Power Supply |
13 |
| 100 - 127 VAC, 7.0 A rms 200 - 250 VAC, 3.5 A rms |
13 |
| <TABLE ROW> |
13 |
| Storage Humidity |
13 |
| 8% to 85% (relative) |
13 |
| <TABLE ROW> |
13 |
| Operating Temperature |
13 |
| +10 �C to +35 �C (+40 �F to +95�F). |
13 |
| NOTE Operating temperature and humidity ranges may vary depending on the mass storage devices ins... |
13 |
| www.hp.com/workstations |
13 |
| NOTE When the computer is turned off by the power button on the front panel, the power consumptio... |
14 |
| 1 setting up and using your workstation |
15 |
| 1 setting up and using your workstation |
15 |
| setting up your hp workstation x1100 |
16 |
| setting up your hp workstation x1100 |
16 |
| WARNING If you have any doubt that you can lift the workstation or monitor safely, do not try to ... |
16 |
| 1. � Check the materials list shipped with your workstation to verify that you have all of the co... |
16 |
| 1. � Check the materials list shipped with your workstation to verify that you have all of the co... |
16 |
| 2. � Place the workstation in an area with easily accessible power outlets and enough space for t... |
16 |
| 3. � Position the workstation so that its rear connectors are easily accessible. |
16 |
| installation tools |
16 |
| installation tools |
16 |
| connecting devices |
16 |
| connecting devices |
16 |
| Figure�1�1 Location of Rear Panel Connectors |
17 |
| Figure�1�1 Location of Rear Panel Connectors |
17 |
| <GRAPHIC> |
17 |
| Figure�1�2 Typical Connectors |
17 |
| <GRAPHIC> |
18 |
| connecting your keyboard and mouse |
18 |
| WARNING Improper and prolonged use of keyboards and input devices can be associated with repetiti... |
18 |
| 1. � Connect your HP keyboard to the workstation. |
18 |
| 1. � Connect your HP keyboard to the workstation. |
18 |
| 2. � Connect your HP mouse to the workstation. |
18 |
| Figure�1�3 Connecting the Keyboard and Mouse |
18 |
| Figure�1�3 Connecting the Keyboard and Mouse |
18 |
| <GRAPHIC> |
19 |
| setting the line voltage switch |
19 |
| CAUTION Care must be taken to ensure that the line voltage switch is set correctly. Failure to do... |
19 |
| 1. � Place the workstation so that you are looking at the back of it. |
19 |
| 1. � Place the workstation so that you are looking at the back of it. |
19 |
| 2. � Use a small thin bladed screwdriver to slide the workstation’s line voltage switch to the le... |
19 |
| Figure�1�4 Setting the Workstation’s Line Voltage Switch |
19 |
| Figure�1�4 Setting the Workstation’s Line Voltage Switch |
19 |
| <GRAPHIC> |
20 |
| connecting the power cord |
20 |
| WARNING For your safety always connect equipment to a grounded wall outlet. Always use a power co... |
20 |
| 1. � Connect the power cords to the rear of the monitor and the computer. ( |
20 |
| 1. � Connect the power cords to the rear of the monitor and the computer. ( |
20 |
| 2. � Connect the monitor’s power cord and the computer’s power cord to a grounded outlet. |
20 |
| selecting a monitor for your workstation |
21 |
| selecting a monitor for your workstation |
21 |
| Table 1�1 |
21 |
| CAUTION To prevent possible damage to your monitor, make sure you select a monitor that supports ... |
21 |
| <TABLE> |
21 |
| Table�1�1 Graphics Card Resolutions and Frequencies (Continued) |
21 |
| <TABLE HEADING> |
21 |
| <TABLE ROW> |
21 |
| Graphics Card |
21 |
| Display Resolution |
21 |
| Vertical Frequency (Hz) |
21 |
| <TABLE BODY> |
21 |
| <TABLE ROW> |
21 |
| Matrox G450 |
21 |
| 640¥480 800¥600 1024¥768 1280¥1024 1600¥1200 1920¥1200 2048¥1536 |
21 |
| 60, 70, 72, 75, 85, 100, 120, 160, 200 60, 70, 72, 75, 85, 100, 120, 160, 200 60, 70, 72, 75, 85,... |
21 |
| <TABLE ROW> |
21 |
| nVidia Quadro2 EX |
21 |
| 640¥480 800¥600 1024¥768 1280¥1024 1600¥1200 1920¥1200 2048¥1536 |
21 |
| 60, 70, 72, 75, 85, 100, 120, 140, 144, 150, 170, 200, 240 60, 70, 72, 75, 85, 100, 120, 140, 144... |
21 |
| <TABLE ROW> |
22 |
| nVidia Quadro2 Pro |
22 |
| 640¥480 800¥600 1024¥768 1280¥1024 1600¥1200 1920¥1200 2048¥1536 |
22 |
| 60, 70, 72, 75, 85, 100, 120, 140, 144, 150, 170, 200, 240 60, 70, 72, 75, 85, 100, 120, 140, 144... |
22 |
| component overview |
23 |
| component overview |
23 |
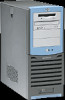
| Figure�1�5 Workstation |
23 |
| Figure�1�5 Workstation |
23 |
| <GRAPHIC> |
24 |
| Figure�1�6 HP Workstation x1100 System Board |
24 |
| <GRAPHIC> |
24 |
| removing and replacing the cover and front�bezel |
24 |
| WARNING For your safety, never remove the workstation cover without first disconnecting the power... |
24 |
| removing the workstation cover |
25 |
| removing the workstation cover |
25 |
| 1. � Switch off the display and computer. Disconnect all power cables and any LAN or telecommunic... |
25 |
| 1. � Switch off the display and computer. Disconnect all power cables and any LAN or telecommunic... |
25 |
| 2. � Unlock the cover lock at the back of the workstation, if required. See Figure 1-1. |
25 |
| 3. � Pull outward on the cover latch, grasp the edges of the cover and lift the cover upward to r... |
25 |
| removing the front bezel |
26 |
| removing the front bezel |
26 |
| • The upper bezel gives access to three 5.25-inch shelves and one 3.5-inch shelf. |
26 |
| • The upper bezel gives access to three 5.25-inch shelves and one 3.5-inch shelf. |
26 |
| • The lower bezel gives access to the Firewire connector and two USB connectors. The lower bezel ... |
26 |
| 1. � Unclip the two bezel latches located on the left-hand side of the bezel. See |
26 |
| 1. � Unclip the two bezel latches located on the left-hand side of the bezel. See |
26 |
| 2. � Open the bezel slightly and then gently push it outward. See |
26 |
| Figure�1�8 Removing the Bezels |
26 |
| Figure�1�8 Removing the Bezels |
26 |
| <GRAPHIC> |
27 |
| replacing the cover and front bezel |
27 |
| 1. � Ensure that all internal cables are properly connected and safely routed. |
27 |
| 1. � Ensure that all internal cables are properly connected and safely routed. |
27 |
| 2. � Ensure that the bezel is correctly oriented, align the two plastic bezel hinges with their b... |
27 |
| Figure�1�9 Inserting the Bezel Hinges into their Slots on the Workstation |
27 |
| Figure�1�9 Inserting the Bezel Hinges into their Slots on the Workstation |
27 |
| <GRAPHIC> |
28 |
| Figure�1�10 Replacing the Cover |
28 |
| Figure�1�10 Replacing the Cover |
28 |
| <GRAPHIC> |
28 |
| removing and replacing workstation components |
28 |
| removing and replacing workstation components |
28 |
| starting and stopping your Linux workstation |
29 |
| starting and stopping your Linux workstation |
29 |
| starting your workstation for the first time |
29 |
| starting your workstation for the first time |
29 |
| initializing your software |
30 |
| initializing your software |
30 |
| NOTE Do NOT switch OFF the workstation while the software is being initialized—this could cause u... |
30 |
| 1. � Turn on the display first, and then turn on the Linux workstation. |
30 |
| 1. � Turn on the display first, and then turn on the Linux workstation. |
30 |
| 2. � When the workstation is switched on, it performs a Power-On-Self-Test (POST). Press |
30 |
| 3. � If you have set a password in the workstation’s |
30 |
| stopping your Linux workstation |
30 |
| stopping your Linux workstation |
30 |
| setting hardware passwords in the hp setup program |
31 |
| setting hardware passwords in the hp setup program |
31 |
| to set a password |
31 |
| to set a password |
31 |
| 1. � Turn on the display and then the workstation. If the workstation is already turned on, save ... |
31 |
| 1. � Turn on the display and then the workstation. If the workstation is already turned on, save ... |
31 |
| 2. � Press |
31 |
| 3. � Select the |
31 |
| 4. � Select the |
31 |
| 5. � Choose the Set Administrator or User Password setup item. You must enter your password twice. |
31 |
| 6. � To save your changes and exit the Setup program, press |
31 |
| if you forget your user password |
32 |
| if you forget your user password |
32 |
| 1. � Switch off the Workstation. |
32 |
| 1. � Switch off the Workstation. |
32 |
| 2. � Re-start the Workstation. If you are prompted for a password, enter the Administration passw... |
32 |
| 3. � When Press F2 to Enter Setup appears, press the F2 key. |
32 |
| 4. � Enter the Administrator password to access the Setup program. |
32 |
| 5. � Go to the Security menu. |
32 |
| 6. � Go to the Set User Password field and set a new User Password. This will replace the old pas... |
32 |
| 7. � Press Esc or select Exit Menu to save the new password. and exit Setup. |
32 |
| viewing your workstation configuration |
33 |
| viewing your workstation configuration |
33 |
| 1. � Turn on the display and then the workstation. If the workstation is already turned on, save ... |
33 |
| 1. � Turn on the display and then the workstation. If the workstation is already turned on, save ... |
33 |
| 2. � Press |
33 |
| configuring your workstation |
34 |
| configuring your workstation |
34 |
| starting the hp setup program |
34 |
| starting the hp setup program |
34 |
| 1. � Turn on the display and then the workstation. If the workstation is already turned on, save ... |
34 |
| 1. � Turn on the display and then the workstation. If the workstation is already turned on, save ... |
34 |
| 2. � Press |
34 |
| main menu |
34 |
| main menu |
34 |
| • The installed BIOS version |
34 |
| • The installed BIOS version |
34 |
| • Reset Configuration Data |
34 |
| • System Time |
34 |
| • System Date |
34 |
| • Key Click |
34 |
| • Key Auto-Repeat Speed |
34 |
| • Delay Before Auto-Repeat |
34 |
| • NumLock at Power-on |
34 |
| advanced menu |
35 |
| advanced menu |
35 |
| • Configure memory caching, USB ports, Integrated I/O Ports and Integrated Audio Devices |
35 |
| • Configure memory caching, USB ports, Integrated I/O Ports and Integrated Audio Devices |
35 |
| • Enable floppy disk drives, IDE devices (Primary and Secondary) |
35 |
| • Configure PCI Devices. |
35 |
| security menu |
35 |
| security menu |
35 |
| boot menu |
35 |
| boot menu |
35 |
| power menu |
35 |
| power menu |
35 |
| using power management |
36 |
| using power management |
36 |
| software and driver availability |
36 |
| software and driver availability |
36 |
| working in comfort and safety |
37 |
| working in comfort and safety |
37 |
| preparing your work environment |
37 |
| preparing your work environment |
37 |
| • Work Surface Height |
37 |
| • Work Surface Height |
37 |
| • Work Surface Height |
37 |
| • Chair |
37 |
| • Chair |
37 |
| • Monitor |
37 |
| • Monitor |
37 |
| • Work Surface Arrangement |
37 |
| • Work Surface Arrangement |
37 |
| CAUTION Various aspects of using mice, keyboards and other input devices may increase your risk o... |
38 |
| your work posture |
38 |
| your work posture |
38 |
| • Head |
38 |
| • Head |
38 |
| • Head |
38 |
| • Back |
38 |
| • Back |
38 |
| • Arms |
38 |
| • Arms |
38 |
| • Hands, Wrists, Forearms |
38 |
| • Hands, Wrists, Forearms |
38 |
| • Legs |
38 |
| • Legs |
38 |
| • Feet |
39 |
| • Feet |
39 |
| additional ergonomic issues |
39 |
| additional ergonomic issues |
39 |
| • Look away from the screen from time-to-time to help reduce eyestrain. Focus on distant objects ... |
39 |
| • Look away from the screen from time-to-time to help reduce eyestrain. Focus on distant objects ... |
39 |
| • Remember to occasionally shift position and move your body. Keeping your body in one position f... |
39 |
| • Changing tasks frequently will help prevent muscle stiffness. Examples: alternating between key... |
39 |
| • Discomfort may be alleviated by using alternative ergonomic designs and accessories such as erg... |
39 |
| additional system information and help |
40 |
| additional system information and help |
40 |
| <GRAPHIC> |
40 |
| 2 Linux system setup and recovery |
41 |
| 2 Linux system setup and recovery |
41 |
| configuring your Linux workstation |
42 |
| configuring your Linux workstation |
42 |
| NOTE You cannot re-run the Linux Setup Tool. |
42 |
| <GRAPHIC> |
43 |
| setting the root password |
43 |
| setting the root password |
43 |
| <GRAPHIC> |
43 |
| CAUTION Do not click on the |
43 |
| NOTE Write your password down and keep it in a secure place. If you forget it, you will not be ab... |
43 |
| changing boot/network parameters |
44 |
| changing boot/network parameters |
44 |
| <GRAPHIC> |
44 |
| 1. � Static boot protocol |
44 |
| 1. � Static boot protocol |
44 |
| 2. � DHCP boot protocol |
45 |
| 3. � BOOTP boot protocol |
45 |
| CAUTION Do not click on the |
45 |
| setting up network authorization parameters |
46 |
| setting up network authorization parameters |
46 |
| <GRAPHIC> |
46 |
| CAUTION Do not click on the |
46 |
| Xserver parameters |
47 |
| Xserver parameters |
47 |
| <GRAPHIC> |
47 |
| CAUTION Do not click on the |
47 |
| domain name server (DNS) parameters configuration |
48 |
| domain name server (DNS) parameters configuration |
48 |
| <GRAPHIC> |
48 |
| CAUTION Do not click on the |
49 |
| system time, timezone and date parameters |
49 |
| system time, timezone and date parameters |
49 |
| time zone |
49 |
| time zone |
49 |
| CAUTION Do not click on the |
50 |
| setting keyboard language (required) |
50 |
| setting keyboard language (required) |
50 |
| <GRAPHIC> |
50 |
| CAUTION Do not click on the |
51 |
| Netscape preferences |
52 |
| Netscape preferences |
52 |
| <GRAPHIC> |
52 |
| CAUTION Do not click on the |
52 |
| summary |
53 |
| summary |
53 |
| <GRAPHIC> |
53 |
| NOTE The system will not let you exit until you have set the root password. |
53 |
| recovering your Linux system |
54 |
| recovering your Linux system |
54 |
| the Linux rescue mode |
54 |
| the Linux rescue mode |
54 |
| booting your system in rescue mode |
54 |
| booting your system in rescue mode |
54 |
| 1. � By booting your system from the diskette or CD-ROM that came with your Red Hat Linux boxed set. |
54 |
| 1. � By booting your system from the diskette or CD-ROM that came with your Red Hat Linux boxed set. |
54 |
| 2. � By booting from a network or PCMCIA boot diskette. These methods assume your network connect... |
54 |
| bash# |
54 |
| <TABLE> |
55 |
| Table�2�1 Linux Commands (Continued) |
55 |
| <TABLE BODY> |
55 |
| <TABLE ROW> |
55 |
| anaconda |
55 |
| anaconda |
55 |
| gzip |
55 |
| gzip |
55 |
| mke2fs.ext2 |
55 |
| mke2fs.ext2 |
55 |
| ps |
55 |
| ps |
55 |
| <TABLE ROW> |
55 |
| badblocks |
55 |
| badblocks |
55 |
| head |
55 |
| head |
55 |
| mknod |
55 |
| mknod |
55 |
| python |
55 |
| python |
55 |
| <TABLE ROW> |
55 |
| bash |
55 |
| bash |
55 |
| hwclock |
55 |
| hwclock |
55 |
| mkraid |
55 |
| mkraid |
55 |
| python1.5 |
55 |
| python1.5 |
55 |
| <TABLE ROW> |
55 |
| cat |
55 |
| cat |
55 |
| ifconfig |
55 |
| ifconfig |
55 |
| mkswap |
55 |
| mkswap |
55 |
| raidstart |
55 |
| raidstart |
55 |
| <TABLE ROW> |
55 |
| chatter |
55 |
| chatter |
55 |
| init |
55 |
| init |
55 |
| mlabel |
55 |
| mlabel |
55 |
| raidstop |
55 |
| raidstop |
55 |
| <TABLE ROW> |
55 |
| chmod |
55 |
| chmod |
55 |
| insmod |
55 |
| insmod |
55 |
| mmd |
55 |
| mmd |
55 |
| rcp |
55 |
| rcp |
55 |
| <TABLE ROW> |
55 |
| chroot |
55 |
| chroot |
55 |
| less |
55 |
| less |
55 |
| mmount |
55 |
| mmount |
55 |
| rlogin |
55 |
| rlogin |
55 |
| <TABLE ROW> |
55 |
| clock |
55 |
| clock |
55 |
| ln |
55 |
| ln |
55 |
| mmove |
55 |
| mmove |
55 |
| rm |
55 |
| rm |
55 |
| <TABLE ROW> |
55 |
| collage |
55 |
| collage |
55 |
| loader |
55 |
| loader |
55 |
| modprobe |
55 |
| modprobe |
55 |
| rmmod |
55 |
| rmmod |
55 |
| <TABLE ROW> |
55 |
| cp |
55 |
| cp |
55 |
| ls |
55 |
| ls |
55 |
| mount |
55 |
| mount |
55 |
| route |
55 |
| route |
55 |
| <TABLE ROW> |
55 |
| cpio |
55 |
| cpio |
55 |
| lsattr |
55 |
| lsattr |
55 |
| mpartition |
55 |
| mpartition |
55 |
| rpm |
55 |
| rpm |
55 |
| <TABLE ROW> |
55 |
| dd |
55 |
| dd |
55 |
| lsmod |
55 |
| lsmod |
55 |
| mrd |
55 |
| mrd |
55 |
| rsh |
55 |
| rsh |
55 |
| <TABLE ROW> |
55 |
| ddcprobe |
55 |
| ddcprobe |
55 |
| mattrib |
55 |
| mattrib |
55 |
| mread |
55 |
| mread |
55 |
| sed |
55 |
| sed |
55 |
| <TABLE ROW> |
55 |
| depmode |
55 |
| depmode |
55 |
| mbadblocks |
55 |
| mbadblocks |
55 |
| mren |
55 |
| mren |
55 |
| sh |
55 |
| sh |
55 |
| <TABLE ROW> |
55 |
| df |
55 |
| df |
55 |
| mcd |
55 |
| mcd |
55 |
| mshowfat |
55 |
| mshowfat |
55 |
| sync |
55 |
| sync |
55 |
| <TABLE ROW> |
55 |
| e2fsck |
55 |
| e2fsck |
55 |
| mcopy |
55 |
| mcopy |
55 |
| mt |
55 |
| mt |
55 |
| tac |
55 |
| tac |
55 |
| <TABLE ROW> |
55 |
| fdisk |
55 |
| fdisk |
55 |
| mdel |
55 |
| mdel |
55 |
| mtools |
55 |
| mtools |
55 |
| tail |
55 |
| tail |
55 |
| <TABLE ROW> |
55 |
| fsck |
55 |
| fsck |
55 |
| mdeltree |
55 |
| mdeltree |
55 |
| mtype |
55 |
| mtype |
55 |
| tar |
55 |
| tar |
55 |
| <TABLE ROW> |
55 |
| fsck.ext2 |
55 |
| fsck.ext2 |
55 |
| mdir |
55 |
| mdir |
55 |
| mv |
55 |
| touch |
55 |
| touch |
55 |
| <TABLE ROW> |
55 |
| ftp |
55 |
| ftp |
55 |
| mdu |
55 |
| mdu |
55 |
| mzip |
55 |
| mzip |
55 |
| traceroute |
55 |
| traceroute |
55 |
| <TABLE ROW> |
55 |
| genhdlist |
55 |
| genhdlist |
55 |
| mformat |
55 |
| mformat |
55 |
| open |
55 |
| open |
55 |
| umount |
55 |
| umount |
55 |
| <TABLE ROW> |
55 |
| gnome-pty-helper |
55 |
| gnome-pty-helper |
55 |
| minfo |
55 |
| minfo |
55 |
| pico |
55 |
| pico |
55 |
| uncpio |
55 |
| uncpio |
55 |
| <TABLE ROW> |
55 |
| grep |
55 |
| grep |
55 |
| mkdir |
55 |
| mkdir |
55 |
| ping |
55 |
| ping |
55 |
| uniq |
55 |
| uniq |
55 |
| <TABLE ROW> |
56 |
| gunzip |
56 |
| gunzip |
56 |
| mke2fs |
56 |
| mke2fs |
56 |
| probe |
56 |
| probe |
56 |
| zcat |
56 |
| zcat |
56 |
| NOTE The |
56 |
| mount -t ext2 /dev/hda5 /foo |
56 |
| booting single user mode directly |
56 |
| booting single user mode directly |
56 |
| LILO boot: linux single |
56 |
| LILO boot: linux emergency |
56 |
| 3 troubleshooting your workstation |
57 |
| 3 troubleshooting your workstation |
57 |
| screen is blank because the system failed to boot |
58 |
| screen is blank because the system failed to boot |
58 |
| 1. � Place the workstation so that you are looking at the back of it. |
58 |
| 1. � Place the workstation so that you are looking at the back of it. |
58 |
| 2. � Use a small thin bladed screwdriver to slide the workstation’s line voltage switch to the le... |
58 |
| Figure�3�1 Setting the Workstation’s Line Voltage Switch |
58 |
| Figure�3�1 Setting the Workstation’s Line Voltage Switch |
58 |
| <GRAPHIC> |
58 |
| solving hardware problems |
59 |
| solving hardware problems |
59 |
| <TABLE> |
59 |
| Table�3�1 Your Workstation Does Not Start Properly � |
59 |
| <TABLE BODY> |
59 |
| <TABLE ROW> |
59 |
| The Workstation doesn’t power on. |
59 |
| The Workstation doesn’t power on. |
59 |
| <TABLE ROW> |
59 |
| Make sure... |
59 |
| Make sure... |
59 |
| How |
59 |
| How |
59 |
| <TABLE ROW> |
59 |
| The workstation’s power cord is properly connected. |
59 |
| Connect the power cord to a working power outlet and to the rear of the workstation. |
59 |
| <TABLE ROW> |
59 |
| There is a buzzing noise. |
59 |
| There is a buzzing noise |
59 |
| <TABLE ROW> |
59 |
| A beep code when the workstation starts up means that there is a configuration problem. |
59 |
| <TABLE ROW> |
59 |
| Make sure... |
59 |
| Make sure... |
59 |
| How |
59 |
| How |
59 |
| <TABLE ROW> |
59 |
| This is the pre-boot diagnostics capability feature. It detects problems with your workstation. |
59 |
| 1. � Count the number of beeps after the buzzer (refer to the section “pre-boot diagnostics audio... |
59 |
| 1. � Count the number of beeps after the buzzer (refer to the section “pre-boot diagnostics audio... |
59 |
| 1. � Count the number of beeps after the buzzer (refer to the section “pre-boot diagnostics audio... |
59 |
| 2. � Contact HP Support (refer to |
59 |
| <TABLE ROW> |
59 |
| If you still have a problem, run HP e-Diagtools or Diagtools (refer to page� 65). |
59 |
| <TABLE ROW> |
59 |
| There is no image during boot and the screen is blank. |
59 |
| <TABLE ROW> |
59 |
| Make sure... |
59 |
| Make sure... |
59 |
| How |
59 |
| How |
59 |
| <TABLE ROW> |
59 |
| The line voltage switch, located on the back of your workstation, is set to 115. |
59 |
| See the section “screen is blank because the system failed to boot” in this chapter. |
59 |
| <TABLE ROW> |
59 |
| If the Workstation starts and you still have a problem, run HP e-Diagtools (refer to page� 65). |
59 |
| <TABLE> |
60 |
| Table�3�2 Your Workstation Has a Hardware Problem (Continued) |
60 |
| <TABLE BODY> |
60 |
| <TABLE ROW> |
60 |
| The keyboard doesn’t work. |
60 |
| The keyboard doesn’t work. |
60 |
| <TABLE ROW> |
60 |
| Make sure... |
60 |
| Make sure... |
60 |
| How |
60 |
| How |
60 |
| <TABLE ROW> |
60 |
| The keyboard cable is correctly connected. |
60 |
| Plug the cable into the correct connector on the back of the workstation. Color coding is used fo... |
60 |
| <TABLE ROW> |
60 |
| The keyboard is free of debris. |
60 |
| Check all keys are at the same height, and none are stuck down. |
60 |
| <TABLE ROW> |
60 |
| The keyboard itself is not defective. |
60 |
| Either replace the keyboard by a known working unit or try the keyboard with another workstation. |
60 |
| <TABLE ROW> |
60 |
| You are using the correct driver. The correct driver is pre-installed on all Linux systems. For o... |
60 |
| Download the latest driver from HP’s Web at: ��www.hp.com/go/workstationsupport |
60 |
| <TABLE ROW> |
60 |
| You are using the latest BIOS. |
60 |
| Download the latest BIOS from HP’s Web at: ��www.hp.com/go/workstationsupport |
60 |
| <TABLE ROW> |
60 |
| The monitor doesn’t work. |
60 |
| The monitor doesn’t work. |
60 |
| <TABLE ROW> |
60 |
| The workstation’s power indicator light works but the monitor remains blank |
60 |
| <TABLE ROW> |
60 |
| Make sure... |
60 |
| Make sure... |
60 |
| How |
60 |
| How |
60 |
| <TABLE ROW> |
60 |
| The monitor is switched ON (LED is on). |
60 |
| Refer to the monitor manual for an explanation of the LED signals (green, orange, or blinking). |
60 |
| <TABLE ROW> |
60 |
| The monitor’s power cord is correctly connected. |
60 |
| Connect the power cord – ensure it is plugged into a working grounded power outlet and into the m... |
60 |
| <TABLE ROW> |
61 |
| The graphics card is installed and the monitor (video) cable is correctly connected. |
61 |
| Connect the monitor (video) cable – ensure it is properly connected to both the workstation and t... |
61 |
| <TABLE ROW> |
61 |
| The monitor’s brightness and contrast settings are correctly set. |
61 |
| Check the settings using the monitor’s OSD (on-screen display) or using controls on the front of ... |
61 |
| <TABLE ROW> |
61 |
| There is an image during boot but then the screen goes blank. |
61 |
| <TABLE ROW> |
61 |
| Make sure... |
61 |
| Make sure... |
61 |
| How |
61 |
| How |
61 |
| <TABLE ROW> |
61 |
| The monitor settings in your Workstation are compatible with your monitor. |
61 |
| Switch to a text console by pressing Ctrl-Alt-F1. Log in as root and check that the “Monitor” sec... |
61 |
| <TABLE ROW> |
61 |
| If the Workstation starts and you still have a problem, run HP e-Diagtools (refer to page� 65). |
61 |
| <TABLE ROW> |
61 |
| The mouse doesn’t work. |
61 |
| The mouse doesn’t work. |
61 |
| <TABLE ROW> |
61 |
| Make sure... |
61 |
| Make sure... |
61 |
| How |
61 |
| How |
61 |
| <TABLE ROW> |
61 |
| The mouse cable is correctly connected. |
61 |
| 1. � Switch off the workstation (not necessary with a USB mouse). |
61 |
| 1. � Switch off the workstation (not necessary with a USB mouse). |
61 |
| 1. � Switch off the workstation (not necessary with a USB mouse). |
61 |
| 2. � Plug the cable into the correct connector on the back of the workstation (color coding is us... |
61 |
| 3. � Switch on the workstation. |
61 |
| <TABLE ROW> |
62 |
| You are using the correct driver. If you are using HP’s enhanced mouse, ensure that the correct d... |
62 |
| Download the latest driver from HP’s Web at: |
62 |
| www.hp.com/go/workstationsupport |
62 |
| <TABLE ROW> |
62 |
| You are using the latest BIOS |
62 |
| Download the latest BIOS from HP’s Web at: |
62 |
| www.hp.com/go/workstationsupport |
62 |
| <TABLE ROW> |
62 |
| The mouse is clean. |
62 |
| Clean the mouse ball as shown below. |
62 |
| <TABLE ROW> |
62 |
| The mouse itself is not defective. |
62 |
| Replace the mouse with a unit that is known to work or try the mouse with another workstation. |
62 |
| <TABLE ROW> |
62 |
| If the workstation starts but you still have a problem, run HP e-Diagtools (refer to page� 65). |
62 |
| <TABLE ROW> |
62 |
| Your Workstation has no sound. |
62 |
| Your Workstation has no sound. |
62 |
| <TABLE ROW> |
62 |
| Check that... |
62 |
| Check that... |
62 |
| How |
62 |
| How |
62 |
| <TABLE ROW> |
62 |
| The lime green Speaker/Headphone connector is plugged into the multi-media keyboard. |
62 |
| Either disconnect the lime green connector to activate the internal speaker or plug-in headphones... |
62 |
| troubleshooting tips: |
63 |
| troubleshooting tips: |
63 |
| • Restart your workstation and see if the problem recurs. |
63 |
| • Restart your workstation and see if the problem recurs. |
63 |
| • Run HP e�Diagtools. You can create a hardware profile of your Workstation (Support Ticket) that... |
63 |
| • Visit the HP Support web site |
63 |
| • Update your Workstation’s BIOS. The latest BIOS for your Workstation and instructions on updati... |
63 |
| • Record the details of the problem so that you can describe it accurately. |
63 |
| • Think of anything you may have done recently before you first experienced the problem. |
63 |
| • If possible, have your system up and running and close by when you call HP Support. |
63 |
| • We recommend you contact your HP dealer, or contact HP Support outside of peak times (mid-morni... |
63 |
| if you lose the key |
63 |
| if you lose the key |
63 |
| need more help? |
63 |
| need more help? |
63 |
| pre-boot diagnostics audio signal |
64 |
| pre-boot diagnostics audio signal |
64 |
| <TABLE> |
64 |
| <TABLE BODY> |
64 |
| <TABLE ROW> |
64 |
| Number of Beeps |
64 |
| Meaning |
64 |
| <TABLE ROW> |
64 |
| 1 |
64 |
| Processor absent, not correctly connected or ZIF socket not closed |
64 |
| <TABLE ROW> |
64 |
| 2 |
64 |
| Power supply is in protected mode |
64 |
| <TABLE ROW> |
64 |
| 3 |
64 |
| No memory, bad memory modules, incompatible memory module |
64 |
| <TABLE ROW> |
64 |
| 4 |
64 |
| Graphics card problem |
64 |
| <TABLE ROW> |
64 |
| 5 |
64 |
| PnP/Workstation initialization problem |
64 |
| <TABLE ROW> |
64 |
| 6 |
64 |
| Corrupted BIOS. You need to activate crisis recovery procedure |
64 |
| <TABLE ROW> |
64 |
| 7 |
64 |
| Defective system board |
64 |
| if you miss the beep code |
64 |
| if you miss the beep code |
64 |
| hp Diagtools hardware diagnostics |
65 |
| hp Diagtools hardware diagnostics |
65 |
| NOTE Run e-Diagtools before contacting HP for Warranty service. This is to obtain information tha... |
65 |
| • Check the hardware configuration and verify that it is functioning correctly. |
65 |
| • Check the hardware configuration and verify that it is functioning correctly. |
65 |
| • Test individual hardware components. |
65 |
| • Diagnose hardware-related problems. |
65 |
| • Obtain a complete hardware configuration. |
65 |
| • Provide precise information to an HP support agent so they can solve problems quickly and effec... |
65 |
| www.hp.com/go/workstationsupport |
65 |
| obtaining e-Diagtools |
65 |
| obtaining e-Diagtools |
65 |
| • The Utility Partition pre-installed on your hard disk drive (recommended) |
65 |
| • The Utility Partition pre-installed on your hard disk drive (recommended) |
65 |
| • The CD-ROM that came with your Workstation: |
65 |
| — Recovery CD-ROM |
65 |
| — Recovery CD-ROM |
65 |
| — Recovery CD-ROM |
65 |
| • Support web site: |
65 |
| starting e-Diagtools from the utility partition |
66 |
| starting e-Diagtools from the utility partition |
66 |
| NOTE This method will only work if the diagnostics partition on your hard disk drive is intact. |
66 |
| 1. � Restart your workstation and select “ |
66 |
| 1. � Restart your workstation and select “ |
66 |
| 2. � In the menu, select the option to run e-Diagtools hardware diagnostics. |
66 |
| starting e-Diagtools from the CD-ROM |
66 |
| starting e-Diagtools from the CD-ROM |
66 |
| 1. � Insert the e-Diagtools CD-ROM in the CD-ROM drive. |
66 |
| 1. � Insert the e-Diagtools CD-ROM in the CD-ROM drive. |
66 |
| 2. � Restart the workstation. |
66 |
| 3. � Select the option to run the hardware diagnostics. |
66 |
| NOTE If you are unable to boot from your CD-ROM drive, restart your workstation and press |
66 |
| running hp e�DiagTools |
66 |
| running hp e�DiagTools |
66 |
| • The workstation model must match the CD-ROM (the CD-ROM is locked to a specific workstation mod... |
66 |
| • The workstation model must match the CD-ROM (the CD-ROM is locked to a specific workstation mod... |
66 |
| • CD-ROM drive has been configured to boot before the hard disk drive. |
66 |
| producing a support ticket |
67 |
| producing a support ticket |
67 |
| hp customer care center phone numbers |
68 |
| hp customer care center phone numbers |
68 |
| A warranty and regulatory information |
69 |
| A warranty and regulatory information |
69 |
| Declaration of conformity |
70 |
| <TABLE> |
70 |
| <TABLE HEADING> |
70 |
| <TABLE ROW> |
70 |
| Declaration of Conformity according to ISO/IEC Guide 22 and EN 45014 |
70 |
| <TABLE BODY> |
70 |
| <TABLE ROW> |
70 |
| Manufacturer:����������������������������Hewlett-Packard Company ��������������������������������... |
70 |
| Manufacturer |
70 |
| Safety |
70 |
| Safety |
70 |
| Safety |
70 |
| IEC 950:1991+A1+A2+A3+A4+A11/EN 60950:1992+A1+A2+A3+A4 IEC 60825-1:1993/EN60825-1:1994+A11 Class ... |
70 |
| EMC |
70 |
| EMC |
70 |
| CISPR 22: 1997 / EN 55022: 1998 Class A CISPR 24: 1997 / EN 55024: 1998 IEC 61000-3-2: 2000 / EN ... |
70 |
| and is certified by: |
70 |
| and is certified by: |
70 |
| and is certified by: |
70 |
| and is certified by: |
70 |
| UL Listed to UL1950, 2nd edition, File E146385 cUL Listed to CSA 22.2 No. 950-M93 TUV Certified t... |
70 |
| supplementary information: |
70 |
| regulatory information |
71 |
| regulatory information |
71 |
| FCC (for USA only) |
71 |
| FCC (for USA only) |
71 |
| <GRAPHIC> |
73 |
| <GRAPHIC> |
74 |
| hp hardware warranty |
74 |
| three year limited hardware warranty |
74 |
| three year limited hardware warranty |
74 |
| limitation of warranty |
75 |
| limitation of warranty |
75 |
| limitation of liability and remedies |
76 |
| limitation of liability and remedies |
76 |
| obtaining on-site warranty service |
76 |
| obtaining on-site warranty service |
76 |
| customer responsibilities |
77 |
| customer responsibilities |
77 |
| obtaining parts warranty service |
78 |
| obtaining parts warranty service |
78 |
| hp telephone support services |
78 |
| hp telephone support services |
78 |
| hp software limited warranty |
79 |
 1
1 62
62 63
63 64
64 65
65 66
66 67
67 68
68 69
69 70
70 71
71 72
72

