HP Workstation x1100 hp workstations general - adaptec RAID installation guide - Page 69
Create, Driver Disk, Ctrl+A
 |
View all HP Workstation x1100 manuals
Add to My Manuals
Save this manual to your list of manuals |
Page 69 highlights
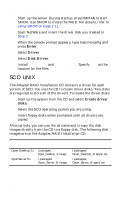
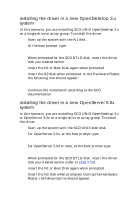
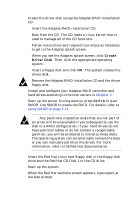
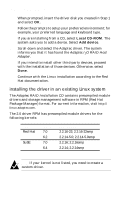
installing the driver 1 Create the driver disk using the Adaptec RAID Installation CD. a Insert the Adaptec RAID Installation CD. b Boot from the CD. The CD loads a Linux kernel that is used to manage all of the CD functions. c Follow instructions and respond to prompts as necessary to get to the Adaptec splash screen. d When you see the Adaptec splash screen, click Create Driver Disk. Then, click the appropriate operating system. e Insert a floppy disk and click OK. The system creates the driver disk. f Remove the Adaptec RAID Installation CD and the driver floppy disk. 2 Install and configure your Adaptec RAID controller and hard drives according to the instructions in Chapter 2. 3 Start up the server. During startup, press Ctrl+A to start SMOR. Use SMOR to create the RAID. For details, refer to using SMOR on page 2-11. Note: Any partitions created on disks that are not part of an array will be unavailable if you subsequently use the disk in a RAID configuration. If your hard drives do not have partition tables or do not contain a recognizable partition, you will be prompted to initialize these disks. The operating system can automatically remove the data or you can manually partition the drives. For more information, refer to the Red Hat documentation. 4 Insert the Red Hat Linux boot floppy disk in the floppy disk drive and the Red Hat CD Disk 1 in the CD drive. 5 Start up the system. 6 When the Red Hat welcome screen appears, type expert at the boot prompt. 3-31
-
 1
1 -
2
-
3
-
4
-
5
-
6
-
7
-
8
-
9
-
10
-
11
-
12
-
13
-
14
-
15
-
16
-
17
-
18
-
19
-
20
-
21
-
22
-
23
-
24
-
25
-
26
-
27
-
28
-
29
-
30
-
31
-
32
-
33
-
34
-
35
-
36
-
37
-
38
-
39
-
40
-
41
-
42
-
43
-
44
-
45
-
46
-
47
-
48
-
49
-
50
-
51
-
52
-
53
-
54
-
55
-
56
-
57
-
58
-
59
-
60
-
61
-
62
-
63
-
 64
64 -
 65
65 -
 66
66 -
 67
67 -
 68
68 -
 69
69 -
 70
70 -
 71
71 -
 72
72 -
 73
73 -
 74
74 -
75
-
76
-
77
-
78
-
79
-
80
-
81
-
82
-
83
-
84
-
85
-
86
-
87
-
88
-
89
-
90
-
91
-
92
-
93
-
94
-
95
-
96
-
97
-
98
-
99
-
100
-
101
-
102
-
103
-
104
-
105
-
106
-
107
-
108
-
109
-
110
-
111
 |
 |