HP Workstation xw8000 Adaptec SCSI RAID 2120S: Installation Guide - Page 34
A Note About CD Support, Creating the Driver Disk from the Bootable CD, Ctrl-A, SCSI Select Utility
 |
View all HP Workstation xw8000 manuals
Add to My Manuals
Save this manual to your list of manuals |
Page 34 highlights
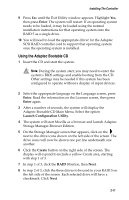
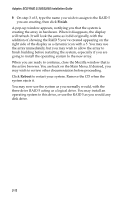
Installing the Driver A Note About CD Support If the CD-ROM reader device is attached to the controller card included as part of this kit, the controller BIOS will need to be configured to allow the CD reader to work. To configure the card for this use, follow these steps: 1 While the system is starting, press Ctrl-A when the controller card displays its message on the screen. 2 When the first SCSI Select Utility window appears, select the option SCSI Select Utility. 3 Click Controller Configuration. 4 Use the arrow keys on your keyboard to position the cursor over CD-ROM Boot Support, then Removable Media Devices Support. Make both lines Enabled, if they aren't already. 5 Press Esc until the Reboot window appears. Allow the system to restart. Creating the Driver Disk from the Bootable CD These instructions cover creation of disks for Windows, Novell, SCO Unix, and Linux. To create a driver disk: 1 Ensure your system BIOS is ready to boot from the CD-ROM drive. See your system documentation if you need help. Insert the CD that came with the controller, and start your system from the CD. Follow instructions and respond to prompts as necessary to get to the Adaptec Main Menu. 2 From the Main Menu, select Create Driver Disk(s). . . 3 Review the type of installation you are doing elsewhere in this chapter to know what type of driver disk to create. Click on the type of driver disk desired, then click OK. 4 When the screen prompts you to insert a disk and click OK, do so. The system will format the disk, insert a file system, if needed, and write the appropriate information onto it. When finished, the screen will display another OK button. 5 Remove the driver disk and click OK. Label the disk to represent the driver disk created. 3-3
-
 1
1 -
2
-
3
-
4
-
5
-
6
-
7
-
8
-
9
-
10
-
11
-
12
-
13
-
14
-
15
-
16
-
17
-
18
-
19
-
20
-
21
-
22
-
23
-
24
-
25
-
26
-
27
-
28
-
 29
29 -
 30
30 -
 31
31 -
 32
32 -
 33
33 -
 34
34 -
 35
35 -
 36
36 -
 37
37 -
 38
38 -
 39
39 -
40
-
41
-
42
-
43
-
44
-
45
-
46
-
47
-
48
-
49
-
50
-
51
-
52
-
53
-
54
-
55
-
56
-
57
-
58
-
59
-
60
-
61
-
62
-
63
-
64
-
65
-
66
-
67
 |
 |
