HP XP20000/XP24000 HP StorageWorks XP Disk Array Configuration Guide: Tru64 UN - Page 22
Checking path failover, fsck order, Backup no=0, yes=1, Options, File system, Mnt Point, Device
 |
View all HP XP20000/XP24000 manuals
Add to My Manuals
Save this manual to your list of manuals |
Page 22 highlights
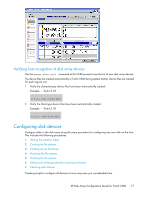
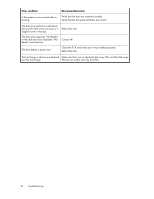
1. After first making a backup copy of the file, edit the /etc/fstab file. Add a line for each new device to be mounted. Example #vi /etc/fstab /dev/disk/dsk4a / ufs rw 1 1 /proc /proc procfs rw 0 0 /dev/disk/dsk12a /usr ufs rw 1 2 /dev/disk/dsk12b swap1 ufs rw 0 2 /dev/disk/dsk15c /HP5700_LU2c ufs rw 1 3 Table 4 Automatic mounting example explanation Device Mnt Point File system Options (r/w) Backup (no=0, fsck order yes=1) /dev/disk/dsk4a / ufs rw 1 1 /proc /proc procfs rw 0 0 /dev/disk/dsk12a /usr ufs rw 1 2 /dev/disk/dsk12b swap1 ufs rw 0 2 /dev/disk/dsk15a /HP700_LU2c ufs rw 1 3 Notes: For UFS systems, you must File System Check (fsck) disks that contain mount points before mounting other disks on those mount points. 2. Shut down and reboot the system. 3. Use the df or df -k command to verify file system auto mounting. Checking path failover The disk array supports Tru64 path failover (Tru64 v5.1B-2 and later only). You can connect multiple FCAs to the disk array with shared LUNs. Confirm the existence of multiple paths for devices as follows: 1. Type hwmgr -view device to obtain the HWID for the device. 2. Type hwmgr -show scsi -full -id HWID to confirm the status of paths to the device. If more than one path is currently connected, the status of each path shows as Valid. If you change the cabling configuration, the old paths will show as Stale. Use the hwmgr -refresh scsi command to remove the stale paths. CAUTION: Tru64 5.1B and later fully support dynamic load balancing and failover when multiple FCAs are connected to the same LUN. This feature is ONLY available with version 5.1B and later. 22 Installing and configuring Tru64 for the XP disk array
-
 1
1 -
2
-
3
-
4
-
5
-
6
-
7
-
8
-
9
-
10
-
11
-
12
-
13
-
14
-
15
-
16
-
 17
17 -
 18
18 -
 19
19 -
 20
20 -
 21
21 -
 22
22 -
 23
23 -
 24
24 -
 25
25 -
 26
26 -
 27
27 -
28
-
29
-
30
-
31
-
32
-
33
-
34
-
35
-
36
-
37
-
38
-
39
-
40
 |
 |
