HP Xb31 HP Digital Projector xb31 - (English) Ceiling Mount User Guide - Page 1
HP Xb31 - Digital Projector XGA DLP Manual
 |
UPC - 808736060691
View all HP Xb31 manuals
Add to My Manuals
Save this manual to your list of manuals |
Page 1 highlights
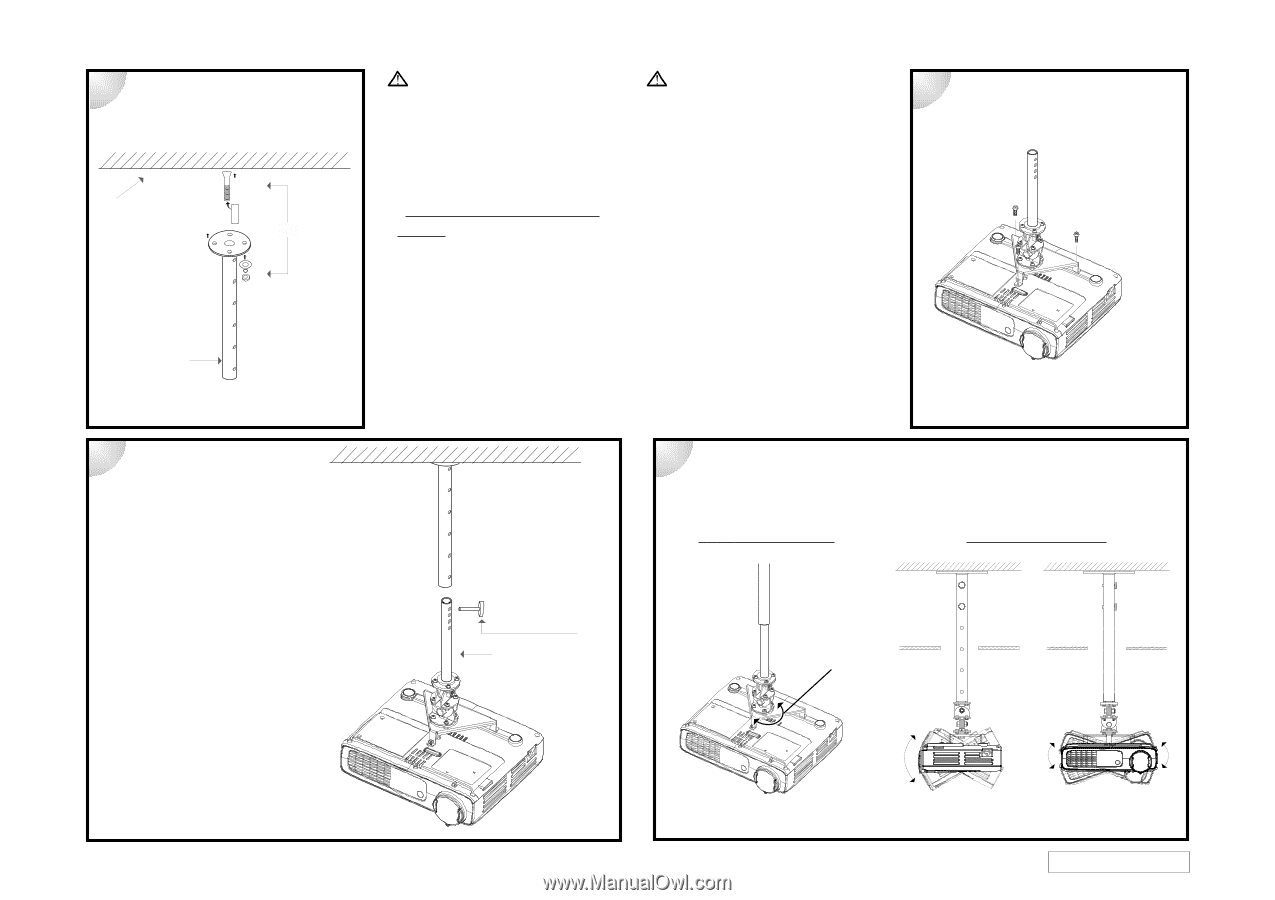
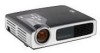
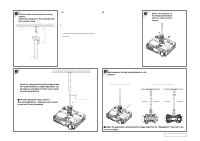
Ceiling Mount User's Guide u Drill four holes into the structural ceiling member. Attach the ceiling rod to the ceiling with the four cylinder screws. Structural Ceiling Cylinder Screw Be sure to install the projector into a solid, structural ceiling member: 4Ceiling Mounting Procedure: Before installation, refer to the "Adjusting the Projected Image" section of the Projector User's Guide for the projection distance based upon the desired image size. Use this projection distance to locate the ceiling mount. Ceiling Rod HP recommends that a competent carpenter or electrician install this ceiling mount. v Mount the projector to the ceiling mount bracket with the three bracket screws. Three Bracket Screws w Attach the ceiling bracket to the ceiling rod with the round thumbscrew. Height adjustments can be made by using different holes on the ceiling rod and ceiling bracket. v The total adjustment range is15.75 to 25.6 inches (40~65cm). Adjusments can be made in one inch (2.5cm) increments. xMake necessary roll and yaw adjustments to the projector. (YAW ADJUSTMENT) (ROLL ADJUSTMENT) Round Thumbscrew Ceiling Bracket 180° ±60° ±20° v Adjust the appropriate ceiling projection image mode from the "Management" menu tab in the on screen display. P/N 36.85807.001-A
-
 1
1
 |
 |