HP Xw8200 Processor Installation - HP Workstations - Page 5
Step 4-Reassemble the Workstation, Step 5-Con the Operating System - processor upgrade
 |
UPC - 882780210455
View all HP Xw8200 manuals
Add to My Manuals
Save this manual to your list of manuals |
Page 5 highlights
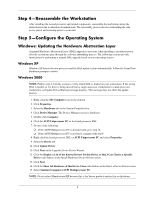
Step 4-Reassemble the Workstation After installing the second processor and related components, reassemble the workstation using the instructions in the workstation documentation. The reassembly process involves reinstalling the side access panel, and restoring power to your unit. Step 5-Configure the Operating System Windows: Updating the Hardware Abstraction Layer A manual Hardware Abstraction Layer (HAL) upgrade is necessary when installing a second processor after the system has gone through the software unbundling process. The following sections provide instructions for performing a manual HAL upgrade based on your operating system. Windows XP Windows XP detects the new processor and the HAL update is done automatically. Follow the Found New Hardware prompts to reboot. Windows 2000 NOTE: Follow steps 1-6 in this section to verify which HAL is loaded on your workstation. If the wrong HAL is loaded, or if a drive is being moved from a single-processor workstation to a dual-processor workstation, an Update Driver Warning message displays. This message does not affect the update process. 1. Right-click the My Computer icon on the desktop. 2. Click Properties. 3. Select the Hardware tab on the System Properties box. 4. Click Device Manager. The Device Manager screen is displayed. 5. Double-click Computer. 6. Click the ACPI Uniprocessor PC or the listed processor HAL. 7. Do one of the following: ❏ If the ACPI Multiprocessor PC is already listed, go to step 16. ❏ If the ACPI Multiprocessor PC is not listed, continue with step 8. 8. Right-click the listed processor HAL or ACPI Uniprocessor PC and select Properties. 9. Select the Driver tab. 10. Click Update Driver. 11. Click Next on the Upgrade Device Driver Wizard. 12. Click the Display a List of the Known Drivers for this Device so that I Can Choose a Specific Driver radio button on the Install Hardware Device Drivers screen. 13. Click Next. 14. Click the Show All Hardware of this Device Class radio button on the Select a Device Driver screen. 15. Select Standard computers/ACPI Multiprocessor PC. NOTE: Do not select Manufacturer/HP because this is for Server products and not for workstations. 5
-
 1
1 -
 2
2 -
 3
3 -
 4
4 -
 5
5 -
 6
6 -
 7
7 -
 8
8 -
 9
9 -
 10
10 -
 11
11 -
12
-
13
-
14
 |
 |
