HP Z3100 HP Designjet Z3100 Printing Guide [HP Raster Driver] - Printing a pho - Page 2
Working Spaces > CMYK - designjet firmware
 |
UPC - 882780677531
View all HP Z3100 manuals
Add to My Manuals
Save this manual to your list of manuals |
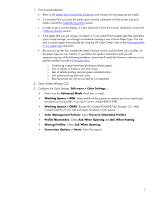
Page 2 highlights
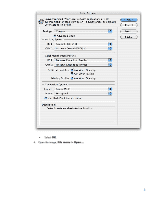
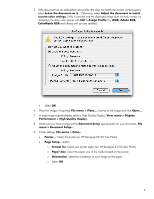
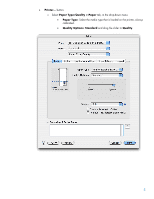
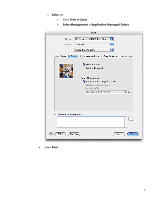
1. First recommendations: • Refer to the Media type functionality & features and choose the most appropriate media. • It is essential that you have the media type correctly calibrated with the printer and print mode, consult the Calibrate my printer section. • In order to get a correct display, it's also essential to have the monitor calibrated, consult the Profile my monitor section. • If the paper that you are using is not listed, or if you cannot find a paper type that resembles yours closely enough, we strongly recommend creating a new Custom Paper Type. You can add a custom paper automatically by using the HP Color Center; refer to the Add and profile a new paper type document. • Be sure your printer has installed the latest firmware version and the latest color profiles, for the paper type you use. Mainly, if you follow this guide's instructions and you are experiencing any of the following problems, download & install the firmware software or the profiles installer from the HP Designjet online. o Contouring in gray transitions printing on photo papers. o Loss of details in shadows and dark areas. o Lass of details printing red and green saturated colors. o Low gamut printing dark red colors. o Blue transitions are not as accurate as it is expected. 2. Open Adobe InDesign CS2. 3. Configure the Color Settings, Edit menu > Color Settings...: • Make sure the Advanced Mode check box is ticked. • Working Spaces > RGB: Select profile of the scanner or camera you have used to get the photo (source profile), if you don't have it, Adobe RGB (1998). • Working Spaces > CMYK: Europe ISO Coated FOGRA27 (for Europe), U.S. Web Coated (SWOP) v2` (for US) and Japan Standard v2 (for Japan). • Color Management Policies: Select Preserve Embedded Profiles. • Profile Mismatches: Check Ask When Opening and Ask When Pasting. • Missing Profiles: Check Ask When Opening. • Conversion Options > Intent: Select Perceptual. 2
-
 1
1 -
 2
2 -
 3
3 -
 4
4 -
 5
5 -
 6
6 -
 7
7 -
 8
8
 |
 |