HP c150w HP c150w Digital Camera - User Manual - Page 9
Self-photographying using the small monitor, 8 Self-timer setting, 9 Recording video clips, 10 - avis
 |
View all HP c150w manuals
Add to My Manuals
Save this manual to your list of manuals |
Page 9 highlights
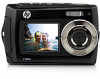
5.7 Self-photographying using the small monitor If you want to take a photo of yourself, you can simply use the small monitor LCD screen. Follow the steps below: 1. Press the LCD switch button to switch to the small monitor on the front of the camera. 2. Use the small monitor as a viewfinder to aim at yourself. 3. Press the Shutter button to take the photo of yourself. 5.8 Self-timer setting You can also use the self-timer function when you take a photograph of yourself or when you take a photograph without flash of an object. To avoid shaking of the camera a tripod is recommended. 1. Set the camera to photo mode. 2. Press the Menu button ( ). The menu will appear. 3. Press the W( ) button to select Self Timer and confirm by pressing the SHUTTER button. 4. Press the W( ) button to select the "On" option 5. Press the Shutter button to confirm. The self-timer function is now ready for use. 6. Aim at the object you wish to take photos of. 7. Press the Shutter button to take a photograph. 8. The photo will be taken after the timer reaches the delay time of 10 seconds. The camera will beep during the delay time. 5.9 Recording video clips 1. Press the Mode button to select the video clip mode ( ). 2. For setting the resolution, Press the Menu ( ) button and select Resolution, then press the Shutter button to confirm. Two resolutions will be displayed. VGA (640 x 480), QVGA ( 320 x 240). 3. Press the Shutter button to start recording videos, press the right button to pause and press the Shutter button again to stop recording. The video clip will now be saved as an AVI file in the camera memory. 5.10 Playback photographs The camera provides two options for playback: a) Single b) Thumbnail 1. Press the Playback ( ) button to get into Playback mode. 2. The last picture or video clip taken will be displayed. Press the W( ) to get into the thumbnail mode. Press the Left /Right /Up /Down button to select the desired picture, and press the Shutter button to view. 3. In full screen display, press the T( ) button to zoom in the photo. 4. To shift the image in zoom-in mode, press the Shutter button and then use the Mode/Menu/Left/Right buttons. 5. Press the Menu ( ) button in Playback mode, press again and hold the Menu button until the menu options displayed. Select SLIDE SHOW and set up the desired slide show way. Press the Shutter button to confirm. The pictures saved in the micro SD card will be displayed in sequence automatically. To stop slide show, press the Menu button. 6. Press the Menu ( ) button in Playback mode, press again and hold the menu button until the menu options displayed. Select Photo Effect and press the SHUTTER button. Select the desired effect by pressing the up/down button and press the shutter button to confirm. The image will be saved as a separate image. 8
-
 1
1 -
2
-
3
-
 4
4 -
 5
5 -
 6
6 -
 7
7 -
 8
8 -
 9
9 -
 10
10 -
 11
11 -
 12
12
 |
 |
