HP mt245 Administrator Guide 11 - Page 11
Adding a profile, Purge on App Exit
 |
View all HP mt245 manuals
Add to My Manuals
Save this manual to your list of manuals |
Page 11 highlights
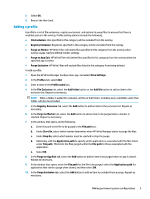
3. Select OK. 4. Restart the thin client. Adding a profile A profile is a set of file exclusions, registry exclusions, and options to purge files to ensure that there is available space in the overlay. Profile setting options include the following: ● File Exclusion: Files specified in this category will be excluded from the overlay. ● Registry Exclusion: Registries specified in this category will be excluded from the overlay. ● Purge on Marker: HP Write Filter will delete files specified in this category from the overlay when overlay usage reaches defined marker settings. ● Purge on App Exit: HP Write Filter will delete files specified in this category from the overlay when the specified app is exited. ● Purge Exclusion: HP Write Filter will exclude files listed in this category from being deleted. To add a profile: 1. Open the HP Write Manager Configuration app, and select More Settings. 2. In the Profiles tab, select Add. 3. Enter a name in the Profile name box. 4. In the File Exclusion tab, select the Add folder button or the Add file button to add an item to the exclusion list. Repeat as necessary. NOTE: When a folder is added for exclusion, all files in that folder, including every subfolder under that folder, will also be excluded. 5. In the Registry Exclusion tab, select the Add button to add an item to the exclusion list. Repeat as necessary. 6. In the Purge on Marker tab, select the Add button to add an item to be purged when a marker is reached. Repeat as necessary. 7. In the window that opens, do the following: a. Enter the path to the file to be purged in the File path box. b. Under Start On, select which marker determines when HP Write Manager starts to purge the files. c. Under Stop On, select which marker must be reached to stop the purge. d. Optionally, edit the Application path to specify which application is associated with the files listed under File path. This limits the files purged within the File path to those associated with the application. e. Select OK. 8. In the Purge on App Exit tab, select the Add button to add an item to be purged when an app is closed. Repeat as necessary. 9. In the window that opens, enter the File path for the file to be purged, select the Application path for application that starts a purge when closed, and then select OK. 10. In the Purge Exclusion tab, select the Add button to add an item to excluded from a purge. Repeat as necessary. Making permanent system configurations 5
-
 1
1 -
2
-
3
-
4
-
5
-
 6
6 -
 7
7 -
 8
8 -
 9
9 -
 10
10 -
 11
11 -
 12
12 -
 13
13 -
 14
14 -
 15
15 -
 16
16
 |
 |
