HP nc4400 Reference Guide - Page 30
Initializing the Embedded Security Chip, File > Save Changes and Exit
 |
View all HP nc4400 manuals
Add to My Manuals
Save this manual to your list of manuals |
Page 30 highlights
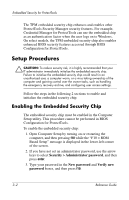
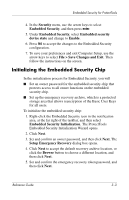
Embedded Security for ProtectTools 4. In the Security menu, use the arrow keys to select Embedded Security, and then press enter. 5. Under Embedded Security, select Embedded security device state and change to Enable. 6. Press f10 to accept the changes to the Embedded Security configuration. 7. To save your preferences and exit Computer Setup, use the arrow keys to select File > Save Changes and Exit. Then follow the instructions on the screen. Initializing the Embedded Security Chip In the initialization process for Embedded Security, you will ■ Set an owner password for the embedded security chip that protects access to all owner functions on the embedded security chip. ■ Set up the emergency recovery archive, which is a protected storage area that allows reencryption of the Basic User Keys for all users. To initialize the embedded security chip: 1. Right-click the Embedded Security icon in the notification area, at the far right of the taskbar, and then select Embedded Security Initialization. The ProtectTools Embedded Security Initialization Wizard opens. 2. Click Next. 3. Set and confirm an owner password, and then click Next. The Setup Emergency Recovery dialog box opens. 4. Click Next to accept the default recovery archive location, or click the Browse button to choose a different location, and then click Next. 5. Set and confirm the emergency recovery token password, and then click Next. Reference Guide 3-3
-
 1
1 -
2
-
3
-
4
-
5
-
6
-
7
-
8
-
9
-
10
-
11
-
12
-
13
-
14
-
15
-
16
-
17
-
18
-
19
-
20
-
21
-
22
-
23
-
24
-
 25
25 -
 26
26 -
 27
27 -
 28
28 -
 29
29 -
 30
30 -
 31
31 -
 32
32 -
 33
33 -
 34
34 -
 35
35 -
36
-
37
-
38
-
39
-
40
-
41
-
42
-
43
-
44
-
45
-
46
-
47
-
48
-
49
-
50
-
51
-
52
-
53
-
54
-
55
-
56
-
57
-
58
-
59
-
60
-
61
-
62
-
63
-
64
-
65
-
66
-
67
-
68
-
69
-
70
-
71
-
72
-
73
-
74
-
75
-
76
-
77
-
78
-
79
-
80
-
81
-
82
-
83
-
84
-
85
-
86
 |
 |
