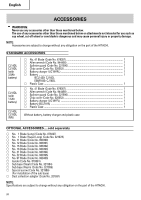
Hitachi CJ18DL Instruction Manual - Page 15
In order to prevent blade dislodging, damage or - motor
 |
UPC - 717709011670
View all Hitachi CJ18DL manuals
Add to My Manuals
Save this manual to your list of manuals |
Page 15 highlights
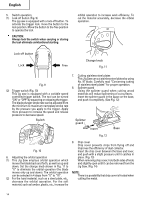
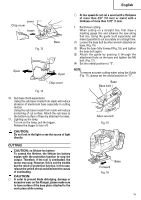
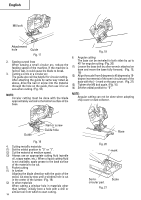
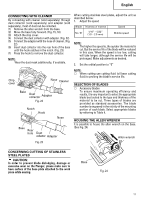
English Lever Chip cover Insert Fig. 13 Base Open Open Chip cover Fig. 14 ⅜ At low speed do not cut a wood with a thickness of more than 3/8" (10 mm) or metal with a thickness of more than 1/32" (1 mm). 1. Rectilinear cutting When cutting on a straight line, first draw a marking gauge line and advance the saw along that line. Using the guide (sold separately) will make it possible to cut accurately on a straight line. (1) Loosen the base bolt by allen wrench attached on base. (Fig. 15) (2) Move the base fully forward (Fig. 16), and tighten the base bolt again. (3) Attach the guide by passing it through the attachment hole on the base and tighten the M5 bolt. (Fig. 17) (4) Set the orbital position to "0". NOTE: To ensure accurate cutting when using the Guide (Fig. 17), always set the orbital position to "0". Base Base bolt 10. Sub base (Sold separately) Using the sub base (made from steel) will reduce abrasion of aluminium base especially in cutting metals. Using the sub base (made from resin) will reduce scratching of cut surface. Attach the sub base to the bottom surface of base by attached 4 screws. 11. Lighting up the lamp To turn on the lamp, pull the trigger. Release the trigger to turn off. CAUTION: Do not look in the light or see the source of light directly. Allen wrench Fig. 15 CUTTING CAUTION: on lithium-ion battery To extend the lifetime, the lithium-ion battery equips with the protection function to stop the output. Therefore, if the tool is overloaded, the motor may stop. However, this is not the trouble but the result of protection function. In this case, release the switch of tool and eliminate the causes of overloading. CAUTION: ⅜ In order to prevent blade dislodging, damage or excessive wear on the Plunger, please make sure to have surface of the base plate attached to the work piece while sawing. Forward Fig. 16 Base 15
-
 1
1 -
2
-
3
-
4
-
5
-
6
-
7
-
8
-
9
-
 10
10 -
 11
11 -
 12
12 -
 13
13 -
 14
14 -
 15
15 -
 16
16 -
 17
17 -
 18
18 -
 19
19 -
 20
20 -
21
-
22
-
23
-
24
-
25
-
26
-
27
-
28
-
29
-
30
-
31
-
32
-
33
-
34
-
35
-
36
-
37
-
38
-
39
-
40
-
41
-
42
-
43
-
44
-
45
-
46
-
47
-
48
-
49
-
50
-
51
-
52
-
53
-
54
-
55
-
56
-
57
-
58
-
59
-
60
-
61
-
62
-
63
-
64
 |
 |
