Hitachi CP X450 User Manual - Page 14
Turning on the power, Turning off the power
 |
UPC - 050585151376
View all Hitachi CP X450 manuals
Add to My Manuals
Save this manual to your list of manuals |
Page 14 highlights
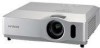
Power on/off Power on/off Turning on the power 1. Make sure that the power cord is firmly and correctly connected to the projector and the outlet. 2. Remove the lens cover, and set the power switch to ON position (marked " I "). The POWER indicator will light up in steady orange (60). Then wait several seconds because the buttons may not function for these several seconds. 3. Press STANDBY/ON button on the projector or the remote control. The projection lamp will light up and POWER indicator will begin blinking in green. When the power is completely on, the indicator will stop blinking and light in steady green (60). To display the picture, select an input signal according to the section "Selecting an input signal"(15). STANDBY/ON button POWER indicator MY SOURCE/ VIDEO COMPUTER DOC.CAMERA ASPECT AUTO SEARCH BLANK MAGNIFY FREEZE PAGE VOLUME UP ON 㧗 DOWN OFF KEYSTONE MY BUTTON MUTE 1 2 POSITION MENU ESC ENTER RESET Power switch Turning off the power 1. Press the STANDBY/ON button on the projector or the remote control. The message "Power off?" will appear on the screen for about 5 seconds. 2. Press the STANDBY/ON button again while the message appears. The projector lamp will go off, and the POWER indicator will begin blinking in orange. Then POWER indicator will stop blinking and light in steady orange when the lamp cooling is complete (60). VIDEO COMPUTER SEARCH ASPECT AUTO BLANK MAGNIFY ON HOME PAGE UP VOLUME OFF END PAGE DOWN MUTE 3. Make sure that POWER indicator lights in steady orange, and set the power switch to OFF position (marked "O"). FREEZE MY BUTTON KEYSTONE 1 2 POSITION MENU ENTER POWER indicator will go off. Attach the lens cover. ESC RESET Do not turn the projector on for about 10 minutes or more after turning it off. Turning the projector on again too soon could shorten the lifetime of some consumable parts of the projector. Power switch WARNING ►A strong light is emitted when the projector's power is on. Do not look into the lens of the projector or look inside of the projector through any of the projector's openings. ►Do not touch around the lamp cover and the exhaust vents during use or just after use, since it is too hot. NOTE • Turn the power on/off in right order. Please power on the projector prior to the connected devices. • When the AUTO ON of the OPTION menu is set to the TURN ON, and the power was turned off by the power switch last time, turning the power switch on makes the projection lamp light on without pushing the STANDBY/ON button (40). • Use the shutdown switch (61) only when the projector is not turned off by normal procedure. 14
-
 1
1 -
2
-
3
-
4
-
5
-
6
-
7
-
8
-
 9
9 -
 10
10 -
 11
11 -
 12
12 -
 13
13 -
 14
14 -
 15
15 -
 16
16 -
 17
17 -
 18
18 -
 19
19 -
20
-
21
-
22
-
23
-
24
-
25
-
26
-
27
-
28
-
29
-
30
-
31
-
32
-
33
-
34
-
35
-
36
-
37
-
38
-
39
-
40
-
41
-
42
-
43
-
44
-
45
-
46
-
47
-
48
-
49
-
50
-
51
-
52
-
53
-
54
-
55
-
56
-
57
-
58
-
59
-
60
-
61
-
62
-
63
-
64
-
65
-
66
 |
 |
