Hitachi DV14DL Instruction Manual - Page 15
Insert the plug of battery charger into the receptacle, Insert the battery to the battery charger,
 |
UPC - 717709012073
View all Hitachi DV14DL manuals
Add to My Manuals
Save this manual to your list of manuals |
Page 15 highlights
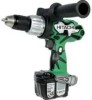
Battery Charge status lamp (red) Overheat lamp (green) English 1. Insert the plug of battery charger into the receptacle When the plug of battery charger has been inserted into the receptacle, the charge status lamp will blink in red. (At 1-second intervals) WARNING: Do not use the electrical cord if damaged. Have it repaired immediately. Fig. 4 2. Insert the battery to the battery charger Insert the battery into the battery charger as shown in Fig. 4. Make sure it contacts the bottom of the battery charger. 3. Charging ⅜ When the battery is connected to the battery charger, charging will commence and the pilot lamp will light in red. (See Table 2) NOTE: If the pilot lamp flickers in red, pull out the plug from the receptacle and check if the battery is properly mounted. ⅜ When the battery is fully charged, the pilot lamp will bilink in red slowly. (At 1-second intervals) (See Table 2) Charge status lamp (RED) Before charging While charging Charging complete Blinks (RED) Table 2 Lamp indications Indications of the pilot lamp Lights for 0.5 seconds. Does not light for 0.5 seconds. (off for 0.5 seconds) Lights (RED) Blinks (RED) Lights continuously Lights for 0.5 seconds. Does not light for 0.5 seconds. (off for 0.5 seconds) Charging Flickers Lights for 0.1 seconds. Does not light Malfunction in the impossible (RED) for 0.1 seconds. (off for 0.1 seconds) battery or the charger Overheat lamp (GREEN) Overheat standby Lights Lights continuously (GREEN) Battery overheated. Unable to charge (Charging will commence when battery cools). NOTE: When standby for cooling battery, UC18YRL cools the overheated battery by cooling fan. 15
-
 1
1 -
2
-
3
-
4
-
5
-
6
-
7
-
8
-
9
-
 10
10 -
 11
11 -
 12
12 -
 13
13 -
 14
14 -
 15
15 -
 16
16 -
 17
17 -
 18
18 -
 19
19 -
 20
20 -
21
-
22
-
23
-
24
-
25
-
26
-
27
-
28
-
29
-
30
-
31
-
32
-
33
-
34
-
35
-
36
-
37
-
38
-
39
-
40
-
41
-
42
-
43
-
44
-
45
-
46
-
47
-
48
-
49
-
50
-
51
-
52
-
53
-
54
-
55
-
56
-
57
-
58
-
59
-
60
-
61
-
62
-
63
-
64
-
65
-
66
-
67
-
68
-
69
-
70
-
71
-
72
-
73
-
74
-
75
-
76
-
77
-
78
-
79
-
80
-
81
-
82
-
83
-
84
-
85
-
86
-
87
-
88
 |
 |
