Hitachi G10SR3 Instruction Manual - Page 9
Class A grain and # 36 grain size. It is most suitable - 4 angle grinder
 |
UPC - 717709011885
View all Hitachi G10SR3 manuals
Add to My Manuals
Save this manual to your list of manuals |
Page 9 highlights
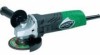
English 9. Use only properly rated depressed center wheels. 5. Move the grinder in the proper direction. Use only depressed center wheels rated at 13700 When using a new depressed center wheel in RPM for G10SR3, 13,000 RPM for G12SR3 or more. direction A (Fig. 4), the wheel edge may cut into the Using a depressed center wheel rated less can lead workpiece. In this case, grind in direction B (Fig. 4). to wheel disintegration during operation and cause Once the wheel edge is worn, the workpiece can be serious bodily injury. ground in both directions. 10. Check the push button. Make sure that the push button is disengaged by pushing push button two or three times before turning on the grinder. (Fig. 5) GRINDER OPERATION 1. Hold the grinder firmly by its housing and side handle (Fig. 1). The grinder produces a counterforce which must be controlled by firmly holding onto the grinder. 2. Turn the grinder "on". (Fig. 3) While holding the grinder firmly, use one finger to slide the switch to the "on" position. Switch 15° - 30° A B Fig. 4 NOTE: The wheel provided (resinoid wheel) is rated as Class A grain and # 36 grain size. It is most suitable for heavy grinding of steel and other types of materials. 6. Adjust operation to desired finish. For a fine finish, decrease pressure by lifting slightly. Grind slowly and at the appropriate speed. OFF ON CAUTION: The revolving depressed center wheel will create air turbulence. Do no lay the grinder down in areas of dust or dirt until it has come to a complete stop. Fig. 3 DEPRESSED CENTER WHEEL ASSEMBLY 3. Use light grinding pressure. AND DISASSEMBLY There is no need to press hard when grinding. Usually the grinder's own weight is sufficient to allow the required light contact with the surface to be ground. WARNING: Never attempt to assemble or disassemble the depressed center wheel, unless the power switch WARNING: Do not press the grinder forcibly against the is in the "OFF" position and the electrical cord has been disconnected from the receptacle. surface to be ground. Heavy pressure can result in wheel breakage and serious injury. It can also damage the surface being ground or damage the grinder's motor. 1. Assembly (1) Turn the disc grinder upsidedown so that the spindle is facing upward. (2) Align the oval-shaped indentation of the wheel washer with the notched part of the spindle, then 4. Use proper grinding angle. attach them. Grind only with the wheel's edge by lifting the (3) Fit the protuberance of the depressed center wheel grinder 15° to 30°, as shown in Fig. 4. onto the wheel washer. (4) Screw the wheel nut onto the spindle. CAUTION: (5) While pushing the push button with one hand, lock Do not use the entire surface of the depressed the spindle by turning the depressed center wheel center wheel. Use only the edge of the depressed slowly with the other hand. center wheel. Tighten the wheel nut by using the supplied wrench as shown in Fig. 5. 9
-
 1
1 -
2
-
3
-
 4
4 -
 5
5 -
 6
6 -
 7
7 -
 8
8 -
 9
9 -
 10
10 -
 11
11 -
 12
12 -
 13
13 -
 14
14 -
15
-
16
-
17
-
18
-
19
-
20
-
21
-
22
-
23
-
24
-
25
-
26
-
27
-
28
-
29
-
30
-
31
-
32
-
33
-
34
-
35
-
36
 |
 |
