Hitachi WR9DMR Instruction Manual - Page 10
Operational Cautions - hard drive
 |
UPC - 717709009882
View all Hitachi WR9DMR manuals
Add to My Manuals
Save this manual to your list of manuals |
Page 10 highlights
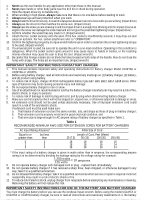
7. Confirm that the battery is mounted correctly 8. Check the rotational direction The bit rotates clockwise (viewed from the rear side) by pushing the R-side of the push button C. The L-side of the push button is pushed to turn the bit counterclockwise. (See Fig. 4) CAUTION: q The push button can not be switched while the impact driver is turning. To switch the push button, stop the impact driver, then set the push button. 9. Switch operation ⅜ When the trigger switch is depressed, the tool rotates. When the trigger is released, the tool stops. ⅜ The rotational speed can be controlled by varying the amount that the trigger switch is pulled. Speed is low when the trigger switch is pulled slightly and increases as the trigger switch is pulled more. NOTE: A buzzing noise is produced when the motor is about to rotate; this is only a noise, not a machine failure. 10. Tightening and loosening screws Install the bit that matches the screw, line up the bit in the grooves of the head of the screw, then tighten it. Push the impact driver just enough to keep the bit fitting the head of the screw. CAUTION: q Applying the impact driver for too long tightens the screw too much and can break it. q Tightening a screw with the impact driver at an angle to that screw can damage the head of the screw and the proper force will not be transmitted to the screw. Tighten with this impact driver lined up straight with the screw. 11. Tightening and loosening bolts A hex. socket matching the bolt or nut must first be selected. Then mount the socket on the anvil, and grip the nut to be tightened with the hex. socket. Holding the wrench in line with the bolt, press the power switch to impact the nut for several seconds. If the nut is only loosely fitted to the bolt, the bolt may turn with the nut, therefore mistaking proper tightening. In this case, stop impact on the nut and hold the bolt head with a wrench before restarting impact, or manually tighten the bolt and nut to prevent them slipping. OPERATIONAL CAUTIONS 1. Resting the unit after continuous work After use for continuous bolt-tightening work, rest the unit for 15 minutes or so when replacing the battery. The temperature of the motor, switch, etc. will rise if the work is started again immediately after battery replacement, eventually resulting in burnout. CAUTION: Do not touch the protector, as it gets very hot during continuous work. 2. Cautions on use of the speed control switch This switch has a built-in, electronic circuit which steplessly varies the rotation speed. Consequently, when the switch trigger is pulled only slightly (low speed rotation) and the motor is stopped while continuously driving in screws, the components of the electronic circuit parts may overheat and be damaged. 3. Use a tightening time suitable for the screw The appropriate torque for a screw differs according to the material and size of the screw, and the material being screwed etc., so please use a tightening time suitable for the screw. In particular, if a long tightening time is used in the case of screws smaller than 5/16" (8 mm), there is a danger of the screw breaking, so please confirm the tightening time and the tightening torque beforehand. 4. Work at a tightening torque suitable for the bolt under impact The optimum tightening torque for nuts or bolts differs with material and size of the nuts or bolts. An excessively large tightening torque for a small bolt may stretch or break the bolt. The tightening torque increases in proportionate to the operation time. Use the correct operating time for the bolt. 5. Holding the tool Hold the impact wrench firmly with both hands. In this case hold the wrench in line with the bolt. It is not necessary to push the wrench very hard. Hold the wrench with a force just sufficient to counteract the impact force. 6. Confirm the tightening torque The following factors contribute to a reduction of the tightening torque. So confirm the actual tightening torque needed by screwing up some bolts before the job with a hand torque wrench. Factors affecting the tightening torque are as follows. (1) Voltage When the discharge margin is reached, voltage decreases and tightening torque is lowered. (2) Operating time The tightening torque increases when the operating time increases. But the tightening torque does not increase above a certain value even if the tool is driven for a long time. (3) Diameter of bolt The tightening torque differs with the diameter of the bolt. Generally a larger diameter bolt requires larger tightening torque.
-
 1
1 -
2
-
3
-
4
-
 5
5 -
 6
6 -
 7
7 -
 8
8 -
 9
9 -
 10
10 -
 11
11 -
 12
12 -
 13
13 -
 14
14 -
 15
15 -
16
-
17
-
18
-
19
-
20
-
21
-
22
-
23
-
24
-
25
-
26
-
27
-
28
-
29
-
30
-
31
-
32
 |
 |
