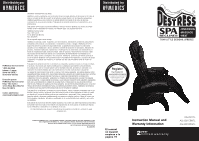
HoMedics AG-3501TL User Manual - Page 4
Attach Seat/Leg Frame to Base
 |
View all HoMedics AG-3501TL manuals
Add to My Manuals
Save this manual to your list of manuals |
Page 4 highlights
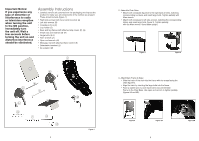
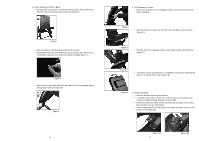
4. Attach Seat/Leg Frame to Base: • Flip the chair on its back and slide the seat in place. Place into frame with the straps facing the back of the chair (figure 6). Figure 6 • Align the seat by inserting large bolts into the frame. • Place washer and nut over each bolt to secure the Seat Frame to the Chair Base. Use open end wrench to tighten partially (figure 7). Figure 7 • Stand chair upright and adjust so the base is level. Completely tighten all nuts and bolts now (figure 8). Figure 8 6 5. Add Massage Cushion: • Slide the top pocket of the massage cushion over the top of the back frame (figure 9). Figure 9 • Slide the bottom pocket over the foot frame by lifting up the footrest (figure 10). Figure 10 • Smooth down the massage cushion and make it flush with the frame (figure 11). Figure 11 • The pillow can be repositioned or completely removed by adjusting the strap on the back of the chair (figure 12). Figure 12 6. Finishing Details: • Remove all letter and number stickers. • To add the cup holder, remove the T-block cover and insert the cup holder into either armrest (figures 13A and 13B). • Feed the power and hand control cord through the back of the frame. Be sure the cords are not twisted. • Attach the power cord to the adaptor and store the hand control in the pocket on the right side. Figure 13A 7 Figure 13B
-
 1
1 -
 2
2 -
 3
3 -
 4
4 -
 5
5 -
 6
6 -
 7
7 -
 8
8 -
 9
9 -
 10
10 -
11
-
12
-
13
-
14
 |
 |
