HoMedics AR-45 Downloadable Instruction Book - Page 5
On/Off and Speed Settings, Timer, Oscillation, UV-C Bulb, Clean Filter Indicator, Using the Remote
 |
View all HoMedics AR-45 manuals
Add to My Manuals
Save this manual to your list of manuals |
Page 5 highlights
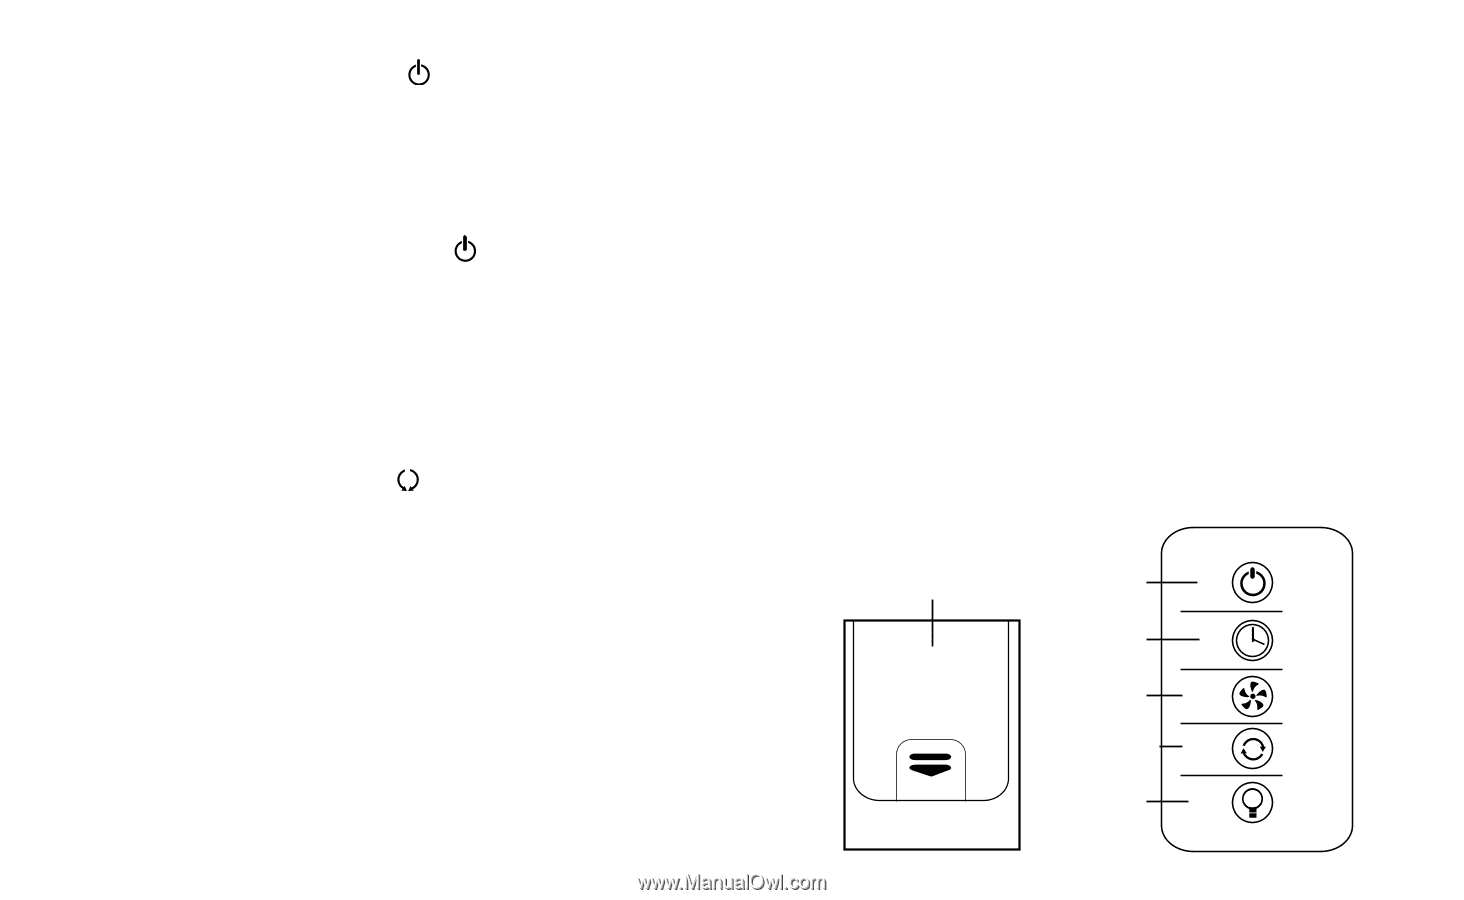
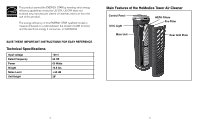
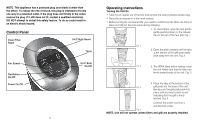
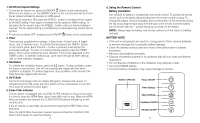
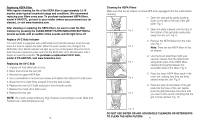
1. On/Off and Speed Settings • To turn the air cleaner on, press the ON/OFF button on the control panel. When the air cleaner is on, the ON/OFF button on the control panel will be lit and the air cleaner will start to operate on LOW speed. • Once the air cleaner is ON, press the SPEED+ button to increase the fan speed to the MED setting. Press again to increase the fan speed to HIGH setting. To decrease the fan speed, press the SPEED- button until your desired setting is reached. The fan speed setting is indicated by the illuminated ring around the fan symbol. • To turn the air cleaner OFF, simply press the ON/OFF button on the control panel. 2. Timer There are four possible timer settings: 2 (two) hours, 4 (four) hours, 8 (eight) hours, and 12 (twelve) hours. To activate the timer press the TIMER+ button on the control panel. Each time the + button is pressed, it will display the successive settings. To return to a setting already passed, press the TIMER- button. Once a timer setting has been selected, it will remain displayed on the TIMER screen. To operate continuously, cycle down through all timer settings until no timer setting is displayed. 3. Oscillation To activate the oscillation feature, press the button. To stop oscillation, press the button a second time. Unit will not automatically realign with foot when oscillation is stopped. To achieve alignment, stop oscillation at the moment the body becomes aligned with the foot. 4. UV-C Bulb The UV-C technology in this air cleaner kills germs, bacteria and viruses. To activate the UV-C bulb, press the UV-C button on the control panel. To turn the UV-C bulb off, press the button again. 5. Clean Filter Indicator The air cleaner is equipped with a CLEAN FILTER indicator to let you know when it is time to clean the HEPA filters, about every 480 hours of use. When the HEPA filters are ready to be cleaned, the CLEAN FILTER indicator will light up on the control panel. If the air cleaner is used daily, we recommend cleaning the HEPA filters more frequently. Once the HEPA filters have been cleaned, press and hold the CLEAN FILTER button until it beeps to reset the Indicator. 8 6. Using the Remote Control Battery Installation One CR2025 3V battery is included with the remote control. To activate the remote control, pull out the plastic tab protruding from the remote control housing. To change the battery, remove the battery door on the bottom of the remote by sliding the tab and pulling the door away from the back of the remote. Insert the battery into the remote with the + symbol facing up as shown on the drawer. NOTE: Always keep the battery and remote control out of the reach of children and pets. BATTERY NOTE • If the unit is not going to be used for a long period of time, remove batteries to prevent damage due to possible battery leakage. • Clean the battery contacts and also those of the device prior to battery installation. • Remove used batteries promptly. • Dispose of batteries properly in accordance with all local, state and federal regulations. • Do not dispose of batteries in fire. Batteries may explode or leak. • Use only CR2025 battery. • Incorrect battery installation may cause damage to remote. Bottom of Remote Power ON/OFF Power Timer Settings Timer Speed Settings Fan Speed Oscillation ON/OFF Oscillation UV Bulb On/OFF UV Light UV 9
-
 1
1 -
 2
2 -
 3
3 -
 4
4 -
 5
5 -
 6
6 -
 7
7 -
 8
8 -
 9
9 -
 10
10 -
 11
11 -
12
-
13
-
14
 |
 |