Honeywell MS9590 User Guide - Page 9
Cable Installation and Removal, Installation - scanner
 |
View all Honeywell MS9590 manuals
Add to My Manuals
Save this manual to your list of manuals |
Page 9 highlights
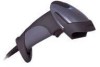
INTRODUCTION Cable Installation and Removal Installation Important: If the cable is not fully latched, the unit can power intermittently. Figure 2. Connecting the Cable 1. Plug the 10-pin RJ45 end of the cable into the 10-pin socket on the MS9590. There will be an audible click when the connector lock engages. 2. Gently pull on the cable strain relief to insure the cable is securely installed. Removal Before removing the cable from the scanner, Metrologic recommends that power to the host system be turned off. If the cable is a PowerLink cable, disconnect the power supply on the cable. Figure 3. Releasing the Cable 1. Locate the small dimple on the handle of the unit near the cable connection. 2. Bend an ordinary paperclip into the shape shown above in Figure 3. 3. To release the cable lock, push the end of the paperclip through the rubber on the handle where the dimple is located. 4. There will be an audible click when the connector lock releases. Pull gently on the strain-relief of the cable to separate the cable from the scanner. 5
-
 1
1 -
2
-
3
-
 4
4 -
 5
5 -
 6
6 -
 7
7 -
 8
8 -
 9
9 -
 10
10 -
 11
11 -
 12
12 -
 13
13 -
 14
14 -
15
-
16
-
17
-
18
-
19
-
20
-
21
-
22
-
23
-
24
-
25
-
26
-
27
-
28
-
29
-
30
-
31
-
32
-
33
-
34
-
35
-
36
-
37
-
38
-
39
-
40
-
41
-
42
-
43
-
44
 |
 |
