Honeywell WAP Quick Installation Guide - Page 1
Honeywell WAP Manual
 |
View all Honeywell WAP manuals
Add to My Manuals
Save this manual to your list of manuals |
Page 1 highlights
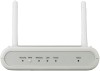
WAP Wireless Access Point - Quick Installation Guide For Online Support visit: http://www.security.honeywell.com/hsc/resources/MyWebTech/ General Information This guide provides information on installing and setting up Honeywell's WAP Wireless Access Point. The WAP provides an easy-to-setup secure wireless solution that enables Honeywell's iPCAM series internet video cameras to communicate with a broadband modem or LAN. Some major features of Honeywell's WAP Wireless Access Point are: • Functions as a secure wireless access point. • Wireless communications utilizes the 802.11b/g/n protocol with WPS security. WPS (Wi-Fi Protected Setup) is a standard for easy setup of a secure wireless network. • In addition to wireless communications, there are three 10/100 Mbps Ethernet ports available for wired cameras. IMPORTANT: This device is for indoor use only. PACKAGE CONTENTS SecurityWPS WirelessLAN Power Reset WAP Wireless Access Point Component Identification Security WPS Wireless LAN Power Reset Antenna [Qty 2] Power Transformer Ethernet Cable Antenna Port (2) Security: On - WPS security is set to on. Flashing - Flashes when WPS button has been pressed for 3 seconds and released, to indicate the WAP is transmitting a new security key to the wireless camera. When the wireless camera replies, the Security LED lights solid. WPS (button): Used to setup a secured wireless connection. (Refer to the documentation for the wireless camera.) Wireless: On - Wireless connection exist. Off - No Wireless connections exist. Flashing (Amber) - Problem occurred while trying to establish the Wireless connection. LAN: On - The LAN port(s) is active. Flashing (Amber) - Problem occurred while trying to connect to the LAN. Power: When power is applied the LED blinks during an initialization period, then remains steady to indicate power is connected. Reset (switch): This switch has two functions; Reboot, and Clear All Data. Use a paper clip to depress. Reboot - Depress and Release to reboot. (Allow cycle to complete.) Clear All Data - Depress and hold for 8 seconds to clear all data, and restore factory settings. (Allow cycle to complete.) 12V / 1A: Connect Power Transformer. WAN: Not Used. (Do not remove the cap plug.) Ports 1, 2, 3, 4: For connection to Ethernet devices. Antenna Ports: Connect the supplied antennas to these ports.
-
 1
1 -
 2
2
 |
 |
