Hoover BH20090 Product Manual - Page 5
Warning - vacuum
 |
View all Hoover BH20090 manuals
Add to My Manuals
Save this manual to your list of manuals |
Page 5 highlights
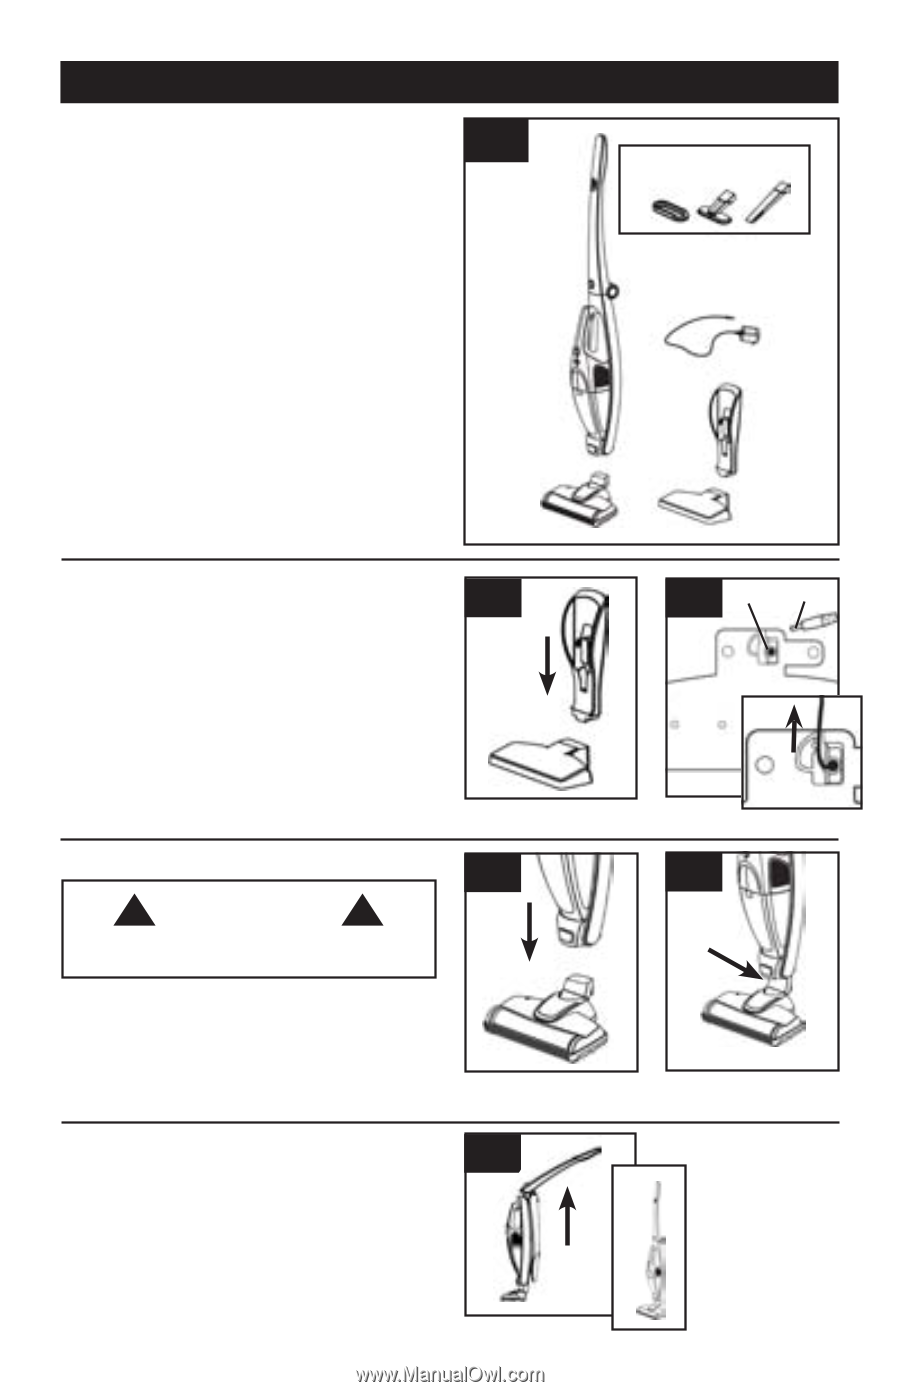
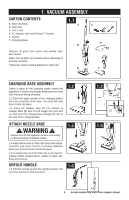
1. Vacuum ASSEMBLY Carton contents A. Stick Vac Body B. Hand Vac C. 3-in-1 Tool D. AC Adapter with IntelliCharge™ System E. Nozzle F. Charging Base 1.1 A C D B Remove all parts from carton and identify each item shown. Make sure all parts are located before disposing of packing materials. *Hand Vac comes packed attached to Stick Vac. E F CHARGING BASE Assembly Select a place for the charging station where the appliance is stable and always protected from heat and moisture during charging. 1.2 Push the upper portion of the charging station onto the connector of the base. You must feel and hear it click into place. 1.3 Insert AC Adapter plug (A) into bottom of charger base (B) and fit cord snugly into cord well so cord exits the charging base through the slot at the rear of the charging base. 1.2 Attach Nozzle base ! WARNING ! Always turn off this appliance before connecting or disconnecting motorized nozzle. 1.4 Align bottom inlet on Stick Vac body with nozzle connector and insert. Nozzle is securely attached when you feel and hear it click into place. 1.5 To release Nozzle from Stick Vac, press Nozzle release button located above nozzle on Stick Vac body and remove. UNFOLD HANDLE 1.6 Fold the handle up into the upright position until you hear and feel it lock into place. 1.4 1.6 1.3 B A 1.5 5 Actual model may vary from images shown.
-
 1
1 -
 2
2 -
 3
3 -
 4
4 -
 5
5 -
 6
6 -
 7
7 -
 8
8 -
 9
9 -
 10
10 -
 11
11 -
12
 |
 |