Hoover BH52210 Product Manual - Page 8
Attach the wall bracket
 |
View all Hoover BH52210 manuals
Add to My Manuals
Save this manual to your list of manuals |
Page 8 highlights
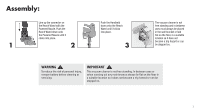
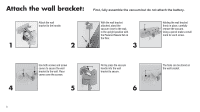
Attach the wall bracket: First, fully assemble the vacuum but do not attach the battery. Attach the wall bracket to the handle. With the wall bracket attached, stand the vacuum close to the wall, in the upright position with the Powered Nozzle flat on the floor. Holding the wall bracket firmly in place, carefully remove the vacuum. Using a pencil make a small mark for each screw. 1 2 3 4 8 Use both screws and screw covers to secure the wall bracket to the wall. Place covers over the screws. 5 Firmly press the vacuum handle into the wall bracket to secure. 6 The tools can be stored on the wall bracket.
-
 1
1 -
2
-
 3
3 -
 4
4 -
 5
5 -
 6
6 -
 7
7 -
 8
8 -
 9
9 -
 10
10 -
 11
11 -
 12
12 -
 13
13 -
14
-
15
-
16
-
17
-
18
-
19
-
20
-
21
-
22
-
23
-
24
-
25
-
26
-
27
-
28
-
29
-
30
-
31
-
32
-
33
-
34
-
35
-
36
-
37
-
38
-
39
-
40
-
41
-
42
-
43
-
44
-
45
-
46
-
47
-
48
-
49
-
50
-
51
-
52
-
53
-
54
-
55
-
56
-
57
-
58
-
59
-
60
-
61
-
62
-
63
-
64
-
65
-
66
-
67
-
68
-
69
-
70
-
71
-
72
-
73
-
74
-
75
-
76
 |
 |
8
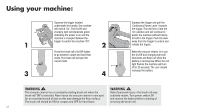
Attach the wall bracket:
First, fully assemble the vacuum but do not attach the battery.
With the wall bracket
attached, stand the
vacuum close to the wall,
in the upright position with
the Powered Nozzle flat on
the floor.
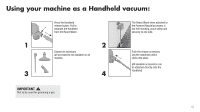
Firmly press the vacuum
handle into the wall
bracket to secure.
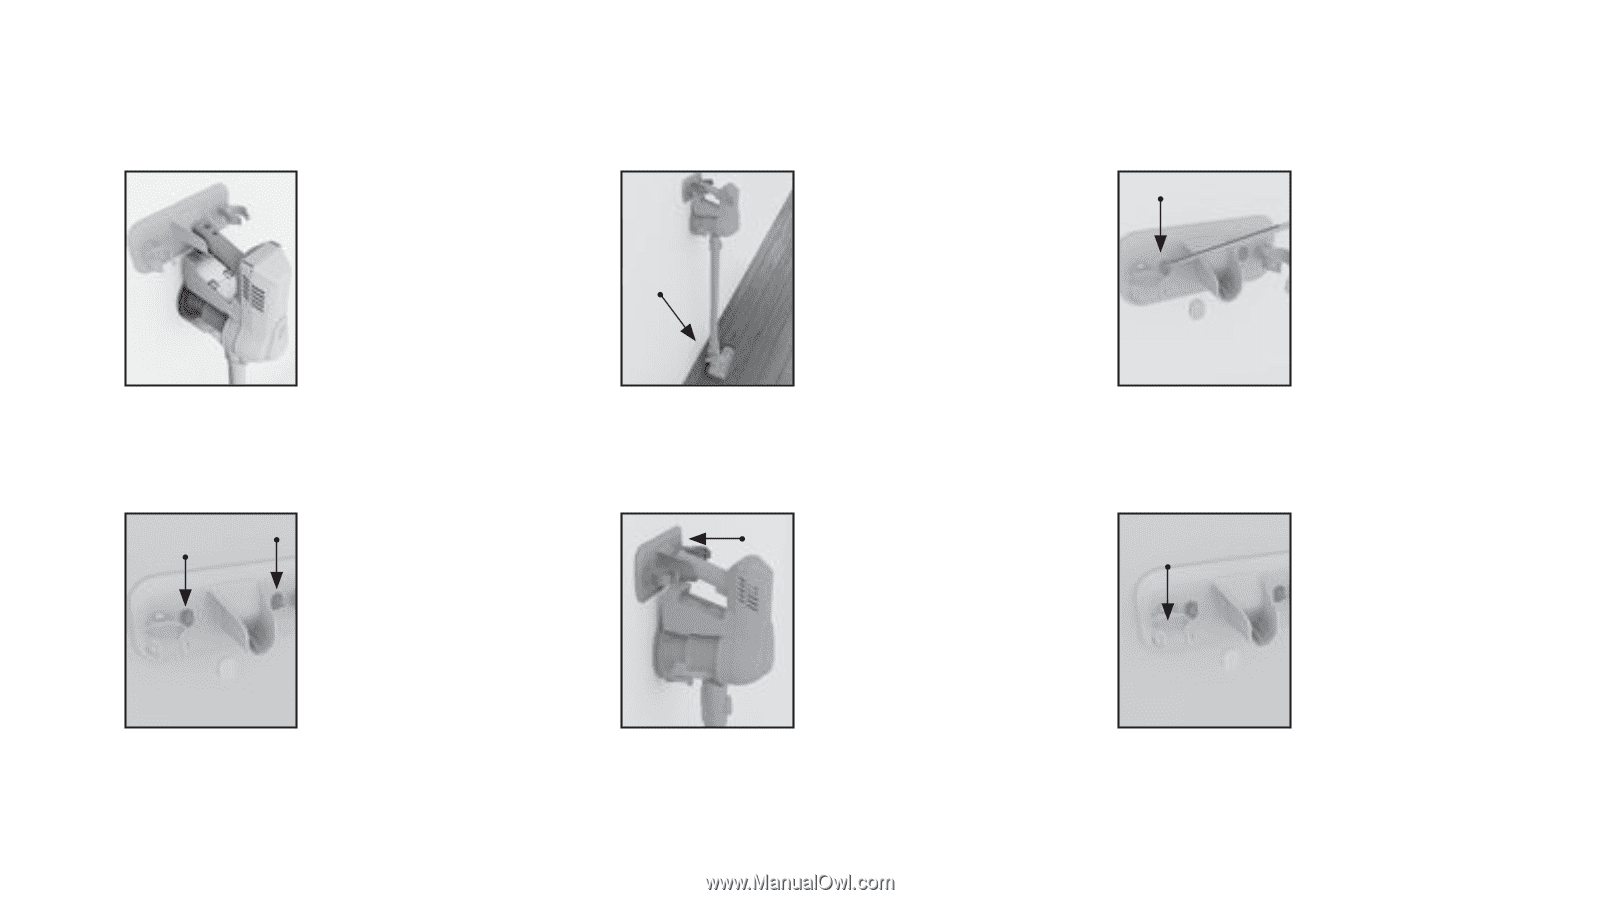
Attach the wall
bracket to the handle.
Use both screws and screw
covers to secure the wall
bracket to the wall. Place
covers over the screws.
Holding the wall bracket
firmly in place, carefully
remove the vacuum.
Using a pencil make a small
mark for each screw.
The tools can be stored on
the wall bracket.
1
4
2
5
3
6