Hoover F5918 Manual - Page 7
How to use
 |
View all Hoover F5918 manuals
Add to My Manuals
Save this manual to your list of manuals |
Page 7 highlights
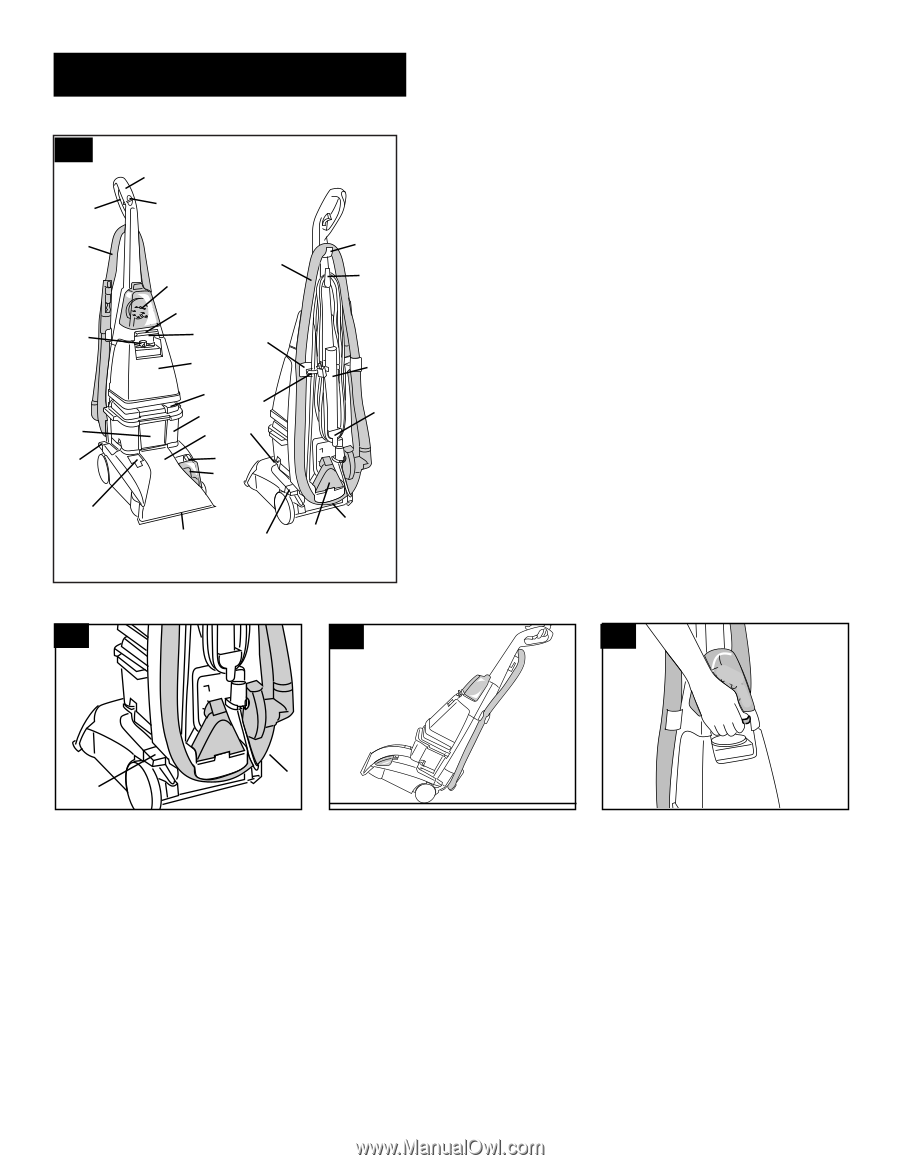
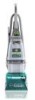
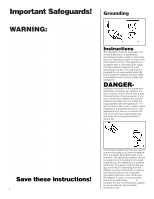
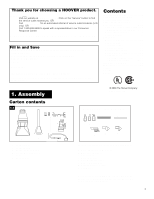
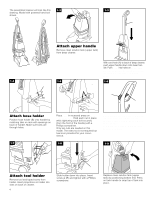
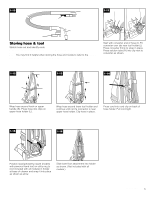
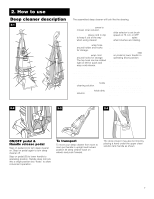
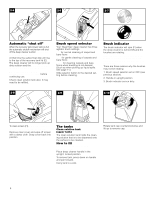
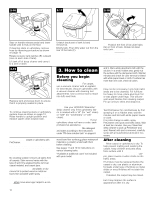
2. How to use Deep cleaner description 2-1 1 2 3 5 9 7 5 8 10 12 11 6 13 26 14 4 15 8 16 17 22 24 18 19 21 20 25 7 23 The assembled deep cleaner will look like the drawing. 1. Hand grip 2. Solution trigger: press to release clean solution. 3. Clean Surge™ button 4. Cord clip: place cord in clip to keep it out of the way when using cleaner 5. Hose 6. Hose holder: wrap hose around holder and hooks for storage. 7. Hose hooks 8. Cord hooks: wrap cord around hooks for storage. The top hook can be rotated right or left for quick and easy cord release. 9. Powered hand tool or stair/ upholstery nozzle 10. Carrying handle 11. Clean solution tank handle 12. Clean solution tank cap/ measuring cup 13. Clean solution tank: holds cleaning solution. 14. Recovery tank lid 15. Recovery tank: holds dirty solution. 16. Recovery tank front panel 17. Hood 18. Brush speed selector: slide selector to set brush speed on HI, LO, or OFF. 19. Brush Indicator: spins when brushes are rotating. 20. Nozzle 21. Solution tube connection 22. Recovery tank latches 23. ON/OFF pedal 24. Handle release pedal: step on pedal to lower handle to operating (floor) position. 25. Stair/upholstery nozzle or utility nozzle 26. Bare floor attachment* *Not included with all models This deep cleaner is intended for household use. Operate deep cleaner only at voltage specified on data plate on back of cleaner. Plug deep cleaner Into a properly grounded outlet. 2-2 2-3 2-4 A B ON/OFF pedal & Handle release pedal Step on pedal (A) to turn deep cleaner on. Step on pedal again to turn deep cleaner off. Step on pedal (B) to lower handle to operating position. Handle does not lock into a single position but "floats" to allow convenient operation. To transport To move your deep cleaner from room to room put handle in upright and locked position tilt deep cleaner back on wheels and push forward. The deep cleaner may also be lifted by placing a hand under the upper clean solution tank handle as shown. 7
-
 1
1 -
 2
2 -
 3
3 -
 4
4 -
 5
5 -
 6
6 -
 7
7 -
 8
8 -
 9
9 -
 10
10 -
 11
11 -
 12
12 -
13
-
14
-
15
-
16
-
17
-
18
-
19
-
20
-
21
-
22
-
23
-
24
-
25
-
26
-
27
-
28
-
29
-
30
-
31
-
32
-
33
-
34
-
35
-
36
-
37
-
38
-
39
-
40
 |
 |