Hoover U5155 Manual - Page 3
Cleaner Assembly
 |
View all Hoover U5155 manuals
Add to My Manuals
Save this manual to your list of manuals |
Page 3 highlights
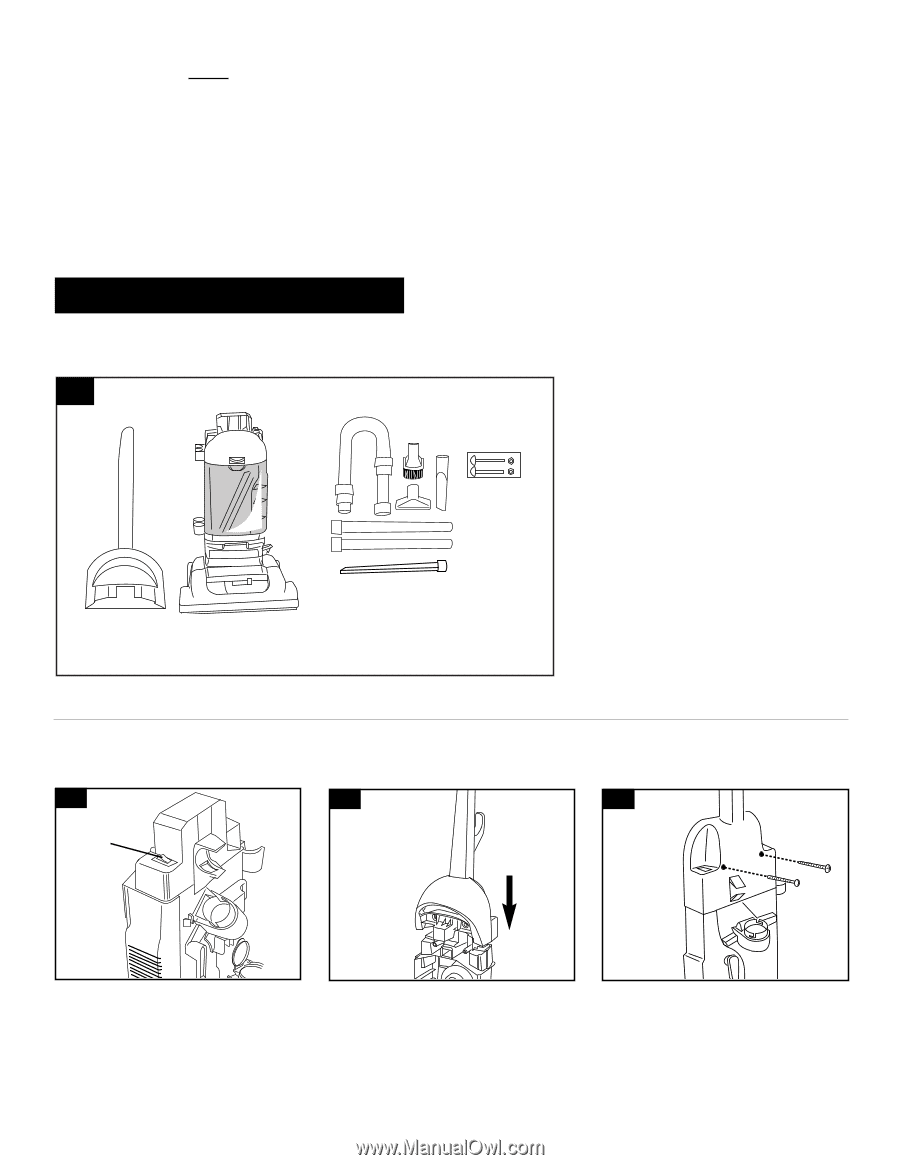
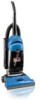
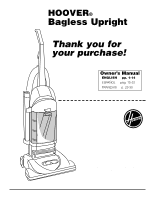
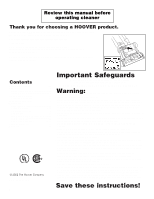
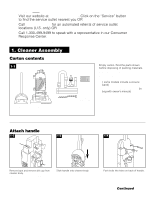
If you need any assistance: Visit our website at www.hoover.com. Click on the "Service" button to find the service outlet nearest you OR Call 1-800-944-9200 for an automated referral of service outlet locations (U.S. only) OR Call 1-330-499-9499 to speak with a representative in our Consumer Response Center. Please do not return this product to the store. 1. Cleaner Assembly Carton contents 1-1 C A B D *Included with some models Empty carton. Find the parts shown before disposing of packing materials. A. Handle section B. Cleaner body C. Hose, cleaning tools and wands (*some models include a crevice wand) D. Handle bolts and nuts packet (in bag with owner's manual) Attach handle 1-2 1-3 1-4 A Remove tape and remove dirt cup from cleaner body. Switch (A) should be in OFF position. Slide handle onto cleaner body. Push bolts into holes on back of handle. Continued § 3
-
 1
1 -
 2
2 -
 3
3 -
 4
4 -
 5
5 -
 6
6 -
 7
7 -
 8
8 -
 9
9 -
10
-
11
-
12
-
13
-
14
-
15
 |
 |