Hoover U5361 Manual - Page 8
Maintenance
 |
View all Hoover U5361 manuals
Add to My Manuals
Save this manual to your list of manuals |
Page 8 highlights
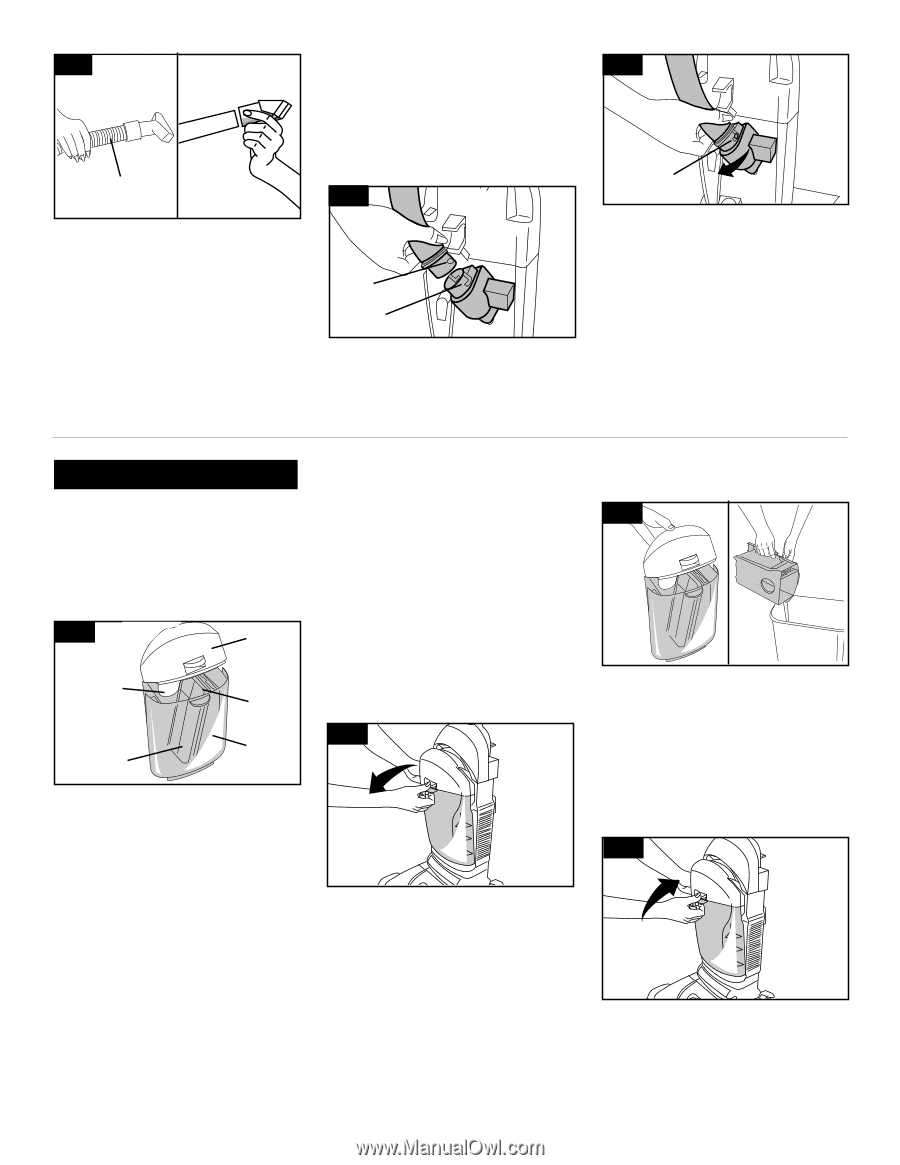
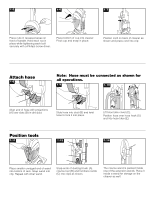
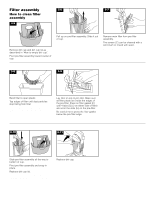
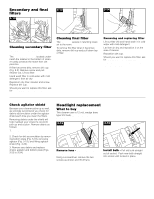
2-14 H Attach wand and tools Attach tool or wand to the hose (H) by pushing it firmly into hose. Attach second wand or tool to the wand in the same manner. Twist wand or tool slightly to tighten or loosen the connection. Extra reach hose (available at additional cost) The extra reach hose provides you with a 20 foot reach to allow easier cleaning of stairs and hard to reach places. Follow the steps below for attaching and detaching hose. 2-15 I J Push ON/OFF switch to OFF position. Remove regular hose from cleaner. Align end of extra reach hose with projections (I) over slots (J) in dirt duct. 2-16 K Slide hose into slots (K) and twist hose to lock it into place. To detach hose, reverse procedure. Attach wands or tools to the other end of hose. 3. Maintenance Familiarize yourself with these home maintenance tasks as proper use and care of your cleaner will ensure continued cleaning effectiveness. Dirt cup 3-1 A E C B D The dirt cup assembly consists of the following parts: Lid (A) Dirt Cup (B) Pre-filter Assembly (C) Main Filter (D) (behind pre-filter) Dirt Opening (E) While the cleaner is in operation, the pre-filter assembly screen will stop larger debris from entering the main filter chamber. This larger debris will be seen collecting in the left side of the dirt cup. The main filter will collect fine particles that have passed through the pre-filter assembly screen. When to empty It is recommended that the dirt cup be emptied before the dirt reaches the dirt opening on back of dirt cup (Fig. 3-1) or after every use if preferred. CAUTION: Very fine materials, such as face powder or cornstarch, may seal the filter and cause loss of suction. When using the cleaner for this type of dust, empty the cup and clean the filters often. How to empty 3-2 3-3 Empty cup - Remove lid. Note: It is not necessary to remove the main filter or the pre-filter assembly to empty the dirt cup. Tap side of cup until no more dust particles fall from the main filter. 3-4 Disconnect cleaner from electrical outlet. Do not use the cleaner without dirt cup or filters in place. Remove cup - Squeeze dirt cup latch. Pull cup forward. Replace cup - Replace dirt cup lid. Place bottom of cup into cleaner. Pivot cup and snap into place. 8
-
 1
1 -
2
-
 3
3 -
 4
4 -
 5
5 -
 6
6 -
 7
7 -
 8
8 -
 9
9 -
 10
10 -
 11
11 -
 12
12 -
 13
13 -
14
 |
 |