Hotpoint RGA724PKWH Use and Care Manual / Warranty - Page 17
Care and Cleaning
 |
UPC - 084691131724
View all Hotpoint RGA724PKWH manuals
Add to My Manuals
Save this manual to your list of manuals |
Page 17 highlights
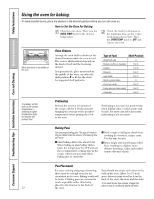
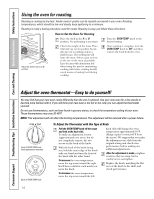
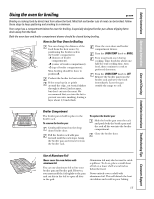
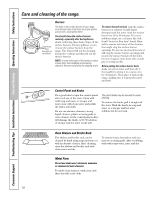
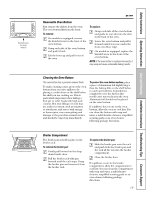
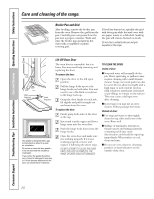
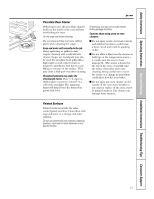
Safety Instructions Operating Instructions Care and Cleaning Installation Instructions Troubleshooting Tips Consumer Support Care and cleaning of the range. ge.com Be sure electrical power is off and all surfaces are cool before cleaning any part of the range. Proper care and cleaning are important so your range will give you efficient and satisfactory service. Follow these directions carefully in caring for your range to assure safe and proper maintenance. If your range is removed for cleaning, servicing or any reason, be sure the anti-tip device is re-engaged properly when the range is replaced. Failure to take this precaution could result in tipping of the range and cause injury. How to Remove the Range for Cleaning and Servicing Follow these steps to remove the range for servicing or cleaning hard to reach surfaces. Shut off the gas supply to the range. Disconnect the electrical supply to the range. Disconnect the gas supply tubing to the range. Reverse these steps to re-install the range. If the gas line has been disconnected, check for gas leaks after re-connection. See the Installation Instructions for the gas lead test method. NOTE: A trained technician should make the gas installation, disconnection and re-connection of the gas supply to the appliance. Slide the range forward to free the range foot from the Anti-Tip bracket. See the Installation Instructions for the location of the bracket. Lift-Up Cooktop Clean the area under the cooktop often. Built-up soil, especially grease, may catch on fire. To make cleaning easier, the cooktop may be lifted up and propped open. Be sure all burners are turned off before raising the cooktop. Then remove the grates. Grasp the two front burner wells and lift the cooktop up and prop it open with the prop rod provided. Be careful of the pilots when the cooktop is up. After cleaning underneath the cooktop with hot, soapy water and a clean cloth, hold the cooktop up, return the prop rod to its storage position and lower the cooktop until it snaps into position. Be careful not to pinch your fingers. Burner Grates Grates should be washed regularly and after spillovers. Wash them in hot, soapy water and rinse with clean water. After cleaning, dry thoroughly by putting them in a warm oven for a few minutes. Don't put the grates back on the range while they are wet. When replacing the grates, be sure they're positioned securely over the burners. To get rid of burned-on food, place the grates in a covered container (or plastic bag) with 1/4 cup ammonia to loosen the soil. Then scrub with a soap-filled scouring pad if necessary. Although they're durable, the grates will gradually lose their shine, regardless of the best care you can give them. This is due to their continual exposure to high temperatures. Do not operate a burner for an extended period of time without cookware on the grate. The finish on the grate may chip without cookware to absorb the heat. 17
-
 1
1 -
2
-
3
-
4
-
5
-
6
-
7
-
8
-
9
-
10
-
11
-
 12
12 -
 13
13 -
 14
14 -
 15
15 -
 16
16 -
 17
17 -
 18
18 -
 19
19 -
 20
20 -
 21
21 -
 22
22 -
23
-
24
-
25
-
26
-
27
-
28
-
29
-
30
-
31
-
32
-
33
-
34
-
35
-
36
 |
 |