Hunter 20807 Owner's Manual - Page 8
metal bracket to secure the square hanger.
 |
View all Hunter 20807 manuals
Add to My Manuals
Save this manual to your list of manuals |
Page 8 highlights
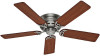
Step 3-1 Square Hanger Motor Assembly Step 3-2 3 • Assembling and Hanging the Fan 3-1. Position the square hanger so that the green ground wire attached to the square faces out of the large opening in the metal bracket. 3-2. Holding the wires out of the way, lift the motor assembly and place the square hanger into the opening in the ceiling plate. WARNING: Make sure the square hanger can not rotate in the metal bracket. Failure to do so could result in the fan falling. 3-3. Install two locking screws through the holes in the side of the metal bracket to secure the square hanger. Green Ground Wire Step 3-3 Green Ground Wire #8-32 x 1" Screw Locking Screw 8 41535-01 • 04/04/11 • Hunter Fan Company
-
 1
1 -
2
-
 3
3 -
 4
4 -
 5
5 -
 6
6 -
 7
7 -
 8
8 -
 9
9 -
 10
10 -
 11
11 -
 12
12 -
 13
13 -
14
 |
 |

8
41535-01
•
04/04/11
•
Hunter Fan Company
Step 3-2
Green
Ground Wire
3-1. Position the square hanger so that the green ground wire attached
to the square faces out of the large opening in the metal bracket.
3-2. Holding the wires out of the way, lift the motor assembly and
place the square hanger into the opening in the ceiling plate.
WARNING:
Make sure the square hanger can not rotate in the
metal bracket. Failure to do so could result in the fan falling.
3-3. Install two locking screws through the holes in the side of the
metal bracket to secure the square hanger.
Step 3-1
Motor
Assembly
Square
Hanger
Step 3-3
Locking Screw
Green
Ground Wire
3 • Assembling and Hanging the Fan