Hunter 36517 Owner's Manual - Page 9
UVC Replacement, WILL NOT OPERATE,
 |
View all Hunter 36517 manuals
Add to My Manuals
Save this manual to your list of manuals |
Page 9 highlights
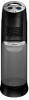
3 Maintenance UVC Replacement UVC Replacement: Your humidifier is equipped with a UVC bulb to help kill germs and bacteria in the water. This bulb needs to be replaced once a year. These instructions will assist you with bulb replacement. 1. Turn the humidifier off and unplug it from the wall outlet. NOTE: Before replacing the UVC bulb, you must empty the water out of the humidifier. 2. Remove the water tank from the unit. 3. Remove the housing from the base by following the instructions in "Cleaning and Storage" on page 7, step 5. 4. Remove the 2 screws attaching the panel to the back of the housing. Figure 12. 5. Grip the indentions on either side of the UVC Cover and pull straight out. Figure 13. 6. Remove the UVC bulb from the UVC cover by turning counterclockwise. NOTE: When handling the new bulb, do not let it come in direct contact with your hands. Oils from your skin can cause the bulb to fail directly, or lessen its life expectancy. Use the bag the bulb came in to screw it into the socket on the UVC cover. 7. Reinsert the UVC cover into the unit, ensuring the pins on the back of the UVC cover are above the bulb. Figure 13. NOTE: If the UVC cover is not installed properly the UVC WILL NOT OPERATE. Ensure the 2 pins on the back of the cover are above the bulb before inserting. 8. Insert the 2 screws that hold the UVC cover, and tighten securely. 9. Reassemble the unit and resume operation. Indentions Screws Figure 12. Pins Figure 13. Figure 14. ©2011 Hunter Fan Company 9
-
 1
1 -
2
-
3
-
 4
4 -
 5
5 -
 6
6 -
 7
7 -
 8
8 -
 9
9 -
 10
10 -
 11
11 -
 12
12
 |
 |
