Hunter 44660 Remote Sensor Guide - Page 1
Hunter 44660 Manual
 |
View all Hunter 44660 manuals
Add to My Manuals
Save this manual to your list of manuals |
Page 1 highlights
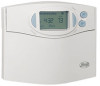
Ch TEMP Model 44758 Remote Sensor Owners Manual Your Model 44668/44665 thermostat can read the temperature from up to three weather-resistant sensors at a distance of up to 75 feet. Note: Distance my vary based on building construction or other interfering frequencies. You can control the temperature from one indoor sensor and/or thermostat, with the second and third being a sensor only. If you use multiple sensors, you might want to number them. Simply use a marker to write a number on the back of each sensor. The remote sensors are designed to either be mounted on a wall, or set on a desk or side table. Consult the Thermostat Instruction Manual for instructions in setting the thermostat to accommodate the remote sensors. You may also download directly from Hunter Fan Company at www.hunterfan. com/support. Setup 1. Remove the four screws on the back of the Remote Sensor. See Figure 1. The Outer Cover will drop off. Battery Cover Figure 2. 3. Use the tip of a paper clip to set the FIRST FOUR Remote Sensor DIP Switches to any configuration you desire. NOTE: Each sensor you use must have a different setting. See Figure 3. To set the remote sensor to display the temperature in Fahrenheit, place the FIFTH DIP switch in the DOWN position. To set the remote sensor to display the temperature in Celsius, place the FIFTH DIP switch in the UP position. ON DIP 1 2 345 Initial Start-Up 1. When the batteries are installed, the LCD Display will show the first initializing screen for approx. 2 seconds. See Figure 5. % C Ch RHTEMP Figure 5. 2. The LCD Display will then show the second initializing screen for approx. 10 seconds. See Figure 6. Ch Figure 6. 3. The LCD Display will then show the normal operating screen. See Figure 7. NOTE: It may take up to 30 seconds for the thermostat to "pick-up" the sensor. Outer Cover Figure 1. 2. Remove the Battery Compartment Cover, which is underneath the Outer Cover. See Figure 2. Figure 3. 4. Install two fresh AA alkaline batteries into the Battery Compartment, being careful to observe the battery polarities. See Figure 4. Battery Compartment (Batteries installed) Ch TEMP Figure 7. Channel 4. The Remote Sensor Screen will display the ambient temperature and, in the bottom-left corner, a channel number between 0 and 15. See Figure 7. This will be the channel to which you will set the thermostat to read the Remote Sensor. See the Thermostat Instruction Manual, page 14, Option 8. 5) Place the Battery Compartment Cover over the Battery Compartment. Figure 4. Wall Mounting 1. Replace the Outer Cover as shown in Figure 8. Use the four screws to secure the Outer Cover. Form No. 44004-01 R030409
-
 1
1 -
 2
2
 |
 |
