Husqvarna 323R Owners Manual - Page 9
Quick-release, Cutting equipment, Locking nut, Never use a machine with defective
 |
View all Husqvarna 323R manuals
Add to My Manuals
Save this manual to your list of manuals |
Page 9 highlights
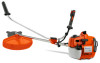
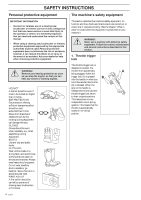
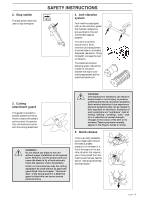
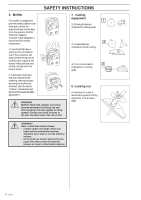
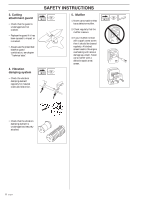
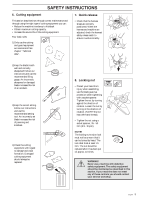
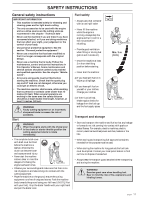
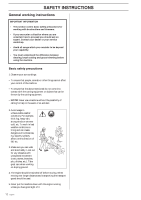
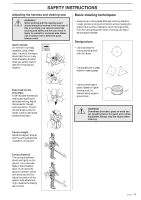
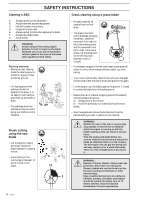
SAFETY INSTRUCTIONS 6. Cutting equipment This section describes how through correct maintenance and through using the right type of cutting equipment you can: • Reduce the machine's tendency to kickback • Obtain maximum cutting capacity. • Increase the service life of the cutting equipment. Four basic rules: 1)Only use the cutting and guard equipment we recommend! See chapter "Technical data". 7. Quick-release • Check that the harness straps are correctly positioned. When the harness and machine are adjusted, check the harness' safety release catch to ensure it works correctly. 2)Keep the blade's teeth well and correctly sharpened! Follow our instructions and use the recommended filing gauge. An incorrectly sharpened or damaged blade increases the risk of an accident. 3)Keep the correct setting. Follow our instructions and use the recommended setting tool. An incorrectly set blade increases the risk of jamming and kickback. 4)Check the cutting equipment with regard to damage and crack formation. Damaged cutting equipment should always be replaced. 8. Locking nut • Protect your hand from injury when assembling, use the blade guard as protection when tightening with a socket spanner. Tighten the nut by turning against the direction of rotation. Loosen the nut by turning in the direction of rotation. (NOTE! the nut has a left-hand thread). • Tighten the nut using a socket spanner, 35 - 50 Nm (3.5 - 5 kpm). NOTE! The locking nut's nylon lock must not be so worn that it can be turned by hand. The lock shall hold at least 1.5 Nm. The nut should be replaced after it has been put on approx. 10 times. ! WARNING! Never use a machine with defective safety equipment. The safety equipment should be maintained as described in this section. If your machine does not meet any of these controls you should contact your service workshop. 9 English -
-
 1
1 -
2
-
3
-
 4
4 -
 5
5 -
 6
6 -
 7
7 -
 8
8 -
 9
9 -
 10
10 -
 11
11 -
 12
12 -
 13
13 -
 14
14 -
15
-
16
-
17
-
18
-
19
-
20
-
21
-
22
-
23
-
24
-
25
-
26
-
27
-
28
-
29
-
30
-
31
-
32
-
33
-
34
-
35
-
36
-
37
-
38
-
39
-
40
-
41
-
42
-
43
-
44
 |
 |