Husqvarna 530iP4 Owner Manual - Page 11
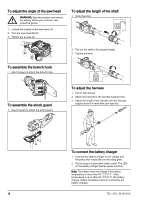
Safety instructions for maintenance, Assembly, Introduction, To assemble the guide bar and saw chain
 |
View all Husqvarna 530iP4 manuals
Add to My Manuals
Save this manual to your list of manuals |
Page 11 highlights
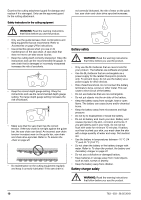
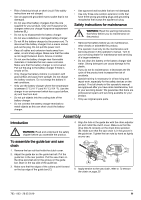
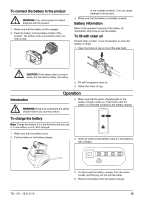
• Risk of electrical shock or short circuit if the safety instructions are not obeyed. • Use an approved grounded mains socket that is not damaged. • Do not use other battery chargers than the one supplied for your product. Only use Husqvarna QC chargers when you charge Husqvarna replacement batteries BLi. • Do not try to disassemble the battery charger. • Do not use a defective or damaged battery charger. • Do not lift the battery charger by the power cord. To disconnect the battery charger from a mains socket, pull out the plug. Do not pull the power cord. • Keep all cables and extension leads away from water, oil and sharp edges. Make sure that the cable is not caught between doors, fences or similar. • Do not use the battery charger near flammable materials or materials that can cause corrosion. Make sure that the battery charger is not covered. Pull out the plug to the battery charger if there is smoke or fire. • Only charge the battery indoors in a location with good airflow and away from sunlight. Do not charge the battery outdoors. Do not charge the battery in wet conditions. • Only use the battery charger where the temperature is between 5 °C (41 °F) and 40 °C (104 °F). Use the charger in an environment which has a good airflow, dry and free from dust. • Do not put objects into the cooling slots of the battery charger. • Do not connect the battery charger terminals to metal objects as this can short circuit the battery charger. • Use approved wall sockets that are not damaged. • Use only three-wire outdoor extension cords that have three-prong grounding plugs and grounding receptacles that accept the appliance's plug. Safety instructions for maintenance WARNING: Read the warning instructions that follow before you do maintenance on the product. • Remove the battery before you do maintenance, other checks or assemble the product. • The operator must only do the maintenance and servicing shown in this operator's manual. Turn to your servicing dealer for maintenance and servicing of a larger extension. • Do not clean the battery or the battery charger with water. Strong detergent can cause damage to the plastic. • If you do not do maintenance, it decreases the life cycle of the product and increases the risk of accidents. • Special training is necessary for all servicing and repair work, especially for the safety devices on the product. If not all checks in this operator's manual are approved after you have done maintenance, turn to your servicing dealer. We guarantee that there are professional repairs and servicing available for your product. • Only use original spare parts. Assembly Introduction WARNING: Read and understand the safety chapter before you assemble the product. To assemble the guide bar and saw chain 1. Remove the bar nut that holds the clutch cover. 2. Adjust the guide bar on the guide bar bolt. Put the guide bar in the rear position. Put the saw chain on the drive sprocket and in the groove on the guide bar. Start on the top side of the guide bar. 3. Make sure that the edges of the cutters point forward on the top edge of the guide bar (C). 4. Align the hole in the guide bar with the chain adjuster pin and install the clutch cover. Make sure that the drive links fit correctly on the chain drive sprocket (B). Make sure that the saw chain is in the groove in the guide bar. Tighten the bar nuts by hand as tightly as you can. C B A 5. Apply tension to the saw chain, refer to To tension the chain on page 20. 783 - 003 - 28.05.2019 11
-
 1
1 -
2
-
3
-
4
-
5
-
 6
6 -
 7
7 -
 8
8 -
 9
9 -
 10
10 -
 11
11 -
 12
12 -
 13
13 -
 14
14 -
 15
15 -
 16
16 -
17
-
18
-
19
-
20
-
21
-
22
-
23
-
24
-
25
-
26
-
27
-
28
-
29
-
30
-
31
-
32
-
33
-
34
-
35
-
36
-
37
-
38
-
39
-
40
-
41
-
42
-
43
-
44
-
45
-
46
-
47
-
48
-
49
-
50
-
51
-
52
-
53
-
54
-
55
-
56
-
57
-
58
-
59
-
60
-
61
-
62
-
63
-
64
-
65
-
66
-
67
-
68
-
69
-
70
-
71
-
72
-
73
-
74
-
75
-
76
-
77
-
78
-
79
-
80
 |
 |
